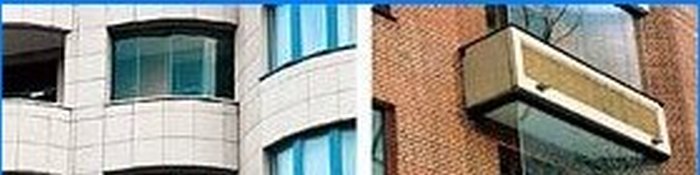
A balcony is a hinged structure (attached to the wall of the house), often decorative, with railings.
A loggia is a modified balcony, usually built into the wall and having walls on the right and left (the balcony does not have them). But in modern language, the words “balcony” and “loggia” are often used as synonyms. In this article, we will also say “balcony”, but we mean “loggia”.
Bulgakov’s character was right: the housing issue spoiled us. How much money we invest in buying real estate! And there is no opportunity to buy – we equip the existing housing, and we will go for everything, just to somehow increase the personal living space. We break down walls, break down partitions, run into a scandal with public utilities, ready to say “no” to our dreams of redevelopment.
Bad, of course. From the point of view of norms and rules, it is completely unacceptable. But is it possible to resist the temptation to make a full-fledged room from a loggia or balcony? Especially if it, the loggia, is larger than a kitchen in a standard apartment. Another thing is how to do it correctly? How, on the one hand, can you improve the life of your loved one and at the same time not collapse on your neighbors and passers-by? We will tell you how to make a balcony or loggia as comfortable and living as possible, regardless of the season..
So, if the balcony / loggia was originally provided for by the project of the house, and not attached arbitrarily, you can do whatever you want with them. Except for demolishing the walls! And I emphasize that you can only convert a balcony / loggia inside.
Legal note
Legislators include glazing of balconies and loggias in the concept of “redevelopment and reconstruction of living quarters.” Redevelopment can be done in order to improve the improvement of the apartment with the permission of the housing maintenance organization (if the apartment is municipal), and without it (if the apartment is privatized). True, the fire brigade has repeatedly expressed disapproval of the very idea of glazing balconies. The reason is that in the event of a fire, glazed balconies increase smoke, increase the already high ambient temperature and prevent the rapid evacuation of people and the elimination of the fire. True, there is also a counterargument: a burning cigarette butt from the upper balcony will not get on the glazed balcony, which means that the risk of fire is reduced.
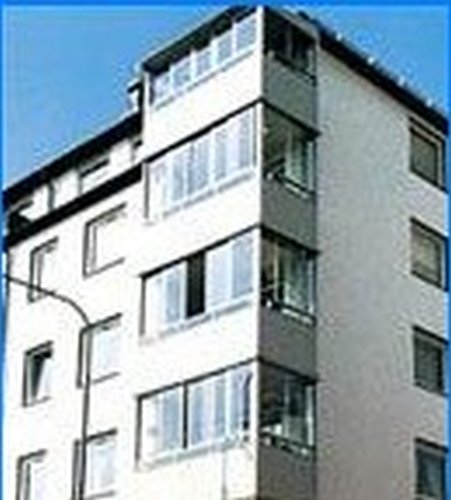
When deciding the question “to glaze or not to glaze?” most citizens choose the former. There is also a temptation to dismantle the wall and combine the balcony with the room, but the law on this matter is implacable: manipulations with the load-bearing wall are strictly prohibited, and all other large redevelopments of the living space require coordination with utilities and city authorities. And the main requirement of the Moscow government for glazed balconies and loggias is that the converted balcony does not spoil the appearance of the facade and does not violate the general architectural concept of the building..
What are the legal ways to improve the balcony?
First way. Conventional glazing.
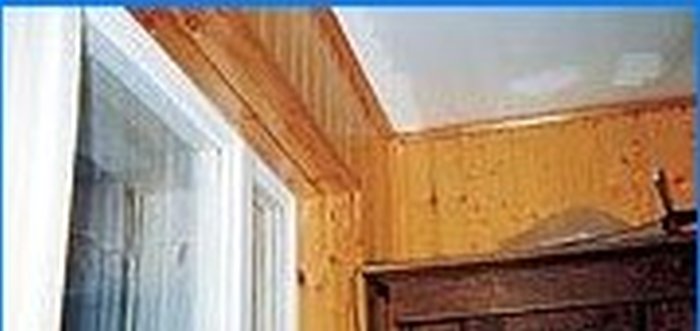
This refers to the installation on the balcony of frames (metal, wooden, plastic) with glasses inserted into them (ordinary, tinted, stained glass, plexiglas). You can get by with a little blood – install domestic wooden frames with ordinary glass on the balcony and make a minimal interior decoration (for example, sheathe the walls with hardboard and stick wallpaper on the hardboard). Such glazing will slightly muffle the street noise and increase the temperature in the “room” by 2-3 degrees. As a result, instead of the usual balcony, we will get a glazed space – a veranda, which you can go to even in winter, but to drink tea in a bathrobe and slippers – only in the warm season. All the pleasure will cost at least $ 250-300, if you take the risk and, having bought ready-made frames, install them yourself. Although we still do not advise you to do this – it is better to hire craftsmen from the company.
Second way. Euroglass.
Better and more reliable, but also more expensive way of glazing. And here you will definitely need the help of specialists. And there is someone to choose from: the number of companies offering such services is quite large.
The concept of “Euroglass” includes:
- Installation of an imported window profile – more often aluminum, steel or plastic, less often – wood and wood-aluminum (they are more expensive than others). Correctly installed imported double-glazed frames retain heat in the room. The design can be sliding, that is, the windows will not open in the traditional way – towards themselves or away from themselves, but move aside on rollers. You can also use a novelty in the construction market – frameless glazing. This design is the most expensive, but the frames will not interfere with admiring the view from the window, and the glass can be moved all at once in one direction or another or folded into a “book”.
- Selection and installation of glasses. Today, many people use plexiglass (transparent plastic): it is more durable than ordinary (although not always thicker: the thickness of the plexiglass is about 5 mm, and the thickness of the ordinary glass is 2-3 mm, 6 mm, 10 mm). If desired, you can order tinted plexiglass – it better retains ultraviolet rays (important for the sunny side of the house). Moreover, you can put a double-glazed window (the so-called European standard). Insulating glass unit will further reduce the noise level inside the room.
- Sealing. Waterproofing the premises with special foam or other sealant. The gaps between frames and walls are filled with sealant. Well-executed sealing not only prevents moisture penetration through the gaps onto the balcony, but also improves thermal insulation.
- Application of paint to the profile (usually in three layers). The paint additionally protects the structure from atmospheric influences, and at the same time decorates it. Water-dispersion or acrylic paints are used. They are all water-repellent, non-fading, non-toxic and low-flammability.
- Inner balcony cladding is available upon request. Here you can use siding, traditional lining, plastic panels, etc..
To transform a balcony in this way, you will have to shell out at least $ 800 (including work), depending on your tastes and the size of the balcony. Although it should be borne in mind that the prices for services in firms offering European glazing are usually negotiable, so it is quite possible to negotiate a discount.
So, your balcony after euro-glazing is more comfortable and beautiful, but still not warm. Are you ready to spend money and time and still make an additional room out of the balcony? Then it needs to be properly insulated..
Frameless balcony glazing
The Finns came up with their own design for glazing balconies and loggias – frameless. There are no frames and partitions here, and the balcony itself after glazing looks light and airy. Experts claim that this method protects against precipitation, dampens street noise and makes the air in the room warmer. Tightness is ensured by special rubber seals and adhesive sealant.
Despite the “airiness”, the frameless construction is very durable. It consists of aluminum profiles – top and bottom (these are guides for glass doors) – and tempered glass (such glass cannot be broken even by a stone strike). Moreover, you can use tinted glass. The doors open simply – you just need to pull the “rope” (upper lock) and turn the handle of the lower lock to the left. And so that the open doors do not dangle in the wind, they can be fixed with a special lock. The cost of frameless glazing “from the Finns” is from 320 $ / sq.m (this includes measurements and installation). But you can find a cheaper option: Finnish aluminum profiles and fittings + domestic glass, it costs $ 120-180 / sq.m.
And the firm “STS Profi”, which uses domestic components for frameless glazing, offers to carry out frameless glazing at even lower prices – from $ 100 / sq.m.
Examples of frameless balcony glazing
The third way to improve the balcony. Combination of euro glazing with various types of special insulation.
The procedure will lead to serious construction work and transformations, because warmth and dryness can be achieved here only by making the walls and floor warm. So, in addition to glazing, this requires:
- lay insulation around the entire perimeter of the balcony, as well as on the floor and on the ceiling;
- make waterproofing;
- to clad the walls and ceiling with the material that you prefer or can afford;
- decide the question: will the balcony be heated, and if so, in what way;
- conduct lighting;
- if the size of the balcony and the construction of the house allow it, you can build additional internal walls – for example, from foam concrete or “light” bricks. They will “eat” part of the space, but the room will become much warmer.
Where do we start?
If you want to make an internal additional wall on the balcony, then start with it. But first consult with the builders, because this issue is very important: floors may not withstand the load. Much depends on the type of house (block, brick, panel or monolith), the size of the balcony, the state of the floors. It is clear that monolithic and brick houses will withstand a serious load, including an additional wall. But in a panel house, it is better to refrain from such experiments..
In any case, the inner wall should be made of thin hollow brick (or brick tile) or lightweight foam concrete. Wall masonry is the most time-consuming and messy part of the job, and not all firms offering balcony landscaping services will undertake it. The negotiated price of a single-layer wall (with the cost of brick or foam concrete) usually does not go beyond $ 200 with a balcony wall area of about 15 square meters.

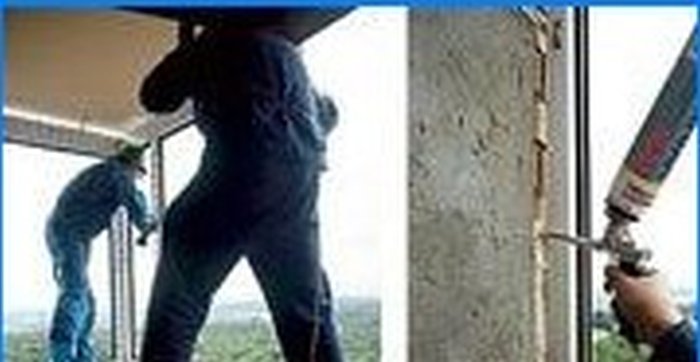
Preparations for glazing the balcony are in progress

Installation process of plastic profiles
Insulation: tow, moss or isover?
The wall is ready. Further – the laying of insulation and waterproofing. Now builders use many types of insulation: isover, mineral wool, polystyrene, isoplast. But in any case, sheathing with insulation will cost no less than $ 7-10 / sq.m. Moreover, it is better not to skimp and purchase the highest quality and reliable material. I recommend Isover. This polymer material resembles foam rubber, fits easily, keeps moisture well, does not damp.
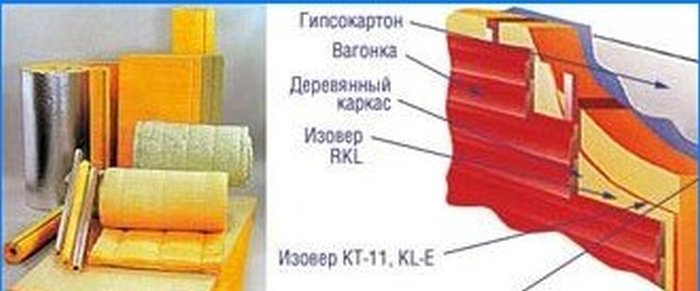
Balcony insulation material isover
You can also use mineral wool. This is an inexpensive insulation, however, it retains heat worse than isover, and sometimes damp (if the balcony is on the north side). Isoplast is also popular. The texture resembles foam familiar to everyone from childhood: lightweight, durable and does not accumulate moisture.
Mineral wool is also used as insulation
In general, when choosing a heater, we advise you to listen to the recommendations of knowledgeable people, and not be guided by the principle “everyone is doing this now – and everything is fine!”. Let me give you an example of such unreasonable gullibility. My friends wanted to glaze their tiny loggia. Gathering strength and money, they chose a company professionally engaged in glazing through newspaper ads. We bought all the necessary materials, decided to use mineral wool as a heater – according to the principle of “cheap and cheerful”. True, they did not take into account that the loggia is located on the north side of the house, under the windows in the front garden there are thick trees, which created increased humidity in the room … In general, after a year the mineral wool became damp, the air in the loggia became heavy, and the seams of the sheathing started up fungus … And the spouses had to hire workers again, tear off the casing and lay a new insulation.
By the way, many people today do not want to hear about synthetic materials and only want to be insulated with natural materials. In this case, we can recommend, for example, tow (including a new material – domestic rolled tow). Wooden sawdust is also suitable (they are filled with a specially made frame-beams, upholstered with plywood on both sides, and a waterproofing agent can also be laid there). There is also such an exotic natural insulation as sphagnum moss, but it is more often used to insulate wooden log cabins. He keeps warm perfectly.
But in general, I would like to reassure those who are afraid of synthetics like fire: all imported finishing materials (European, Canadian, American), used in the construction and improvement of housing, undergo environmental impact assessment and have all the mandatory quality certificates. For example, Scandinavian manufacturers are so intimidated by the influential environmental organization Greenpeace that they will never allow material to be produced if it is not approved by environmentalists and its safety for human health and the environment has not been repeatedly confirmed.
Waterproofing
Waterproofing for a balcony is not only sealing joints with foam or any other sealant. This is an ebb device (an external cornice that does not allow water to leak under the frame), and the application of a water-repellent composition (oil paint, enamel, drying oil, “Pinotex” – transparent impregnation, varnish) to the frames and wooden parts.

In addition, wooden parts must be treated with a wood preservative – a special compound that prevents bacteria and fungus from rotting and multiplying. There is a wide selection of such formulations on our market. By the way, drying oil is also an antiseptic. But still, in order to choose the right antiseptic, it is better to consult with builders who work directly with the tree.

Additional waterproofing is provided by a plastic profile on the frames and the installation of a double glazing. Another good option is to glaze the balcony with frames for skylights, especially if the balcony is on the top floor and you can make a roof over it. Modern roof windows are perfectly waterproof and thermally insulated, equipped with a convenient device for opening and fixing in different positions and look good.
Specialists seal the seams with polyurethane foam
How to correctly waterproof the balcony so that there is no dampness? Roofing material and different types of modified polyethylene can serve as a waterproofing material – the construction company will tell you which ones are “in fashion” now. Penofol or foam foil can be used as an excellent hydro-vapor barrier material. But in general, this material is correctly called folgoizolon. This is a special porous polyethylene covered with a metallized lavsan film, similar to polyethylene covered with foil. Sold in rolls.
Folgoizolone absolutely does not accumulate moisture in itself, reflects ultraviolet light and prevents the formation of condensation. In addition, it keeps warm well. A four-millimeter coating of foil insulation keeps heat in the same way as a wall of one and a half standard bricks.
It is laid on the floor or nailed to the wall. It should be laid on a flat surface, very tightly, without gaps (therefore, it is better to turn to professionals). If the installation is done correctly, additional waterproofing can be dispensed with. But in principle, you can make additional waterproofing, for example, from roofing material. You can also seal the seams with assembly foam …
Folgoizolon is a domestic material, it is not too expensive: about $ 3 / sq.m. Imported analogs will cost 1.5-2 times more with the same quality.
Finishing work: wood or plastic?
So, we have installed insulation and waterproofing. Now you need to choose finishing materials that will be used for cladding balcony walls, ceiling and floor.
The undisputed favorite among finishing materials in Russia is, of course, wood. Why is it understandable. From time immemorial we have been building and are building from wood, this material is environmentally friendly, keeps heat well (we even put up with the high fire hazard of wood, the ability to absorb moisture and crack in the sun).
The most commonly used lining (special grooved board). The lining, in turn, is divided into ordinary and Euro lining (the prefix “euro” means that the lining is made according to the European standard, but not necessarily imported). Lining is made, as a rule, from spruce or pine. An ordinary domestic one costs at least $ 35–40 per sq.m. Euro lining – at least $ 70-80 per sq.m, but it is very smooth and even, almost without knots and spots. In addition, the lining is lighter. Imported lining is more expensive – from $ 90-120 per sq.m..
Lining is the most popular material in Russia for interior decoration of a loggia
But every year, artificial and synthesized materials are becoming more and more popular: siding, which is sometimes mistakenly called “vinyl clapboard”, clapboard, various types of plastic and laminated panels. The price of a good siding is from $ 20 / sq.m. Plastic panels cost $ 18-21 / sq.m, but they are thicker and wider than siding panels. True, there is one significant drawback – panels burn easier than siding (siding does not burn, but melts). But both materials are non-toxic..
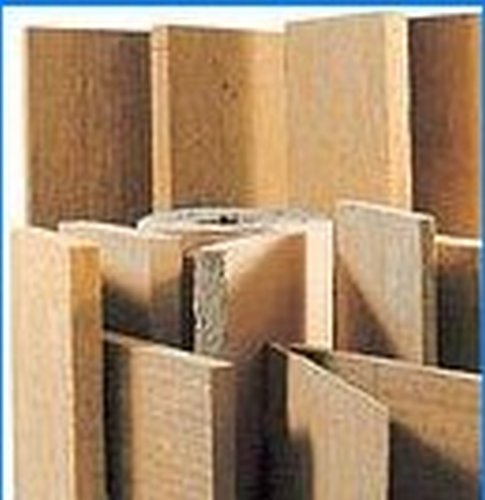
It is best to cover the floor on the balcony with Euro-board – these are imported wooden plates from various types of wood, with a thickness of 25 to 40 mm. From above, you can lay linoleum, carpet or make a self-leveling floor of polyurethane. Not everyone knows what a self-leveling floor is, so I will briefly tell you how it is done. A mixture of two components is “whipped” with a drill with a nozzle, poured onto the floor and leveled with a spatula. The self-leveling floor dries for 12-24 hours. According to experts, such a floor can withstand damage and is extremely durable. But this is a topic for a separate article. And we will go further.
Lighting and heating
It is not difficult to arrange lighting on the balcony – usually for this, electric wires are taken out (that is, from the room to the balcony) and lamp shades or fluorescent lamps are installed. It is better to make open wiring, especially if the balcony is sheathed with clapboard: if suddenly the tree “leads”, the closed wiring can pinch – and not far from the fire.
After the glazing, cladding and waterproofing is complete, heating may be considered. And this, by the way, is the most important thing in our case. After all, no matter how sophisticated with the decoration, in the conditions of the Russian winter, the temperature on the closed balcony will not reach a comfortable room temperature (there will be a maximum of + 10-15 ° C). What to do? Of course, you can’t put steam heating pipes on the balcony – it’s forbidden. Hence, you will have to use other methods.
Here are the main and most accessible ones:
- Underfloor heating device, that is, a special heating system that works on the principle of a heating pad. The process looks something like this. Tubes are laid on the base, as a rule, copper, filled with an electrolytic solution. The tubes are carefully insulated with dielectric materials. And the floor covering itself is placed on top (board, linoleum, etc.) Under the influence of the current, the tubes heat up, and the floor becomes warm. There is a warm floor with water (steam) heating. But it is better to use it in houses with gas heating..
- The installation of a warm floor will have to spend a significant part of the money allocated for the arrangement of the balcony. It will cost at least $ 500.
- Installation of an electric fireplace and other local heating devices (radiator, heater or air conditioner). This is not a bad solution to the problem, unless, of course, you are not afraid of astronomical electricity bills..
Let’s summarize. In total, all construction work will cost no less than $ 3000- $ 3500 (including the cost of materials).
So, we have listed the most popular ways to equip a balcony / loggia. But there are more exotic options and, of course, more expensive and time consuming. For example, a device on the balcony of a winter garden or sauna.
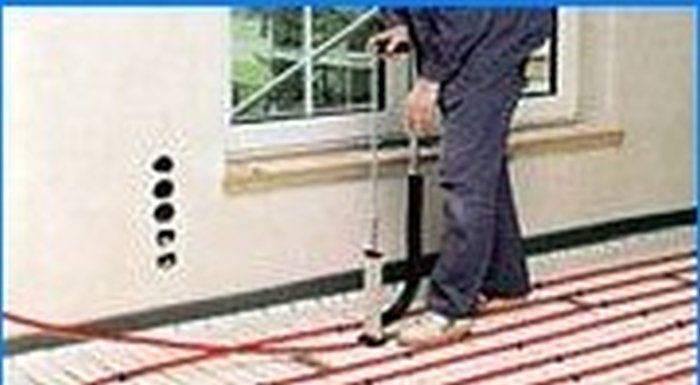
It looks like an electric floor heating system
The fourth way. Winter garden – on the balcony
The glazed and insulated balcony space can be turned into a winter garden and create a comfortable microclimate there for any plants. In principle, this is not very difficult to do. There would be money. It is only necessary to insulate the floor, purchase special “long” lamps (they not only illuminate, but also heat the room) and other greenhouse accessories (humidity regulator, thermometer, etc.).
If you have equipped a balcony or loggia with double glazed windows, installed underfloor heating and water containers to maintain humidity and watering, then even such sissies as a coffee tree, persimmon, orchids and azaleas will spend the winter happily in your winter garden. If you want, you can put some animals there, including parrots, hamsters and tree frogs.
How much will it cost? With minimal insulation and meager design, a winter garden on a balcony can be arranged for about $ 1,000. But if you use “warm” aluminum frames, a good heated floor or special plastic structures for winter gardens, the amount will exceed $ 4000.
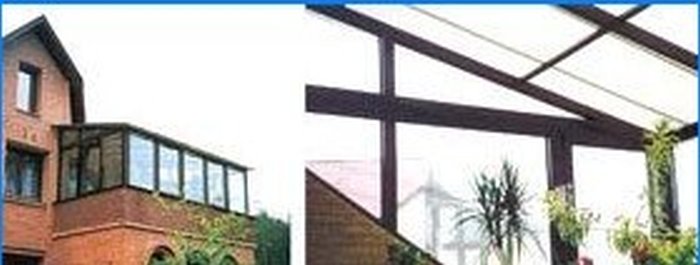
In the cottage on the glazed balcony, you can arrange a winter garden
Fifth way. Sauna – on the balcony
But, perhaps, the most unconventional way to operate a balcony is to set up a so-called collapsible sauna there. Do you dream of warming your bones and removing toxins from your body in a dry, beneficial steam, without leaving your home? Your dream comes true.
Today, collapsible mini-saunas have appeared on the Russian market, which can be installed both in the bathroom and on the balcony. A balcony, as the experts told me, is even preferable, especially if the apartment has only one bathroom. If you decide to experiment with a sauna, your balcony must be thoroughly prepared beforehand – not only glazed and insulated, but also provided with enhanced sound and waterproofing, otherwise your joy from using a home sauna will be overshadowed by constant complaints from neighbors.
In addition, you will need:
- Collapsible wooden boards made of pine, spruce, aspen or linden. The wood must be specially prepared:
a) dried to a moisture content of at least 8% (otherwise the tree will dry out);
b) processed on woodworking machines with an increased number of revolutions;
c) the surface is sanded and treated with linseed oil and special oil (which does not heat up). - Electric stove.
- Metal box with special stones.
High-quality lining is quite suitable for self-manufacturing of shields; the shield itself is also assembled quite simply: using a hammer and nails or a screwdriver and screws. But it’s easier to buy a ready-made collapsible mini-sauna and make sure that the masters installed it correctly. The procedure is as follows. A quadrangular “box” of the required size is assembled from the shields (for example, commercially available folding Finnish saunas have a minimum size of 0.8 x 0.8 m, the height usually does not exceed 2.1 m). An electric oven is placed in the “box”. Aluminum foil or polyethylene is used as a vapor barrier for walls, floors and ceilings..
Pay special attention to ceiling insulation. It should be twice as warm as the floor and walls so that accumulated moisture does not drip from it. For this, the amount of insulation and finishing materials must be doubled, that is, compared to the walls and floor, the ceiling is obtained as if in two layers.
Sealed anti-fog lampshades are used as lighting devices in a home sauna. They can be purchased at any store selling accessories for baths and saunas.
A fireproof wire must be used to connect the sauna heater. The electrical wiring to the sauna must be separate. Installation of a thermometer and clock is required. The benches and seats in your sauna should be made of non-resinous wood (e.g. linden, aspen, abashi).
The cost of setting up a sauna is no less than $ 600–800, or even more if you decide to use valuable wood species. This amount, of course, does not include the cost of finishing the balcony itself..
Who will do it?
In the simplest version of the glazing of the loggia, in principle, you can handle it yourself. But in order not to succeed, as in the proverb about the shoemaker and the pastry maker, it is still better to turn to professionals. How do you find them? There are again several ways:
- Ask your friends who have already finished the balcony, visit them: if you liked everything, invite the same construction team, call the same firms where your friends bought finishing materials. But, alas, this approach may not be very reliable (why this is so, I have already told above).
- Another source of information is advertisements. Feel free to call. But our advice: more often than not, only large, “promoted” firms guarantee the quality of work, fulfillment of deadlines and guarantees.
- Trust your intuition. If you do not like the workers for something, do not like the conditions or the voice of the manager, it is better to immediately contact other specialists. And vice versa. As a rule, the first impression about the company is the most correct.
Euroglass makes the balcony comfortable, beautiful and moisture-proof, but only heating can make it warm
What how much?
Let’s summarize the results of our research. If you have money and desire, you can turn your balcony or loggia:
- in a glazed veranda – the minimum cost with good quality work and materials – $ 250;
- in a room decorated as you like (but better – wooden or vinyl clapboard), with a warm floor or heated by an electric fireplace – this pleasure will cost from $ 3000 and more;
- to the winter garden – having spent at least $ 1000 depending on the scope of work;
- to a home mini-sauna – the device will cost about $ 800, excluding the cost of finishing the balcony itself.
So, you have chosen one of four options, found a construction company. But before embarking on the implementation of a grandiose plan, weigh again all the pros and cons.
So think what is better: to do capital improvement of the loggia or leave everything as it is. Let me give you some friendly advice. If you have extra money, and the apartment, whatever one may say, is too small, exchange it for a large one with a surcharge and leave the balcony as it is.
And the last thing. To be honest, many of us are very tempted to dismantle the wall and combine the balcony with the room. But we authoritatively declare that the law is implacable on this score: manipulations with the bearing wall are strictly prohibited! And all other major redevelopment of residential premises requires approval from utilities and city authorities. So you should not embark on risky experiments: this kind of manipulation with the balcony can weaken the supporting structures of the house and lead to an accident..
Calculation of the cost of glazing a loggia with an area of 7.2 square meters
Loggia: 6 x 1.2 m.
Floor area: 7.2 m2.
Glazing area: 6 x 1.5 m = 9 m2.
Area for lining (or other finishing materials): 6 x 2 x 1.2 m (the area of the outer wall under the frames, taking into account the device of the double box) + 2 x (2.7 x 1.2) m (double area of the side wall) = 14.4 m2 + 6.5 m2 = 20.9 m2 (approximately 21 m2).
Ceiling height: 2.7 m.
The cost of building materials at the minimum option: *
1. Windows (wooden frame, single glazing) – from 1000 rubles / sq.m.
2. Grooved floorboard – 3600 rubles / m3 **.
3. Euro lining – from 4500 rubles / m3 (a good imported Euro lining can cost 8000 per “cube”, but it is not profitable to use it for finishing a balcony).
4. Beam 50 x 50 – 8 rubles / linear m (logs for the floor, base for lining).
5. Insulation (isover, polystyrene) – 530-570 rubles / m3.
6. Macroflex (assembly foam for filling cracks) – 60-80 rubles / bottle.
7. Nails, screws, accessories – 200 rubles.
8. Paint, drying oil, impregnation for wood – 65-80 rubles / kg.
Estimated material consumption for three-sided finishing (outer, sides and floor):
1. Windows – 9 sq.m. (9 x 1000 = 9000 rubles).
2. Floor board – 7 pcs. (size 0.20 x 0.04 x 6 m), cost of 1 piece. – 170 rubles. (7 x 170 = 1190 rubles).
3. Euro lining – 24 pcs. (size 0.20 x 0.02 x 6 m), cost of 1 piece. – from 110 rubles. (24 x 110 = 2640 rubles)
4. Beam – 30 linear meters (30 x 8 = 240 rubles).
5. Nails, screws, accessories – 200 rubles.
6. Macroflex – 4 cylinders (4 x 80 = 320 rubles).
7. Paint – 2 kg (160 rubles).
8. Insulation (isover, polystyrene) – 570 rubles.
Total: Materials – 14 320 rub. (510-520 USD) + work – 250 USD = 760-770 USD.
Use of other materials for Euro glazing:
1. Laminate (or parquet board) – from 200 rubles / sq.m.
2. Laminated panels (instead of lining) – from 100 rubles / sq.m.
3. PVC windows (imported, double-glazed windows) – from 3000 rubles / piece, from 970 rubles / sq.m.
4. Suspended ceilings (plastic) – from 120 rubles / sq.m.
5. Accessories (lamps) – from 400 rubles / piece.
Estimated material consumption for three-sided finishing (outer, sides and floor):
1. Frame (block under the panel) – 27 linear meters (27 x 8 = 216 rubles).
2. Laminated wall panels (21 x 100 = 2100 rubles).
3. “Black” floor under parquet board – 7 boards + timber (1305 rubles).
4. Laminate, parquet board (7.2 x 200 = 1440 rubles).
5. Macroflex – 4 balloons (4 x 80 = 320 rubles).
6. Insulation (isover, polystyrene 1 m3) – 570 rubles.
7. Windows: 6 double-glazed windows 90 x 150 x 6 cm (6 x 3000 = 18,000 rubles), taking into account the cost of the profile.
8. False ceiling (7.2 x 120 = 864 rubles).
9. Lamps – 4 pcs. (4 x 400 = 1600 rubles.).
10. Work – from 50% of the cost of materials (about 450 USD).
Total: Materials – 26 415 rubles. ($ 950) + work $ 450 = 1400 USD.
* Prices of the markets “Kashirsky Dvor” and “Yaroslavsky” (at the time of this writing)
** Floorboards, eurolining, insulation are more often sold in “cubes” (m3). But when laid, they are measured in “squares” (sq. M). The calculation indicates the price per m3, while the article deals with sq.m.
into an inviting outdoor space? What are some practical and creative ideas on using furniture, plants, and lighting to transform a balcony or loggia into a cozy and enjoyable area for relaxation and entertainment? How can one make the most of the limited space available while still ensuring comfort and functionality? Any tips or recommendations would be greatly appreciated. Thank you!
Into a usable indoor space?
I’ve always wondered how to make the most out of my balcony or loggia. Is there a way to convert it into a functional indoor space? I would love to utilize it all year round, but I’m not sure where to start. Are there any specific steps or considerations I should keep in mind? Would it require significant renovations or can it be done with simple modifications? Any tips or suggestions would be greatly appreciated!