Recommendation points
- What containers can be used
- Features of installation at high ground level
- Earthworks and installation of tanks
- Backfill and caisson installation
- Internal filling of a septic tank
- Completion of installation and start-up
For the construction of a septic tank, it is not at all necessary to build volumetric concrete tanks. A local treatment plant with a low capacity can be made with your own hands from eurocubes or nylon containers. This article will focus on the design and installation stages of such a septic tank..
Homemade septic tanks inherit the principle of operation of ready-made solutions, such as “TOPAS” or “TANK”, but structurally they are very different. It is almost impossible to divide the container into chambers: polyethylene is difficult to adhere in artisanal conditions, and the narrow neck makes it difficult to work. Therefore, they use several adjacent containers connected to each other..
What containers can be used
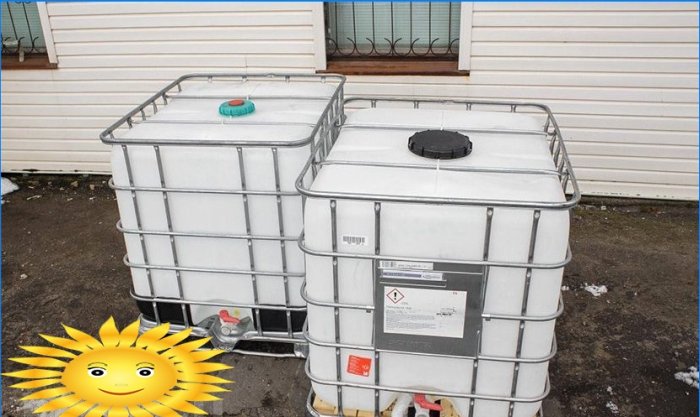
For a septic tank, it is advisable to use used containers without damage to the body with the shape of a vertical cylinder or parallelepiped. The wall thickness of the container must be at least 3.5 mm, and the eurocube must be at least 2 mm.
Due to their small capacity (1000-1050 liters) Eurocubes are used in septic tanks with a daily capacity of up to 1 m3 per day, in other cases, use nylon containers. It is not difficult to calculate their volume – the total capacity of the septic tank is chosen equal to three times the daily drainage value. And with the number of discharges over 5 m3 per day, the total volume of the septic tank chambers should be 2.5 times higher.
The dimensions of the aeration tank and the primary settling tank are in a ratio of 1.5: 1, the second and third chambers are equal in volume. For example, a septic tank with a volume of 6 m3 has the following chambers capacity:
- Primary sedimentation tank 1500 liters.
- Aeration tank – 2250 liters.
- Deep cleaning chamber – 2250 liters.
In sewage treatment plants with a volume of more than 10 m3 all chambers have the same volume.
Features of installation at high ground level
It is reasonable to mount homemade septic tanks from plastic containers at low waste loads – up to 6-8 m3 per day. Unlike treatment facilities with concrete tanks, they have a number of disadvantages.
When the groundwater level (GWL) is below 1.5–2 meters, the septic tank is mounted according to the standard scheme. But if the groundwater is higher, there is a real threat of fluid return and flooding. In this case, a buffer tank with a higher level is required, into which purified water is supplied by means of an airlift or a drain pump..
Option for a septic tank with a high level of groundwater: 1 – sewage inlet; 2 – the first container; 3 – the second container; 4 – drainage pump; 5 – ventilation; 6 – buffer tank; 7 – drainage field
If the groundwater level is too high (less than 50 cm), there is a possibility of flooding the septic tank through the caisson or the gaps of the drainage channel. These problems are solved in the following ways:
- Laying of an introductory drainage pipe above the GWL with subsequent insulation.
- The device of a sealed sewer channel.
- Caisson sealing, use of containers with elongated necks.
- Installation of a septic tank close to the soil surface and its insulation.
The last point implies the minimum removal of the septic tank from the riser, but no closer than three meters from the foundation of the building.
Earthworks and installation of tanks
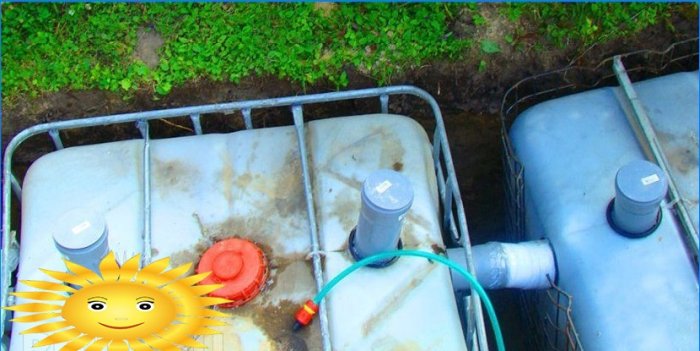
The installation of a septic tank begins after laying the sewer canal. For a home-made septic tank, in contrast to factory VOCs, the height of the inset of the inlet pipe matters – optimally 20–25 cm from the top. Taking this into account, determine the depth of the pit. The containers are placed in the right order on the planned soil, then the contours of the future foundation pit are marked, retreating from the walls of the chambers 25-30 centimeters for backfill.
The bottom of the pit is filled with concrete, reinforced with a metal mesh with rods of 4 mm and a cell of 60×60 mm. Concrete hardens in 2–3 days, after their expiration, you can install the first and third containers, cut inlet and outlet pipes, respectively. To insert a pipe, it is convenient to use a wooden block with two self-tapping screws screwed into it through and through, the distance between the tips of which is 1–2 mm less than the radius of the pipe. With this “compass” a perfectly round hole is cut out at the point of entry and the pipe is inserted. You need to make an effort, but this method makes the abutment of the walls more dense..
In places where pipes are inserted, the connection is treated with hot melt glue: first with a white transparent rod, and then with a translucent black one. Tees with a straight outlet are put on the ends of the pipes and placed vertically, the lower end is extended to the middle of the chamber height.
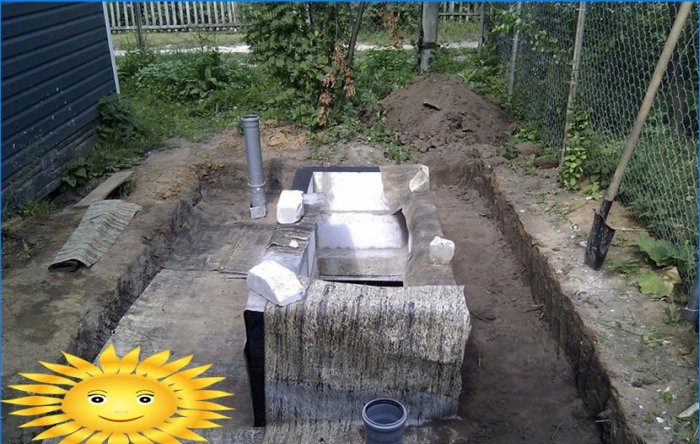
Backfill and caisson installation
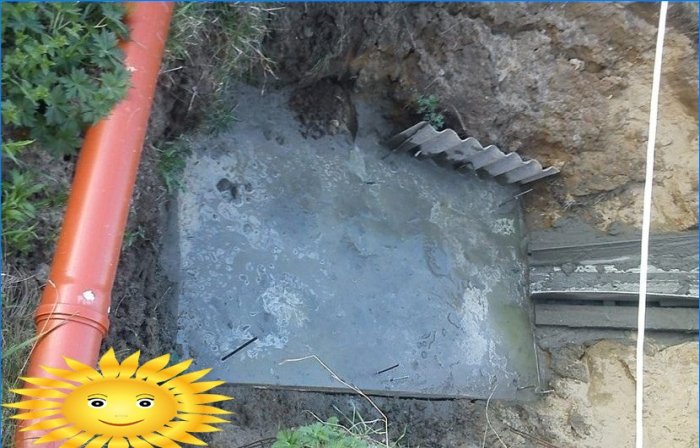
After installing all the containers, a mixture of five parts of sand and one part of cement is prepared, and the gaps between the walls of the tanks and the pit are filled with it. This is done in several stages. First, they fall asleep and tamp the bottom layer in 1/4 of the height, filling the septic tank with water by a third. In the future, backfill is carried out up to half, and then 2/3 of the height.
When installing at a shallow depth, it is reasonable to cover the septic tank with expanded polystyrene plates before filling. When the backfill covers the inlet pipe, the PPS plates are cut and laid horizontally, then they continue to fill the septic tank to the level of the upper wall of the tanks.
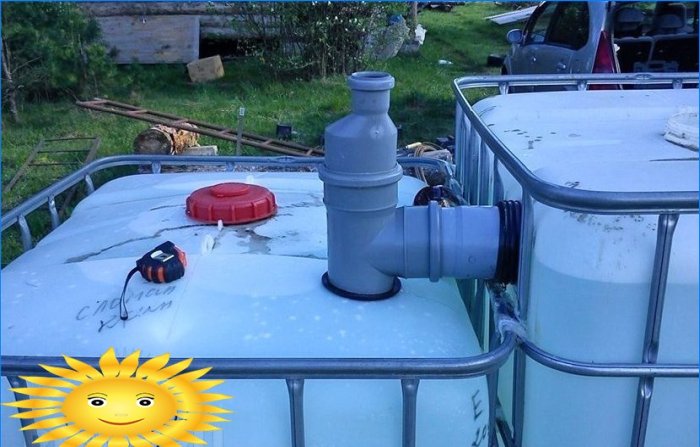
The caisson is a technical chamber designed to accommodate equipment. The walls of the caisson are laid out in half a brick so that they protrude 10-15 cm above the ground level, the bottom is poured after inserting the pass-through sleeves into the upper wall of the chamber. When pouring the screed, the neck of the septic tank is fenced with an annular formwork, for example, made of plastic. The caisson can be common or individual for each chamber. In the latter case, pass-through sleeves for pipes and hoses are laid in the partitions.
Internal filling of a septic tank
Of the electrical equipment in the septic tank, only a compressor is used, such as the Pondtech A-85. An airlift system is used to transfer the mass. The airlift for pumping liquid from the primary settler is placed at the level of the inlet pipe, and in the aeration tank it is placed 10–15 cm from the top of the chamber. The dumping taps are lowered to the middle of the container height. To pump activated sludge from the aeration tank and the deep cleaning chamber into the primary clarifier, two separate airlifts are used with a common discharge point 70–100 cm from the bottom. The airlift suction nozzles are located 10-15 cm from the bottom, and the pump itself is placed at a third of the chamber height.
Corrugated spiral hoses of 32 mm are excellent as transfer channels, they can be easily laid without sharp turns. The connection to the airlifts is sealed with screw clamps or nylon ties.
1 – inlet pipe; 2 – membrane diffuser (aerator); 3 – concrete pouring; 4 – airlift for pumping into water; 5 – compressor; 6 – cement-sand filling; 7 – caissons; 8 – airlift for pumping sludge; 9 – outlet pipe
Airlifts can be done by hand. To do this, take a piece of PVC pipe 32 mm 15–20 cm long, drill two 15 mm holes in it in the middle and screw fittings into them for a 12 mm hose with 1/2 “thread. The connection is tight enough, if desired, it can be processed with hot melt glue. Put two pieces of hose on the fittings and connect them with a tee.
From the compressor, air is supplied to membrane diffusers located 40 cm from the bottom of the first chamber and 25–30 cm from the bottom of the second chamber. To power the airlifts, T-bends are made, air is passed through the flow regulators. Sludge transfer airlifts are additionally equipped with cranes or solenoid valves for automatic control.
Completion of installation and start-up
At the highest points of each container, usually in lids, it is necessary to install exhaust ducts to remove ventilation gases. After that, the septic tank is filled with water and tested in a “clean” mode: regulate the air supply to the airlifts and check the pumping speed. If the operating mode suits you, the septic tank can be started.
How does one go about constructing a DIY septic tank using eurocubes?
Can anyone provide more information on how to build a DIY septic tank using eurocubes? I’m curious about the process, materials needed, and if it’s a reliable and cost-effective option for sewage treatment. Any tips or personal experiences would be greatly appreciated!
Building a DIY septic tank using eurocubes involves digging a hole, placing the eurocubes in layers, adding a distribution pipe, covering with a filter cloth, and sealing with concrete. The materials needed include eurocubes, PVC pipe, filter cloth, and concrete. It can be a cost-effective option, but the reliability depends on proper installation and maintenance. Regular pumping and inspection are crucial. Personal experiences vary, so it’s important to research and follow guidelines closely. Consulting with a professional is recommended to ensure safety and effectiveness.