Recommendation points
- Specifications
- Necessary materials
- Instruments
- Stage one – markup
- Stage two – installation
- Stage three – assembly of the structure
What if the cooker and the hood above it are far from the duct? It is very simple to lay a box from the hood to the ventilation pipe. But not always a standard box can be laid so that it does not spoil the interior of the kitchen..
Specifications
In order to preserve the maximum height of the ceiling in the kitchen and at the same time hide all communications, you can make a stretch ceiling. According to technical conditions, the stretch ceiling film can be stretched only forty millimeters from the floor slab. However, the height of a standard plastic ventilation duct is more and is fifty millimeters. In this case, a self-made galvanized box can be used for the exhaust duct..
Necessary materials
For work we need:
- Galvanized strips that can be bought on the construction market;
- Dowel nails;
- Construction silicone;
- Plastic ventilation box;
- Plastic turn for the box.
The width of the galvanized strip should be at least half a meter so that the edges can be bent and maintain a sufficient flow area for ventilation.
Instruments
We will use the tools that are in any home, namely:
- Roulette;
- Simple pencil;
- Marker;
- Long ruler;
- Square;
- Perforator;
- A hammer;
- Metal scissors;
- Assembly knife;
- Silicone syringe;
- Gloves.
We have prepared all the necessary tools and materials and proceed to the process.
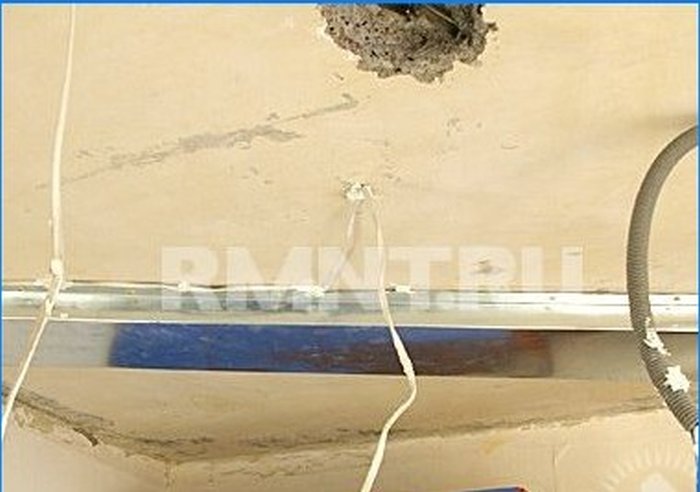
Stage one – markup
You need to know exactly where the hood will be located. The marking starts from the outside of the hood. It is from here that the plastic box will go vertically to the ceiling. Now draw a straight line along the ceiling from the center of the box to the center of the outlet to the ventilation duct.
If the ceiling area is large and the line is long enough, then it is easier to draw a line using thick thread and chalk..
Cut off a piece of thread that is slightly longer than the intended strip and rub it with chalk. If the ceiling is white, then the chalk is better to take a dark color.
We attach one end of the thread to the center of the box, and the other to the ventilation duct in the center of the hole. The thread should be taut and as close to the ceiling as possible. We pull the thread down like a bowstring. When she returns, she will hit the ceiling and leave an even trail. This will be the axis of our galvanized box..
We turn to the marking of galvanized strips. In this case, the height should be no more than thirty centimeters. In order not to reduce the flow area, we increase the width of the ventilation duct. In this case, the width is 400 millimeters..
We find the center of the strip along the short side and from it we set aside in each direction, first two hundred millimeters, then thirty. This must be done on both sides. We connect the points using a long ruler. You should get parallel stripes. After that, we fold the galvanized sheet inward, then outward. To make the fold more accurate, you can use the same long ruler as a stop. When all the details are ready, proceed to installation.
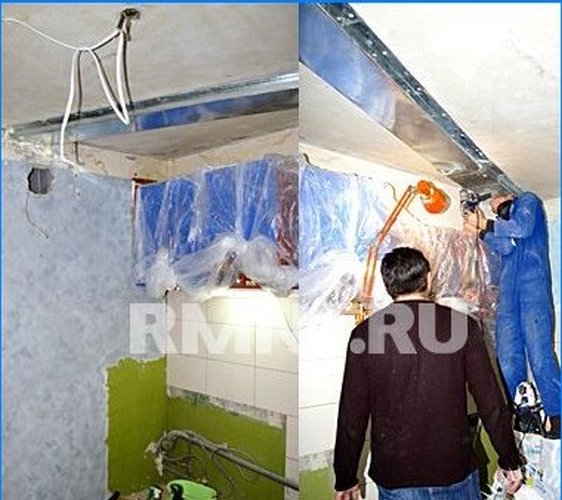
Stage two – installation
For better operation of the hood, the junction of the box to the ceiling must be coated with silicone. Also, the joints of the box parts are smeared with each other..
Silicone also plays the role of a soundproofing pad, reducing the transmission of hum from the hood to the floor slab and, accordingly, to the entire room as a whole. It remains to attach the structure exactly to the ceiling, drill holes for the dowels and nail the box to the floor slab.
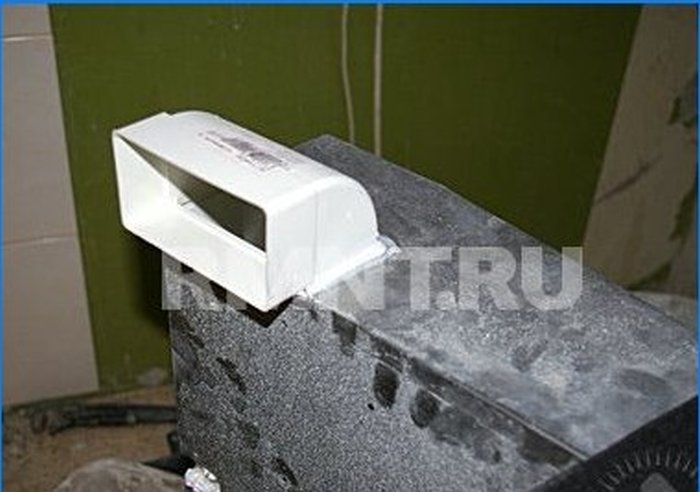
Stage three – assembly of the structure
In the side part of the hood, a hole is outlined according to the size of the plastic turn. A turn is simply applied with the side with which it will have to enter the hood, and outlined with a marker (the pencil does not write very well on a metal surface). The hole is cut with metal scissors. With the help of silicone, a plastic twist is glued into it.
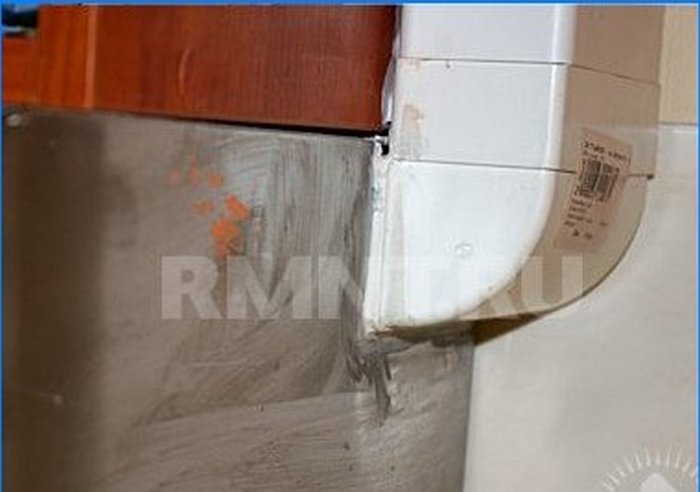
A hole is also cut in the ceiling box to fit the cross-section of the plastic pipe. All the elements are ready, we insert the box into the turn, and only then we mount the hood.
Now kitchen smells do not spread throughout the apartment, but fly away where they should be – into the chimney.

Can anyone provide step-by-step instructions on how to create hidden ventilation for a kitchen hood? I want to keep the clean and sleek look of my kitchen while ensuring proper ventilation. Any tips, tricks, or recommended resources would be greatly appreciated. Thank you in advance!