Recommendation points
- Organizational issues
- Earthworks: digging a trench under the highway
- Junction into the highway
- Bed under the chimney, insulation
- Entering the house, metering unit
Independent installation of the line for connecting to the water supply as a result not only turns into savings on the contractor’s services, but also gives confidence that all work was carried out in full compliance with the technology. Today we will tell you how to organize the introduction of water into a private house.
Organizational issues
Before getting permission to connect to the water supply, you need to register a new consumer. This is largely the interest of the developer – the presence of the project in a common base will help to shift responsibility for damage to underground utilities onto those who did it.
In addition, a potential consumer is given a set of documents that make up the technical specifications for the project. This includes an image of the pipeline route, its depth and distance from key landmarks, pipe material and diameter, and other local conditions and notes. To get this set, you need to write an application addressed to the head of the local branch of the water utility or the person replacing him on this issue.
The obtained technical conditions are the initial data of the project, on their basis a set of working documentation is compiled, including:
- calculation of water consumption and wastewater volume;
- wiring diagrams in perspective;
- floor plans of the water supply system and the arrangement of bathrooms;
- drawings and diagrams of metering, distribution and water treatment units;
- amelioration scheme and a list of irrigation equipment, if any.
An example of an axonometric diagram of a house water supply system
The consumer himself can study the requirements for the design of water supply systems and draw up a project on his own, but in this case, the compiler will have to indicate a certified specialist with SRO approval for the design of this type, a copy of which must be attached to the project. The project serves as the basis for concluding an agreement between the water supplier and its consumer..
After payment, everything, as a rule, already depends on the contractor. But you can pick up the technical side of the issue, up to an independent insertion into the system. It is important to complete the work in strict accordance with the regulatory requirements, otherwise your connection will not pass the inspection.
Earthworks: digging a trench under the highway
According to the layout of the project, excavation is carried out in a strip about 30 cm across. Usually, the main pipe is laid along the shortest path, but 2 meters before the tie-in point it turns to the municipal pipeline at a right angle. A section one meter from the main pipe is dug out with a broadening of up to 50-60 cm, the pipeline itself is cleared of soil to a clearance of 250 mm on each side.
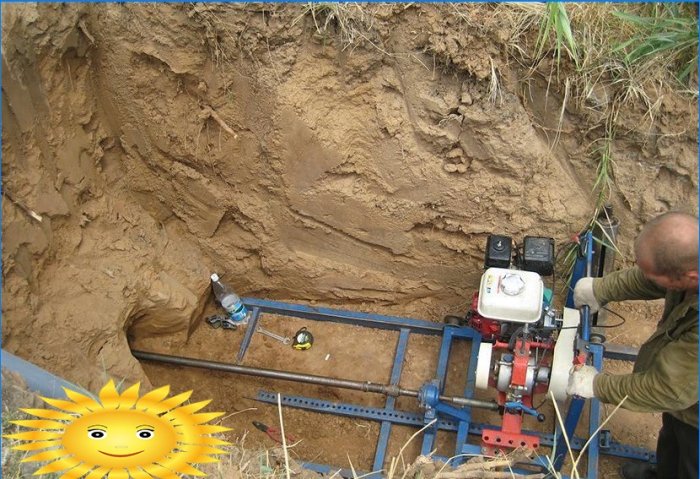
Problems arise when working on the roadway. To cross a paved road, you will need to drive the casing without cutting the web and opening the preparatory embankment. You can’t do without special equipment here, a puncture under the road is a rather difficult engineering task.
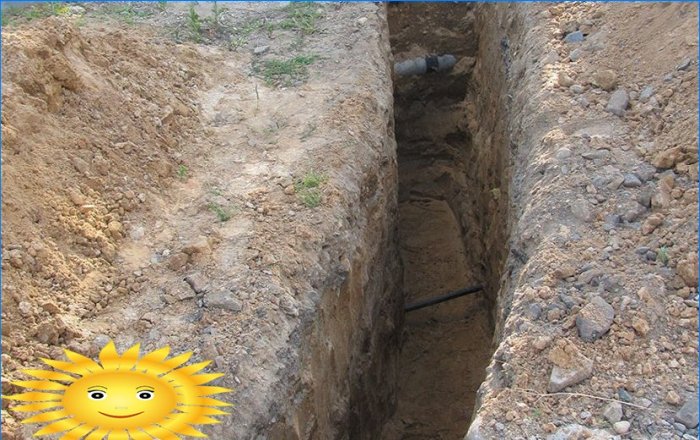
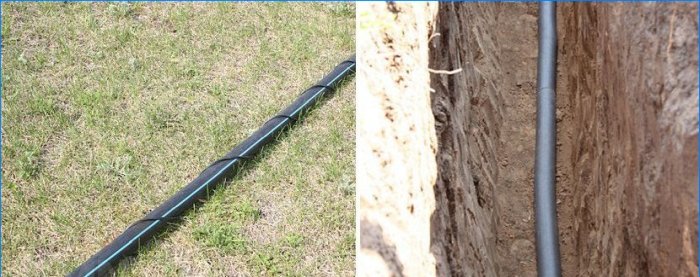
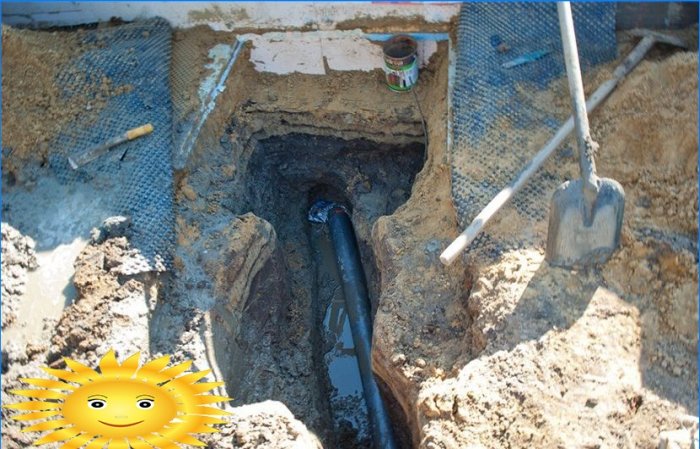
It is much easier to cross a dirt road with a trench, but difficulties are also possible here. The fact is that when the work of the contractors of the water utility is carried out, most of these projects are closed in one working day: the trench is dug out, the pipe is cut in and laid to the technical well. Then the master signs the certificate of completion, the pipe is covered with backfill and a signal tape, and the soil is backfilled.
If you do the work yourself, the wait for the inspection can take several days, so you need to make a flooring over the trench for the passage of vehicles. It is not so difficult: across the track, wooden beams or trims of logs 80–100 cm long are laid. Small trenches are made under them and bricked at each point of support. Across the beams, that is, in the direction of the trench, the flooring of planks 3–3.5 meters long is knocked off. Remember to shield the work area with reflective warning strips.
Junction into the highway
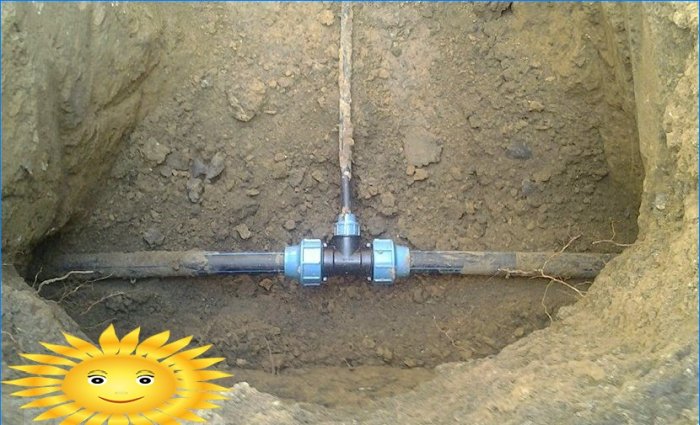
The branching method of the main pipe depends on its material. For HDPE and plastic pipes, the tie-in is carried out by installing a tee fitting with a side branch of 25–32 mm. It is very important that there are as few threaded connections as possible in this assembly, so barrel adapters are not welcome.
Metal and cast iron pipes are branched with overhead tie-in clamps. A part of the clamp with a branch is packed with a paste-sealant, the most reliable will be the mastic for planting car windows. The area of contact of the clamp with the pipe must be cleaned of dirt and rust, to ensure good adhesion of the sealant.
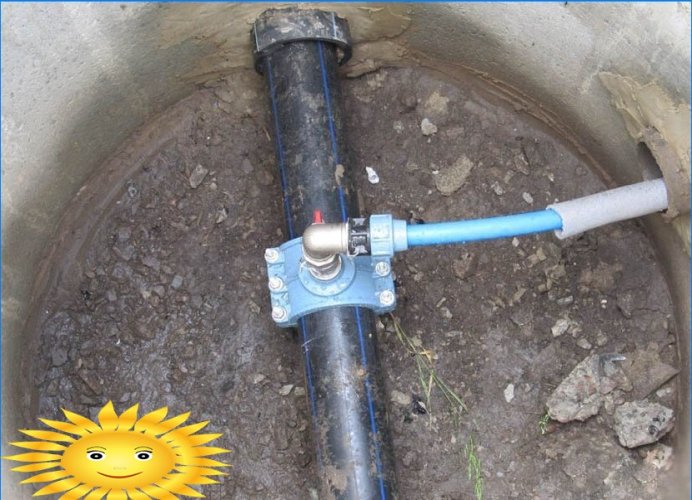
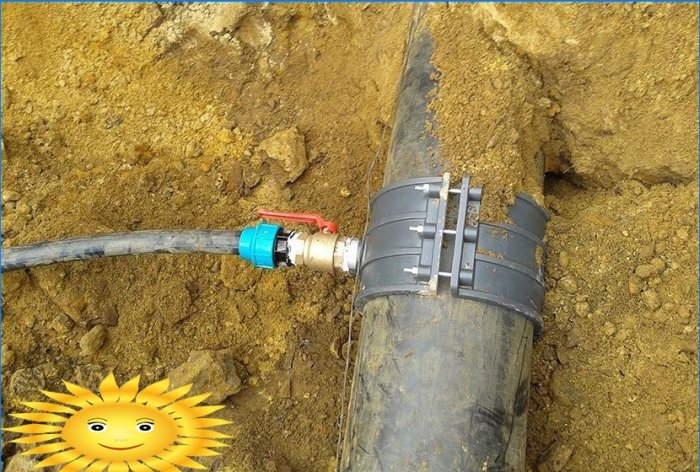
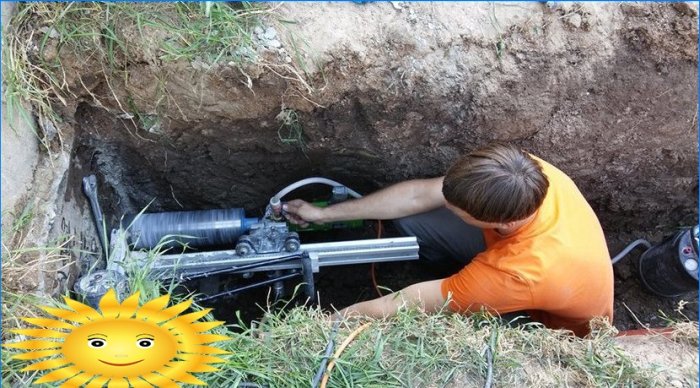
The Clamp is a good way to cut into a line of any material that is under pressure. A ball valve is immediately packed to the clamp outlet, then a hole is drilled. The drill can be protected from water by the cut-off top of the bottle.
The exact same method can be used for steel pipes to which a threaded end is pre-welded. It is important to have time to pierce the pipe with a drill to reach, quickly pull it out and close the tap. Therefore, the drill must be powerful, and you need to drill at high speeds and with a strong feed. Sufficient hole diameter – 14-18 mm, depending on the pipe passage.
Bed under the chimney, insulation
The inlet pipe should lie 15–25 cm below the depth of soil freezing. The bottom of the trench must be prepared with a bedding that quickly passes water, for example, sand or expanded clay. The height of the bed under the chimney is about 10 cm, another 5–6 cm is poured from above. At a shallow burial depth and on unstable soils, it is recommended to distribute the load with a layer of fine gravel of 3-4 cm or lay a trench with a brick before backfilling with soil.
1 – sand bed; 2 – water pipe; 3 – brick; 4 – soil
It often happens that the level of the trench is lower than the main pipe was laid. Being deceived by the principle “if it flows there, then it will not freeze here either,” you risk losing water in the winter. The fact is that pipes with constant circulation do not have time to form ice, but liquid stagnant at the same depth will instantly clog the pipe.
Therefore, the line is laid in freezing soil only when absolutely necessary, for example, at the entrance to the house or at the tie-in point. In these places, the input sections are considered vulnerable and require insulation or heating. If you do not use a composite pipe with insulation, the problem is solved by spreading PSB plates or extruded polystyrene over a layer of sand, the pipe is wrapped around the sides with them..
Pipe heating systems with self-regulating cables are the most effective way to eliminate the problem of pipe freezing. The system automatically adjusts the power depending on the current temperature of the conductor; when heated above +1 … + 3 ° C, consumption drops to zero. With proper deepening, only individual sections will have to be heated, which will not be too overhead: in fact, they rarely freeze, plus the heating does not need to be kept on all the time when the line is executed with the HDPE pipe.
Entering the house, metering unit
Before connecting the pipe to the distribution manifold, a metering unit must be installed. It can be located both in the house and in a technical well, depending on the convenience of taking readings. The input must be supplied with shut-off valves, followed by a mud filter, water meter and check valve.
1 – water well; 2 – main pipeline; 3 – drain; 4 – a sealed sleeve; 5 – coarse filter; 6 – counter; 7 – check valve; 8 – shut-off valve
It is most profitable to enter the pipe into the house in the underground, “diving” under the foundation tape. In buildings with a plinth, this is difficult to accomplish; advance installation of mortgages is required for the wire of communications through concrete.
Remember that when passing through the concrete tape, you risk breaking the waterproofing belt, so the pipe is carefully sealed. At the same time, on unstable soils, it is necessary to pass a pipe through a casing sleeve of twice the diameter, packed on both sides with plugs made of plastic sealant.
An alternative is to raise the pipe near the wall and lead it into the house above the foundation through the wall. In this case, it is hoped that the residual heat from the building and good insulation will be sufficient, but this section of the pipe should remain accessible for maintenance and heating..


Can anyone provide step-by-step instructions on how to connect tap water to my house? I’m not sure about the process and would greatly appreciate some guidance. Thank you in advance!
Can someone please explain the process or steps involved in connecting tap water to my house? I’m not familiar with how to do it and would appreciate any guidance or advice. Thank you in advance!