Recommendation points
- Basics of receiving satellite TV
- Frequency bands
- Parabolic antennas
- Types of parabolic antennas
- Offset antennas. Build and install
- Direct focus antennas. Build and install
- Setting up the satellite TV antenna
- Satellite selection
- Receiving data for directing the antenna to the satellite
- Installing the antenna in the desired position
- Some features of the installation of satellite dishes
In this article, we will take a closer look at various types of satellite dishes, talk about the rules for their installation, the features of setting up equipment and operating. After reading the article, you can do everything yourself – from buying to calculating the position of the “plate”.
Basics of receiving satellite TV
Future satellite TV users do not need to go into detailed technical details, but some basics will not hurt to know. For example, existing signal standards, frequency ranges and some other details.
Common standards for transmitted signals:
- DVB-S Mpeg-2 – TV broadcast plus Internet. Almost all satellites existing today support this standard, as well as any satellite receiver available on the market..
- DVB-S Mpeg-4 – the standard is similar to the first, except for one point – it requires a receiver that supports the Mpeg4 format.
- DVB-S2 Mpeg-4 (DVB-S2) is a relatively new standard for television signals, the Internet signal. Requires appropriate receivers.
Frequency bands
Broadcast of TV signals and reception / transmission of Internet signals using satellites is carried out in two frequency ranges:
- C-band – to receive signals in this frequency range, a parabolic antenna with a large diameter dish 2.0-4.5 meters is required.
- Ku band – reception of signals in this frequency range is possible using parabolic antennas with a dish diameter of 0.5-1.5 meters.
Parabolic antennas
Reception of a television signal from satellites is possible using two types of antennas – offset and direct focus. These are parabolic antennas with three main nodes:
- Reflective and focusing mirror (parabolic dish).
- Irradiator complete with low noise amplifier and signal converter.
- Swivel adjustment mechanism.
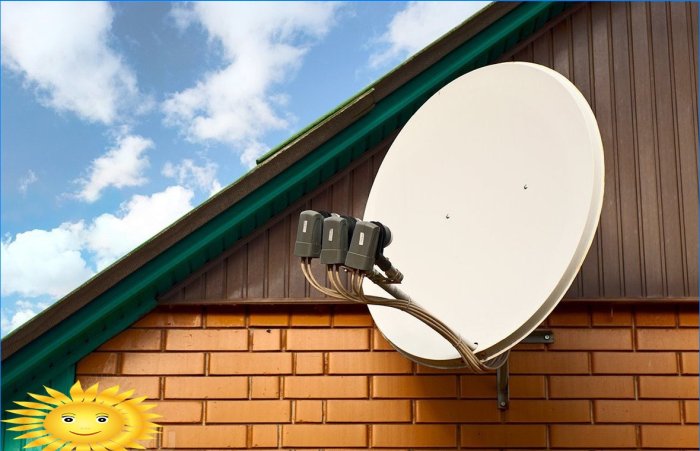
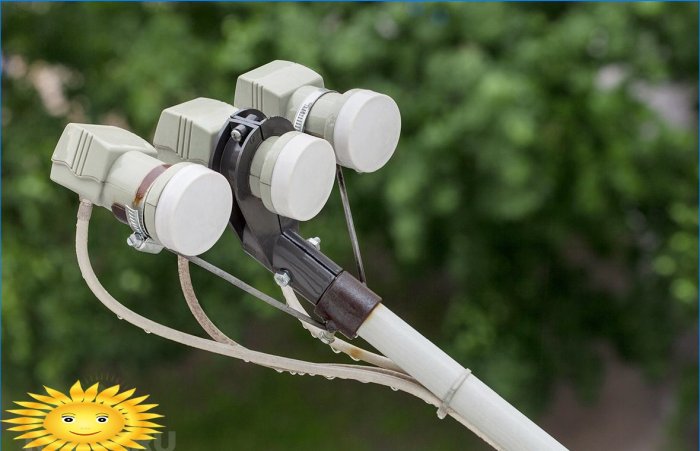
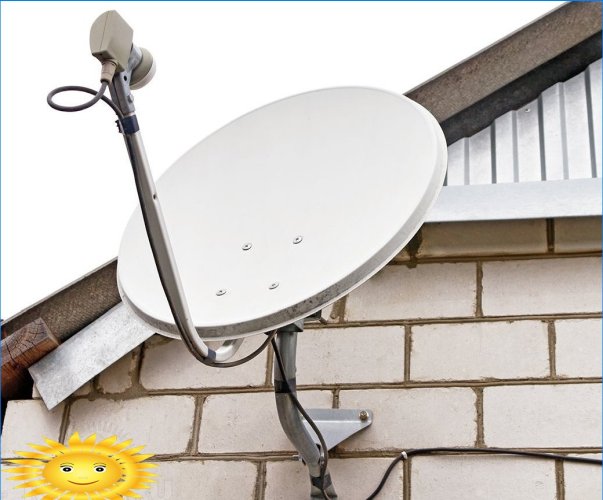
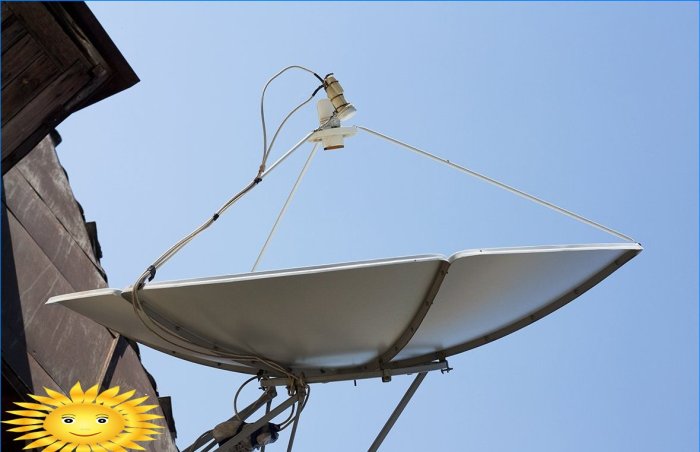
Irradiator(low-noise block converter) – it is a converter (popularly often called simply “head”), receives a focused signal, amplifies and converts it into an intermediate frequency signal suitable for processing by the receiver.
Receiver– a special electronic set-top box receiver, where decoding and conversion of an intermediate signal into a signal suitable for processing by a television receiver is carried out. There are many models of satellite TV receivers, including those supporting MPEG-2 and MPEG-4 digital video compression technologies. Usually, receivers are sold complete with parabolic antennas.
Typical receiver designs:
- conditionally coded (paid) access;
- access via smart cards (receivers with a card reader);
- access through the CI-module (receivers with TV signal decoding);
- Free public TV (FTA series receivers).
Types of parabolic antennas
Offset satellite dish– a design that has a slightly shifted focus relative to the center point of the dish, so the actual direction of offset antennas is usually just below the satellite’s horizon point. The antenna disk is usually vertical to the earth’s surface. The “offset” is usually installed on the wall of the house. Offset designs are designed to receive a Ku-band signal, but can also work in the C-band if the “dish” mirror has a diameter of more than 1.2 meters. Advantages – high focusing accuracy. Disadvantages – insufficient protection of the converter from the external environment. This is the most common variant of “plates” in the private residential sector..
Direct focus satellite dish– here the focus is located exactly in the center. The diameter of the mirror of such structures varies in the range of 0.9–4.7 meters. Installation usually requires a horizontal support. Advantages – collapsible design of the mirror, which is of no small importance for large sizes. However, for the same reason, disadvantages appear in the form of poor focusing and, as a consequence, losses of up to 10% efficiency. This type of antenna can be considered universal – they are designed to receive a signal of both C and Ku-bands.
Attention! Satellite antennas are highly directional devices. Regardless of the design, the installation is carried out taking into account the mandatory orientation of the device to the southeast, south or southwest (depending on the specific satellite). In other words, the installation of the antenna should be carried out in a place where the coverage of the indicated directions is ensured (optimally – all three).
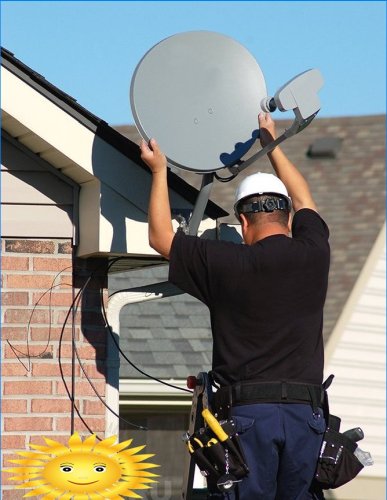
Offset antennas. Build and install
Assembling an offset satellite dish is not as complicated as it might initially seem. Usually complete with a purchased device comes with detailed assembly instructions. The task is to connect the plate with the bracket, assemble the rotary mechanism and install the antenna converter holder. After assembly, the swivel mechanism must ensure that the mirror moves with some effort, both vertically and horizontally..
The structure is delivered to the installation site and installed on the wall of the house. Previously, it is required to mark and make several holes for the anchor bolts on the wall. Anchor bolts are installed, the antenna bracket is attached. Then it remains only to fix the converter itself on the converter holder and connect everything with a signal cable according to the scheme: antenna converter – receiver – TV.
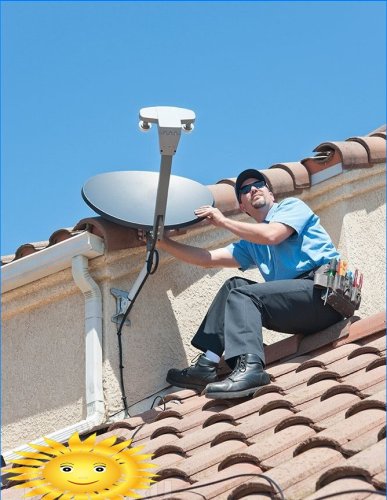
Direct focus antennas. Build and install
The procedure for assembling a direct focus antenna is somewhat more complicated than an offset one, but many can also do such work. The mirror of direct focus antennas, as a rule, collapsible, consists of several segments that form a whole dish. In the case of a private house, the plate is collected on the ground and then rises to the roof. Since the roofs of private houses are predominantly pitched, you will need to make a special stand.
Antenna stand – as an option, a prototype of a staircase with a riser, given that direct focus satellite antennas are mounted on a horizontal surface. The stand is mounted on the roof slope and the antenna mirror is already mounted on the stand, together with a support “leg” and an adjustment mechanism. Mounting options on a pole, on the wall of the house are also not excluded if they provide an unobstructed direction of the antenna to the satellite.
Setting up the satellite TV antenna
You can start tuning under the following conditions:
- the satellite is selected – the translator of the television signal;
- the space in front of the antenna mirror is free for the signal to pass through;
- the TV screen is available for review by the tuner or the assistant to the tuner.
Satellite selection
The list of operating satellites is wide enough. Naturally, the user capabilities are quite extensive, but at the same time they are limited by the geostationary orbit of satellites. All satellites are in the sky: southeast – south – southwest. In this case, the greatest angle of elevation of the satellite in relation to the horizon line is exactly in the direction to the south. That is, the greater the deviation to the southeast or southwest, the lower the satellites are located above the horizon..
Interesting TV satellites:
- YAMAL 201 / 300K, orbital position – 90 ° E e. Coverage: the entire territory of Russia, plus neighboring countries. Open access to popular C and Ku band center channels.
- EUTELSAT 36A / 36B, orbital position – 36 ° E e. More than 150 channels from well-known operators “NTV-Plus” and “Tricolor-TV”, including channels broadcast in HDTV format. Most of the channels are paid, but there are also free channels.
- HOT-BIRD 13B / 13C, orbital position – 13 ° E e. An impressive range of channels, including European ones. There are paid and free channels.
- HORIZONS-2 / IS-15, orbital position – 85.2 ° E The basis of the broadcast is the paid packages “Continent TV” and “Telekarta TV”.
The list goes on. If desired, information on satellites is always available on the network.
Receiving data for directing the antenna to the satellite
To set up a satellite dish, you need the following data:
- the value of the orbital position of the satellite;
- geographical coordinates of the antenna installation site (terrain coordinates);
- elevation angle of the satellite relative to the antenna installation site;
- azimuth value.
At first glance, it is quite difficult. But only at first glance. In fact, all marked data can be calculated using the formulas.
Lift angle calculation:
- F = arctan {[Cos (g2 – g1) x Cos (v) – 0.151] / sqrt (1 – Cos2 (g2 – g1) x Cos2 (v)]}
Calculation of the azimuth value:
- Ф = 180 ° + arctan {tan (g2 – g1) / sin (v)}
Where: g2 – the value of the longitude of the area, v – the value of the latitude of the area, g1 – value of satellite longitude.
However, if you have difficulties with higher mathematics, then it is better to use special software (for example, the Satellite Antenna Alignment program), or get the calculation data on specialized sites.
Installing the antenna in the desired position
So, the data is received. You can start setting the plate in the desired position, and then make fine adjustments, focusing on the quality of the picture on the TV screen. Orientation of the device to the azimuth is performed using a compass. Then a strictly vertical position of the plate is set. The exact vertical of the disc can be obtained, focusing, for example, on a plumb line installed nearby. We have already obtained the value of the satellite elevation angle – using a regular protractor, try to bring the antenna as accurately as possible to this value, starting from the imaginary horizontal line formed between the center point of the converter head and the center point of the antenna mirror.
Further, slowly turn the dish to the right, left, while simultaneously controlling the appearance of the signal on the TV screen. If the signal does not appear, change the angle of elevation by one or two degrees and repeat the process. When a signal appears, they achieve the highest quality picture and then finally fix the position of the dish.
Some features of the installation of satellite dishes
Modern satellite dishes can be equipped with various accessories, the presence of which greatly facilitates the setup process, and sometimes the user does not have to configure the equipment at all. Among these accessories:
- actuators
- moto suspensions
- positioners
SuperJack Actuator
For example, the SuperJack V-BOX II positioner provides full control of the satellite dish through a rotary mechanism. The device’s memory chips contain about one hundred orbital positions of satellites. Supports both local control mode and command control mode coming directly from the satellite.
STRONG SRT DM2100 DiSEqC
Moto suspension or swivel motor. An example of such a device is the Strong DM2100 DiSEqC system, which is capable of tracking satellites located from 30 ° West longitude to 90 ° East longitude. The system also has pre-programmed installation data for over twenty popular satellites. True, this motorized suspension can be used only with parabolic antennas with a diameter of no more than 1.2 meters. Works with receivers via DiSEqC 1.2 protocol.
Lightning protection Dr. HD
Like any antenna system, the satellite one also needs lightning protection. Everything is quite simple here. There are special compact inexpensive devices like Dr. HD / Prof GC-862BL, which reliably protect not only the antenna, but all the equipment as a whole..


I would like to know how to independently mount and configure satellite TV equipment. Could you provide step-by-step instructions or resources that can guide me through the process?
Can someone please provide a step-by-step guide on how to independently mount and configure the equipment for satellite TV? I’m new to this and would really appreciate any tips or suggestions. Thank you!