Recommendation points
- The principle of operation and types of deflectors
- Why do you need a deflector
- How much does the deflector cost
- Deflector with own hands (Volpert-Grigorovich)
- Deflector size calculation
- Working process
The article describes different types of deflectors, features of their design, principle of operation and differences from other types of traction amplifiers. We will tell you about the need to install them, give a table with prices, and also consider step-by-step instructions for assembling a deflector with your own hands.
A deflector is a device that optimizes air flow to increase traction in an air duct or chimney. Literally translated deflector – reflector, guiding device. This fully describes its function and purpose..
The principle of operation and types of deflectors
The air flow is directed by creating a low pressure area at the bottom of the device. When the air flow around the deflector, a “vortex” is formed in the lower part, which, passing the space bounded by the walls, creates additional thrust. The stronger the air flow, the more powerful the thrust inside the device. In other words, the deflector directs the wind parallel to the duct pipe, which increases the thrust due to the pressure drop.
This effect is possible with the location of the walls, which is determined by the basic aerodynamic calculation. At the present time, several models of deflectors with optimal proportions have been developed experimentally..
TsAGI– development of the Central Aerohydrodynamic Institute. Zhukovsky. This deflector increases traction due to thermal and air pressure, as well as a pressure drop at a height of 2 m from the roof. This design allows hidden installation in the duct, therefore it is used mainly for ventilation systems (cleaning from combustion products is difficult).
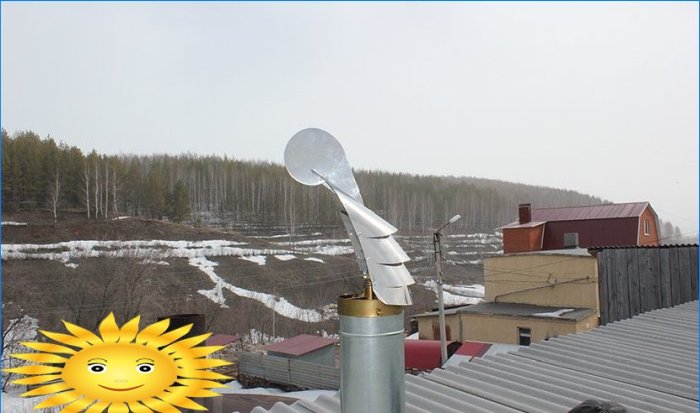
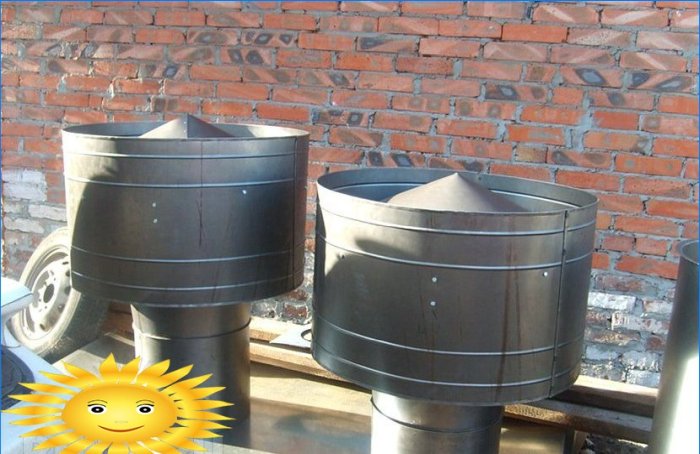
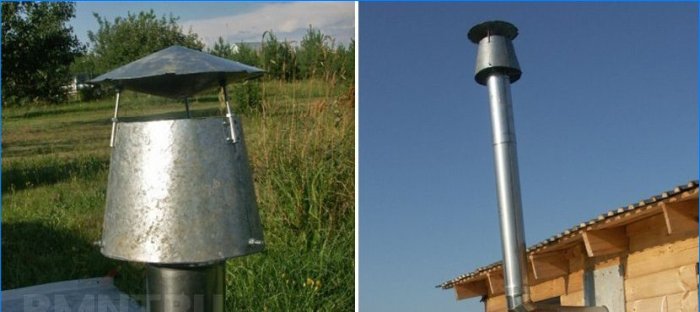
Deflector Khanzhenkov.It is an additional wall around the pipe and a “rain plate”, which also serves as an exhaust hood. This umbrella is immersed a certain distance inside the circumferential wall.
Volpert-Grigorovich deflector.It differs in a simpler design – a “plate” of two umbrellas is located above the enclosing wall.
Swivel deflector(“Hood” or “Net”). It is a semicircular air trap gutter attached to a rotary rod installed inside the channel. With wind load turbulence arises and thrust increases. Plays the role of a weather vane.
“Hood deflector” on video
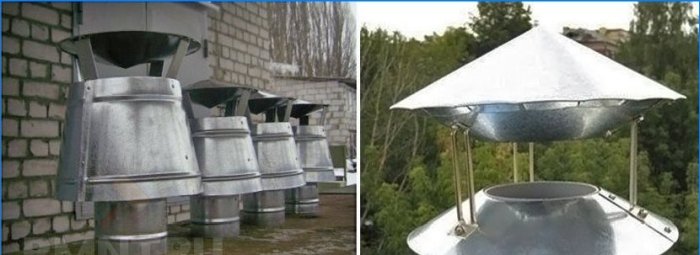
In addition to these models, there are countless other designs that often defy classification. Among them, one can distinguish both modern versions with enlarged spiral blades based on a bearing (they rotate during operation), and simple “umbrella-covers” made of a piece of galvanized steel, which also increase traction.
Since the calculation of performance and selection of the design of the deflector for ventilation systems is a matter of professionals, we will pay attention to reflectors for stove and fireplace chimneys.
Why do you need a deflector
In addition to its main purpose – the removal of combustion products, the deflector performs several more useful functions:
- Significant increase in traction. Draft attracts more oxygen and this has a positive effect on fuel economy in pyrolysis boilers and furnaces – it burns out completely.
- Extinguishing sparks. This problem is familiar to those with a short solid fuel reactor * flue. Sparks from a chimney – a sign of a hot source and powerful draft – can ignite. The deflector allows you to stop the spark and allow it to burn out safely.
- Protection against atmospheric precipitation. In theory, an ordinary “umbrella” copes with this task, but it does not give the first two advantages.
* Reactor – the place where the combustion reaction takes place, the hearth, the source of combustion products (stove, fireplace, potbelly stove, boiler, etc.).
All reflections on the advisability of modernizing the chimney are reduced to the question of what to choose: an “umbrella” or a deflector? The simplicity of the first does not give the effect of the second, but the complexity of the deflector in comparison with the “umbrella” makes many think.
How much does the deflector cost
Ventilation devices are calculated together with the entire system. Deflectors of a specific model can be purchased for the required pipe diameter.
Table. Deflector prices
Name Model Steel type Channel diameter, mm Price, cu e. “Vent-Class” D-120 Deflector Khanzhenkov galvanized 120 18 “Vent-Class” D-250 Deflector Khanzhenkov galvanized 250 42 “StovesFireplaces” TsAGI-100 Deflector TsAGI galvanized one hundred 17 “StovesFireplaces” TsAGI-220 Deflector TsAGI galvanized 220 40 Turbovent “Stabil 120” Volpert-Grigorovich galvanized 120 21 Turbovent “Stabil 260” Volpert-Grigorovich stainless steel 260 46 Turbovent “Dragon” Dr-150-CH-A Turning stainless steel 150 one hundred Turbovent “Dragon” Dr-200-CH-A Turning stainless steel 200 115 Turbovent “Dragon” Dr-300-CH-A Turning stainless steel 300 140 Deflectors are often made in artisan workshops and small workshops (in this case, the product may not have a specific name and model reference). An indicator of the quality of the company’s work will be the product passport indicating the dimensions of the parts, steel grade and other details.
Deflector with own hands (Volpert-Grigorovich)
Of course, home craftsmen did not stand aside and began to make deflectors for their own needs in their workshops. It turned out to be profitable – having a galvanized sheet, tools and scrap metal, you can save up to $ 40. e. at the installation of the deflector.
To work you need a tool:
- Ruler, tape measure, marker, drawing set.
- Scissors for metal, mallet, riveter or self-tapping screws with 15 mm press washer.
- Drill with drills.
Material:
- Sheet metal 0.3-0.5 mm (galvanized, stainless steel, aluminum, etc.).
- Available metal for rigid mountings – hairpin, aluminum, strip, etc..
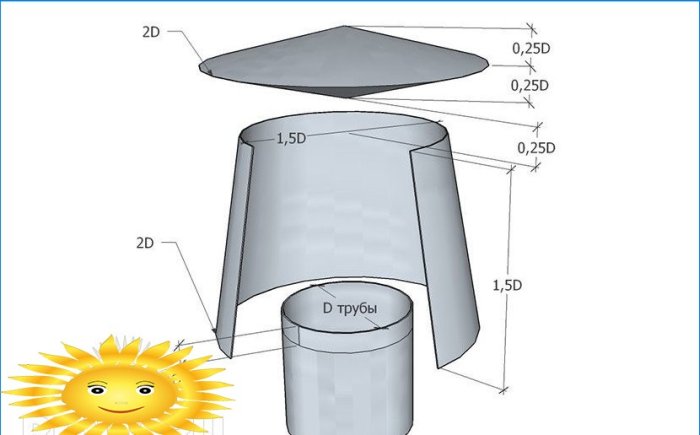
Deflector size calculation
This is the most important step in the whole work. Calculation formulas were derived and tested in practice in a wind tunnel and tied to the current parameter – the channel diameter D.
These data are included in the table, on the basis of which a simple deflector can be calculated for any size, based on the channel diameter D.
Index D coefficient Bottom diffuser diameter 2 Upper diffuser diameter 1.5 Diffuser height 1.5 Recessing the pipe into the diffuser 0.15 Cone height 0.25 Umbrella height 0.25 Reverse cone height 0.25 Umbrella and diffuser clearance 0.25 Working process
After all the calculations are completed, it is necessary to transfer the drawings to the sheet and cut out the details of the product:
- Cut with scissors for metal parts.
- Roll up diffuser housing and drill both edges. Then fasten this case with rivets.
- Rivet the top and bottom cones. The upper one will be larger than the lower one and its edge can be used to attach the “plates” to each other. To do this, cut and bend the legs (6 pcs.) In the edge of the upper cone.
- Before assembling the umbrella, do not forget to install the studs in the lower cone for mounting to the diffuser, if the fastening is done on the legs, they can be installed on the outside on the rivets.
- You can attach the umbrella to the diffuser using studs or aluminum plates. If there are studs, for them you need to make hinges on the deflector body – go around the stud with a galvanized flap and make mounting holes in it.
- After assembling the device, we install it. To do this, it is best to remove the upper section of the pipe and mount the structure on a workbench, and then reinstall it. Mounting method – pins or pins.
Remember that the connections must be reliable as the deflector is exposed to significant wind loads.
A home-made reflector has no decorative value, but the benefits of its installation are obvious – increased traction by 20-25%, protection of the roof from sparks. In addition, it replaces an additional 1.5–2 meters of pipe height. Whichever deflector you choose, you will feel the benefits of installing it in the next heating season.

Can you provide detailed step-by-step instructions on how to assemble deflectors for ventilation and chimney as a DIY project? I am interested in understanding the process and would greatly appreciate any guidance or tips you can offer. Thank you in advance!