Recommendation points
- What a playground can consist of
- Materials and tools for work
- Construction erection
- Painting and installation of game elements
If you are spending your summer vacation in the country with children, then you just need to organize a place for games. It should be functional, safe, beautiful and simply loved by kids. Let’s talk about the basic principles of building a playground with our own hands, materials and the basics of the layout of the elements of the complex.
What a playground can consist of
As part of the playground, 2 types of structural elements can be distinguished: stationary and mobile.
Stationary ones are the main load-bearing part of the structure, are rigidly fixed and remain unchanged during operation. The stationary part of the site should be made of strong and durable materials, be reliable (withstand the weight of several children) and safe (do not leave splinters, have fences in places where a fall is possible).
Mobile elements can be attached, removed or adjusted as children grow up and their interests change, or according to weather conditions (for example, in rain or snow).
Examples of stationary elements: playhouses, bridges, ladders, benches, sandbox, climbing wall.
Mobile elements: swings, slide, rings, rope, Swedish or rope ladder, basketball hoop, climbing ledges, gates and much more.
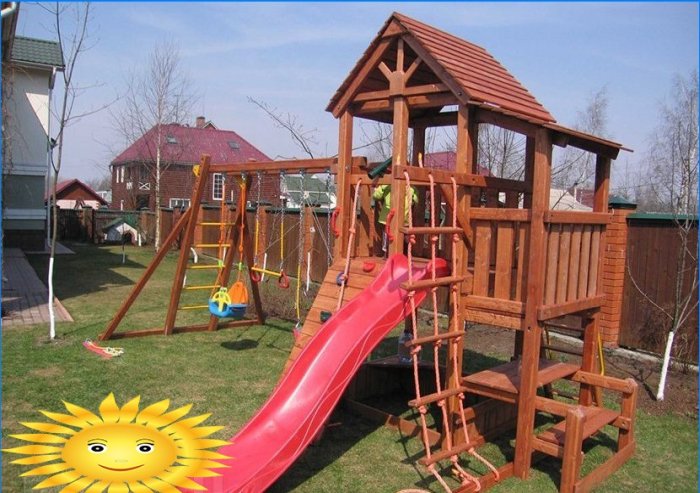
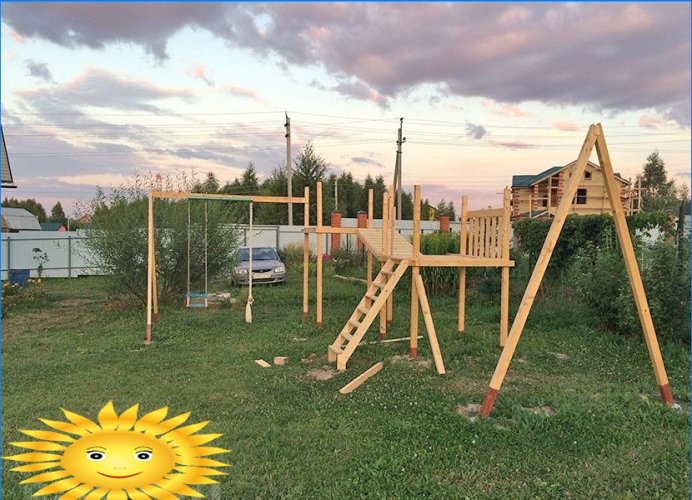
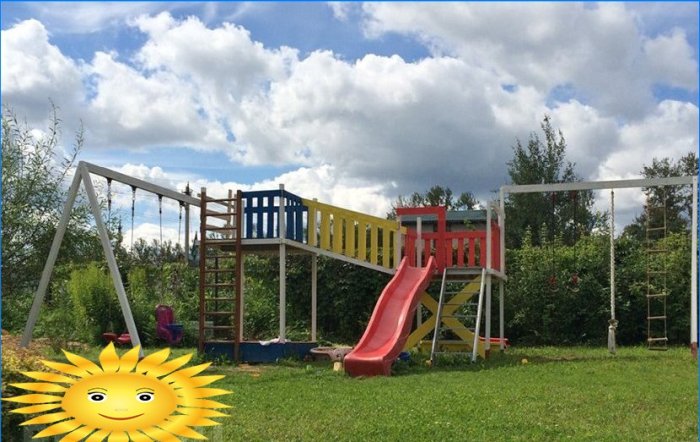
Consider the process of building a playground made of wood, designed for the simultaneous play of 2-3 children. The site consists of 3 levels: 1st – on the ground, 2nd – at a height of 1.3 m from the ground, the third – 1.7 m from the ground. A staircase leads from the 1st to the 2nd level, and a wooden bridge from the 2nd to the 3rd level. The site contains play elements with the possibility of a canopy in various combinations and removal in winter.
Materials and tools for work
To build a wooden platform, the following materials are needed:
- planed timber 50×70 and 50×100 mm;
- planed boards 20×96 and 16×70 mm.
The connection of the wooden elements of the supporting structure is made with screws and nuts. The floor boards are fixed with self-tapping screws. It is necessary to have a stock of screws and self-tapping screws of different lengths and select them at the junction depending on the size of the material.
To work you need tools:
- shovel or drill;
- saw;
- jigsaw;
- screwdriver;
- level.
Additional materials:
- crushed stone, sand, cement (dry mix);
- protective impregnation for wood;
- paint in several colors;
- brushes.
Construction erection
First, the installation of vertical supports from beams is made.
Areas of beams that will be placed in the ground must be treated with a protective impregnation for wood against dampness, rot and insect eating..
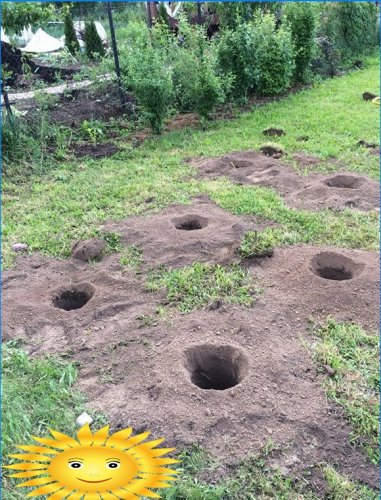
To install the beams, holes are formed about 50–70 cm deep and 15–20 cm in diameter. You can simply dig the holes or use a drill (manual or electric). The location of the pits and the distance between them is determined by the design that was initially selected.
At the bottom of the pit, it is advisable to lay an insulating material (for example, roofing material) or pour a small layer of dry rubble. Then prepared beams are installed strictly vertically in the center of the pit, and the remaining space is filled with rubble, sand and cement mortar. The mortar should protrude slightly above the surface of the ground to prevent tree contact with grass or ground, this will provide a longer service life.
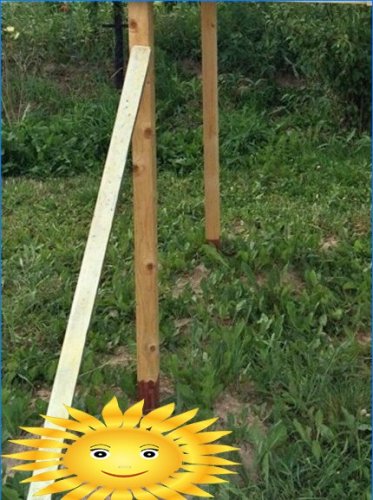
Several bars are not installed vertically, but forming a printed letter “L” in shape. The installation principle is the same, but the pit needs a wider one so that a part of the timber can be placed in it at an angle.
After this stage, you need to wait several days until the cement mortar is completely dry. The exact time depends on the depth of the pits and weather conditions.
The next step is to form horizontal playgrounds at a height. First, a timber is mounted along the perimeter of future sites, and a floor of boards is laid on it. The thickness of the boards can vary depending on the size of the site (the larger it is, the thicker the boards should be), you may also need a support bar in the middle so that the boards do not sag when walking on them.
In the construction under consideration there are 2 platforms, between which a wooden bridge is thrown. It is erected according to the same principle – the support beams are fixed at an angle between two platforms, and then boards are laid on them..
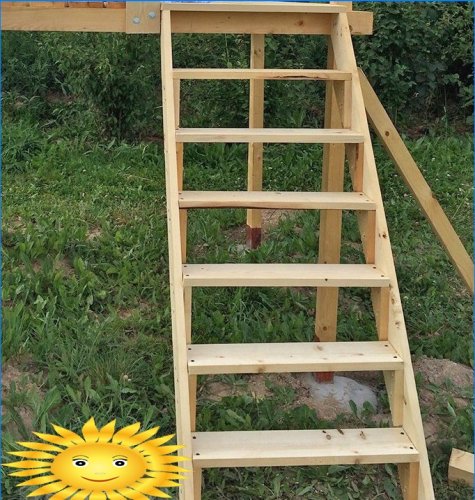
To access the 1st level, a staircase is erected according to the following principle: two parallel guide boards are attached at an angle at two points: to the ground and to the platform of the first level, and steps are installed between them. Each step rests on wooden corners attached to the guide boards. At the point of contact with the ground, you need to fill in a small area of cement mortar so that there is no contact of the tree with the ground, and the boards should be treated with a protective impregnation.
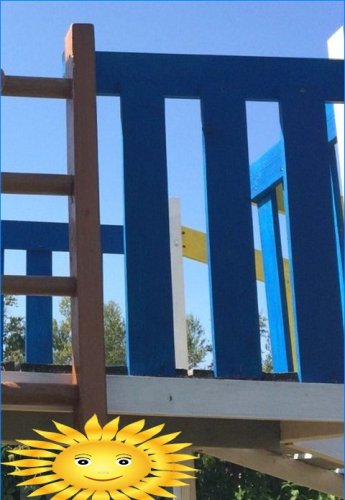
The next step is to erect protective fences on the upper tiers.
First, the railing is installed by attaching it to the vertical bars, and then the protective grill between the railing and the floor in the form of vertical planks. Thinner boards can be used for the railings.
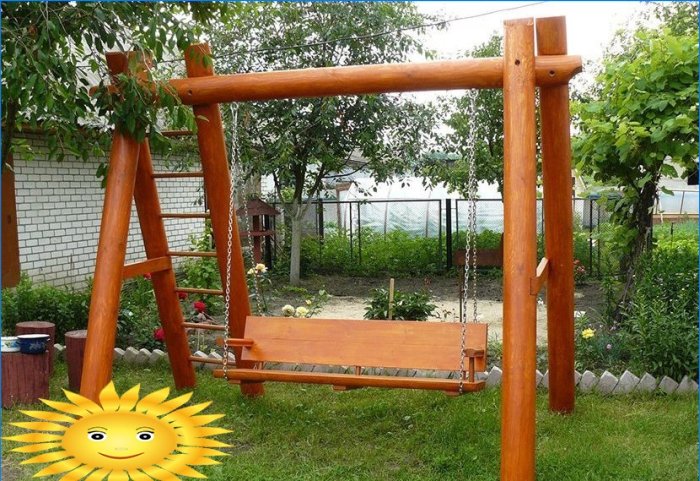
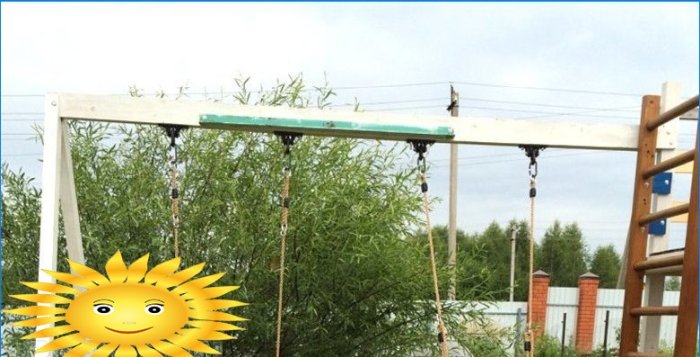
Swings and other movable elements require hanging bars. For them, a beam of 50×100 mm or larger should be used. One edge of the beam is fixed to the L-shaped support, and the other to the vertical support beam, on both sides the structure is securely tightened with screws.
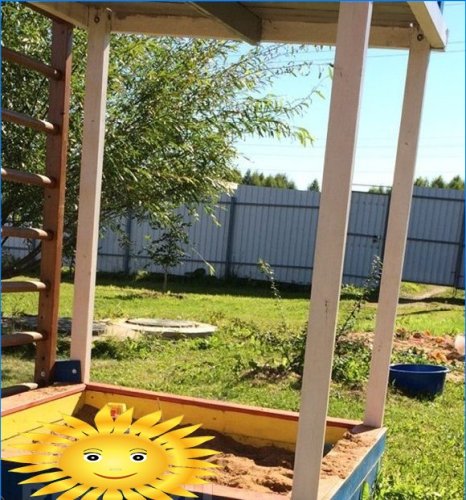
On the ground, you can equip a sandbox with benches. For this, the boards of the sandbox are limited to boards, and boards for benches are installed on top. At the bottom of the sandbox, you need to lay a material that prevents the growth of grass, and fill up the sand.
Painting and installation of game elements
After the site is erected, all elements must be carefully sanded to avoid splinters and for better paint application, special attention should be paid to the railing, floor and stairs.
Then you can start painting. The paint should be suitable for outdoor use, under which the first layer can be additionally applied with a protective impregnation. The number of coats also depends on the properties of the paint and your preference..
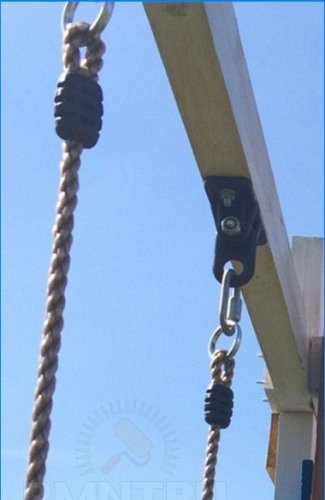
For the swing canopy, swing loops can be used, which are installed on the crossbar, after which the swing itself is attached to them with the help of carabiners.
A similar attachment mechanism is used for rope, rings, trapeze and rope ladder. If all fasteners are the same and universal, then you can easily change the arrangement of the elements, or replace them. The slide can be bought at a specialized store, or made from metal or polycarbonate sheet and wood. The nuances of installing the slide will depend on the option chosen, but the basic rule is that it must be securely fixed at the starting point and below on the ground.
Another interesting element is the Swedish wall from the old sports complex, which has found a second life on this site.
The resulting structure can be improved further: add a roof over the upper platforms, benches and a table (or maybe a children’s kitchen with a real sink) on the ground under the second platform, one of the side edges can be sewn up with boards and a climbing wall can be arranged, ledges for it can be purchased at store or made from small blocks.
But in its current form, it will become a favorite place for children to play.!

Can you provide some practical tips or ideas for creating a do-it-yourself playground in summer cottages? It would be great to have suggestions on what kind of equipment or features are suitable for different age groups, as well as any safety precautions to consider. Additionally, if you could share any budget-friendly options or creative solutions, it would be greatly appreciated!
Creating a DIY playground in a summer cottage can be a fun and rewarding project for families. For young children, consider installing a sandbox, swings, a small slide, and a playhouse. Older kids may enjoy a climbing wall, rope ladder, or monkey bars. To ensure safety, use soft, impact-absorbing surfaces like rubber mulch or sand under equipment. Regularly inspect and maintain all structures to prevent accidents.
Budget-friendly options include using recycled materials like old tires for swings, pallets for building structures, or repurposing old furniture for play areas. Consider incorporating nature elements like rocks, logs, or tree stumps for natural play features. Remember to also provide shade, seating, and water access for children and caregivers. Lastly, involve kids in the design process to create a playground that reflects their interests and encourages imaginative play.
Creating a DIY playground in a summer cottage can be both fun and rewarding. For younger kids, consider incorporating swings, slides, sandboxes, and small climbing structures. Older children may enjoy monkey bars, a rope climbing area, or a zip line. Safety is paramount, so make sure all equipment is installed securely and inspect regularly for wear and tear. Use soft surfaces like wood chips or rubber mulch underneath play equipment to cushion falls. Budget-friendly options include repurposing tires for a tire swing, building a simple treehouse with scrap lumber, or creating a DIY water play area with PVC pipes and sprinklers. Get creative with DIY projects like a mud kitchen, a mini rock-climbing wall, or a scavenger hunt course to keep kids entertained all summer long.
Creating a DIY playground in a summer cottage is a fantastic way to keep kids entertained and active. For younger children, you can include swings, slides, sandboxes, and small climbing structures. Older kids might enjoy monkey bars, a rope climbing area, or a zip line. Safety is key, so make sure all equipment is securely installed and regularly inspected. Using soft surfaces like wood chips or rubber mulch can help prevent injuries from falls. If you’re on a budget, consider repurposing materials like tires for a tire swing or building a treehouse with scrap lumber. You can also get creative with DIY projects like a mud kitchen, mini rock-climbing wall, or scavenger hunt course. There are endless possibilities for creating a fun and exciting playground for kids to enjoy all summer long.