Recommendation points
- What stone to use for the fireplace
- Adhesive selection
- How to prepare the masonry surface
- Layout scheme
- Cladding procedure
- How to lay out an arched vault
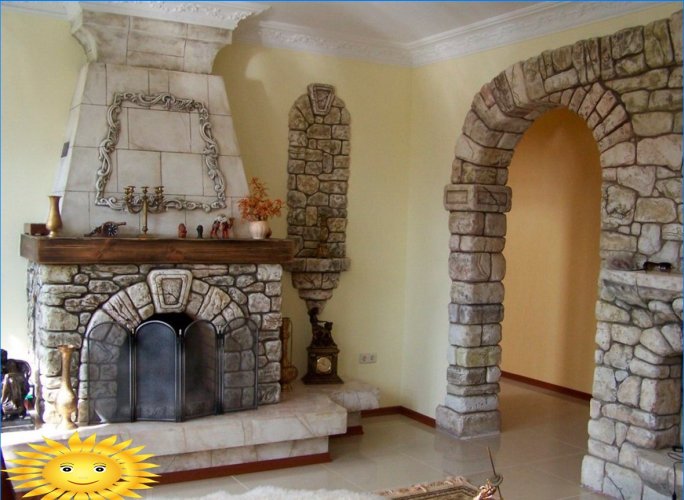
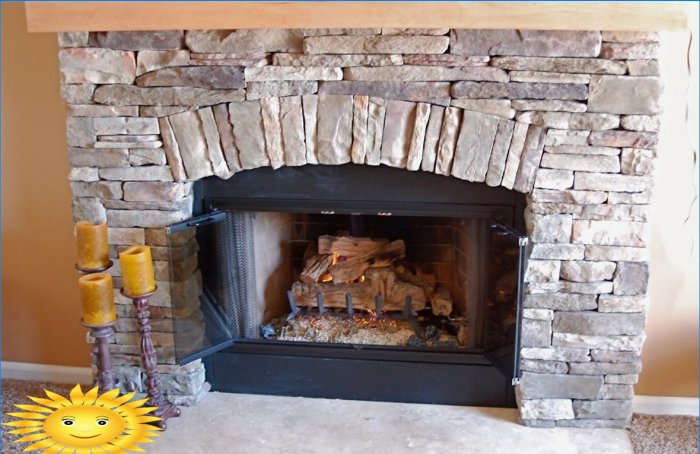
Decorating a fireplace with natural stone looks much more impressive than unassuming brickwork. For facing a fireplace with a stone with your own hands, you should learn how to choose the right material, prepare the base and carry out the facing work. We will tell you about the main nuances and procedure of work.
What stone to use for the fireplace
Despite the fact that the facing of the fireplace does not experience pronounced sudden changes in temperature, it is still located inside the living space. Because of this, it is required to completely exclude even the slightest likelihood of harmful emissions, which means that sedimentary rocks such as shale or sandstone should not be used..
From the point of view of radiological safety, it is also not the best solution to cover the fireplace with granite stones. The main risk factor from the use of such materials in interior decoration is associated not with the natural radiation background of the rocks, but with the gases with which the stones are saturated and emit many times more intensively even with slight heating. Radon poses the greatest danger.
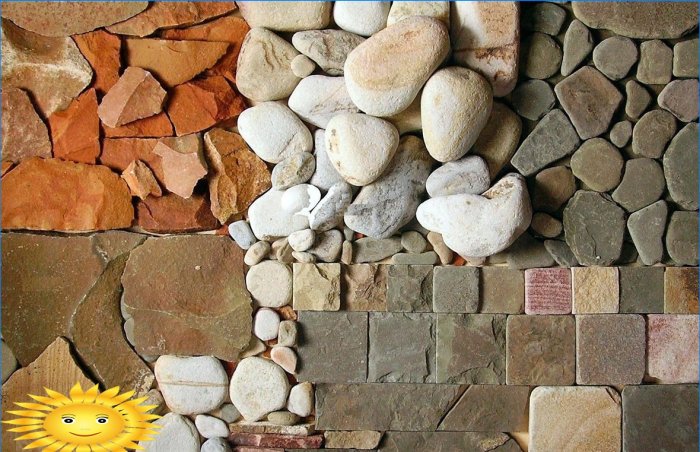
It is recommended to purchase noble rocks of volcanic origin for facing the fireplace. In the most budgetary projects, large pebbles and pebbles are used, it is also possible to use embossed concrete products, that is, stones of artificial origin.
Basalt
Diabase
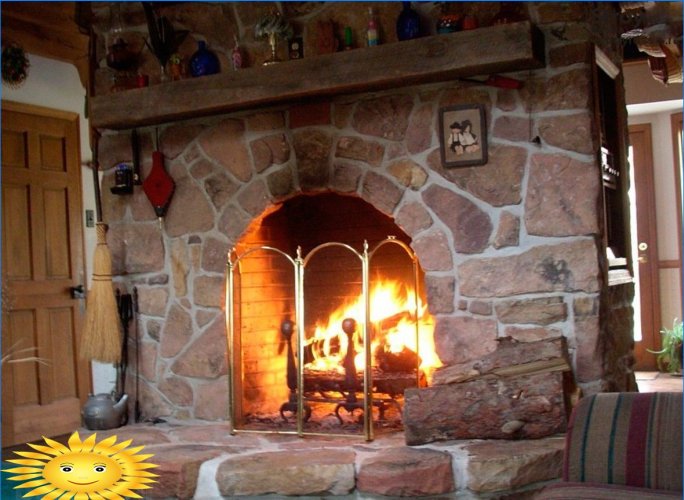
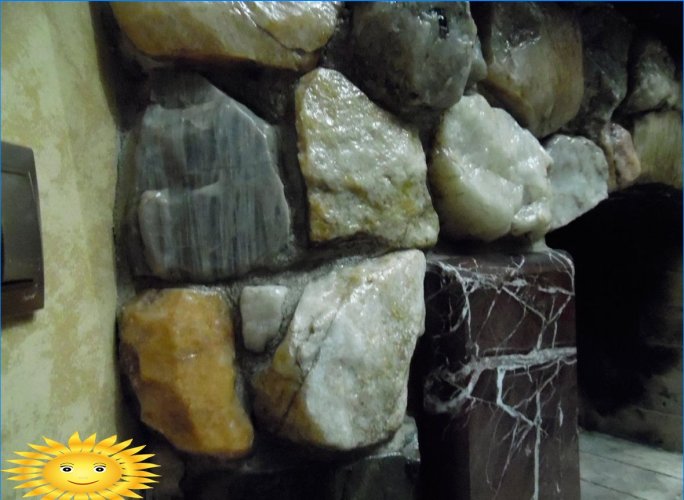
A truly magnificent look can be achieved using the same rocks that are used for laying a sauna stove: basalt, diabase, jadeite. These rocks, even with strong heating, do not form harmful secretions and are completely safe. It is better to select the stones yourself, a flat format of different sizes is preferable, mixed with equilateral stones of the same thickness, due to which the empty places of the layout will be filled. Better to buy stones of medium grinding or generally unprocessed.
Jadeite polished
Jadeite chipped
Adhesive selection
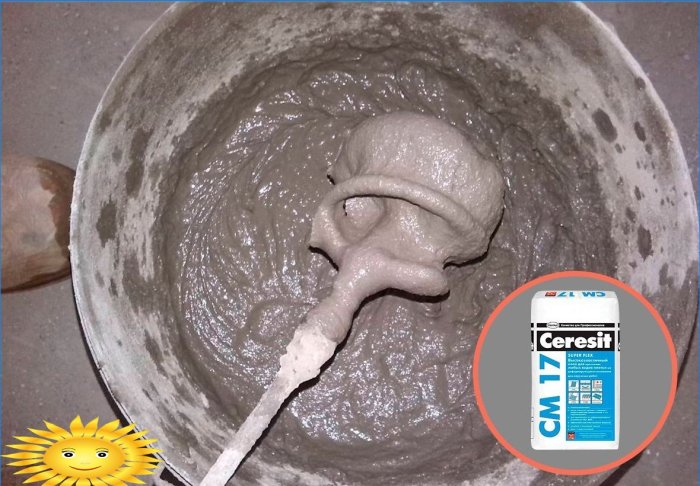
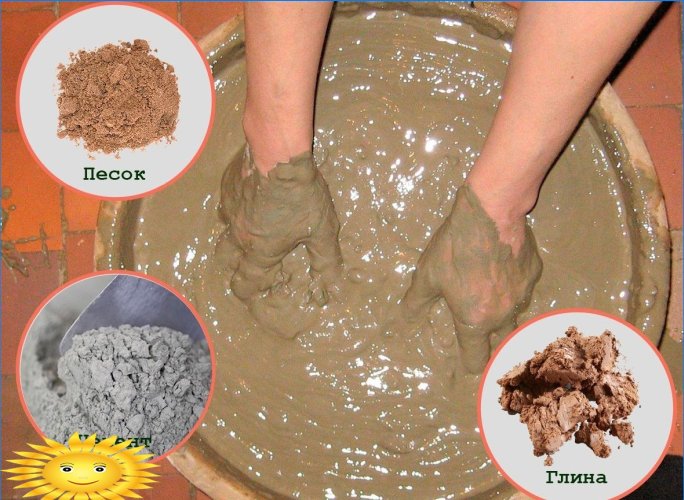
If you use dense, hard rocks without defects, the durability of the fireplace cladding will depend entirely on the quality of the adhesive mixture and the reliability of its adhesion to the brick base. The cement mortar will not be able to work in this temperature regime for a long time, therefore the choice is narrowed down to two options: buying a ready-made dry adhesive mixture for special purposes or preparing your own mortar based on chamotte clay.
With ready-made compositions, everything is simple, in most cases the usual Ceresit CT-17 or Knauf “Marble” will be enough. You can also use more highly specialized mixes like Scanmix Fire. The main limitation in using this type of glue is the maximum joint thickness, which is why the choice of material for masonry is limited to artificial stone. Natural rock has an irregular shape, and can only be laid on tile adhesive after careful adjustment.
A home-made solution provides relative freedom in this regard: with it, stones can be laid without tedious grinding, which will give the fireplace a more authentic look. The composition of the solution includes chamotte clay, river or mountain sand and cement grade not lower than 300 in a dry weight ratio of 3: 1: 1. Clay must be wiped through a sieve in advance, removed from debris and inclusions, and then filled with water for 40-50 hours. After that, sand is added to the mixture, it is necessary to eliminate cracking at the initial stage of setting. Cement is necessary to accelerate setting and increase adhesion, it is added immediately before laying. In such a solution, it will not be superfluous to use heat-resistant plasticizers. Final mixing should be done with a mixer or a drill with a tile adhesive attachment.
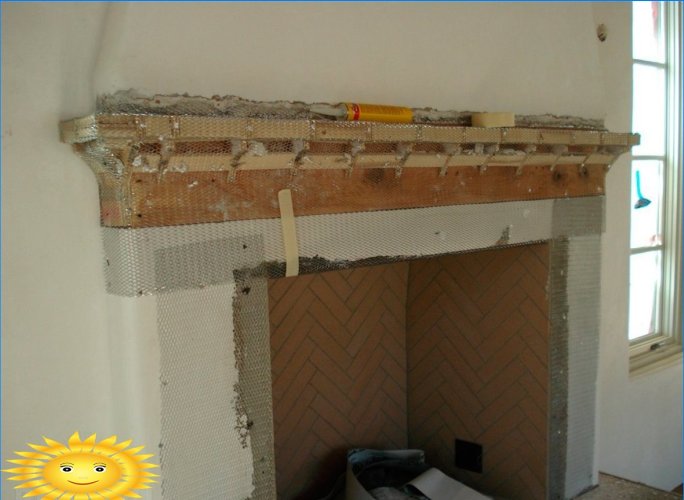
How to prepare the masonry surface
The third component of a quality fireplace cladding is a carefully prepared base. It is strictly necessary to prime the brickwork and the composition for this must be of the highest quality possible. It is recommended to use Knauf Tiefengrund or similar acrylate-based primers Dufa Putzgrung, Marshall Export Base, but mandatory for interior work.
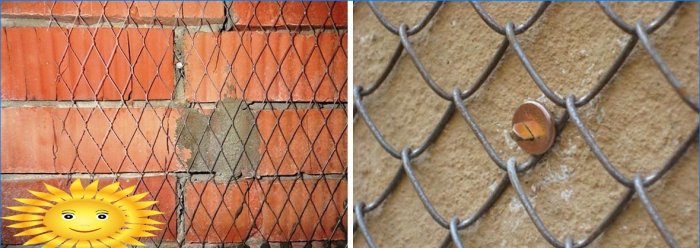
The second step is to secure the plaster mesh. The size of the cell should be chosen twice as large as the planned thickness of the glue line. It is impossible to fix the mesh with dowels in plastic plugs; use metal anchor wedges with a diameter of 6 mm. The attachment points are located with a frequency of about 25-30 cm. It is necessary to attach it to the brick body, and not to the seam. To prevent the masonry from splitting, turn the hammer drill to a lower speed.
Additionally, you can “tear” the surface of the masonry by tapping it with a hammer and chisel to form a multitude of notches. This will significantly increase adhesion, but this can only be done at the initial stage before priming. At the end of the preparation, the surface must be thoroughly dedusted, you can also open the masonry with another layer of primer from a hand spray.
Layout scheme
The entire fireplace cladding can usually be split into a series of flat areas. These include the front and side walls, it is also possible to expand the lower part to form a base. The fireplace shelf, as a rule, is not tiled in order to have an additional functional surface.
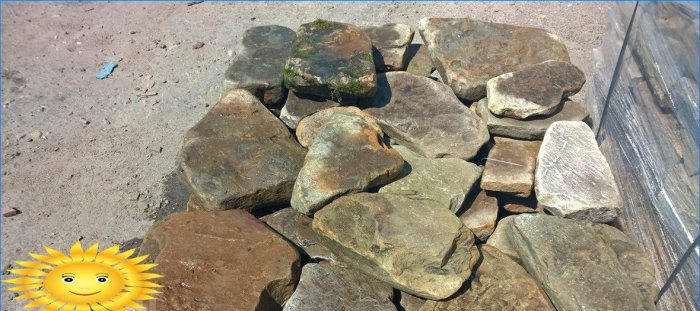
Flat areas must be displayed in the unfolding diagram on A4 sheet and all key dimensions must be indicated. According to the resulting cut, a mosaic of stones and their fragments is assembled on the floor, which are fitted to each other as tightly as possible. The seams between the cladding elements should not exceed 20-25 mm, in the optimal variant it is recommended to adhere to values of 5-6 mm.
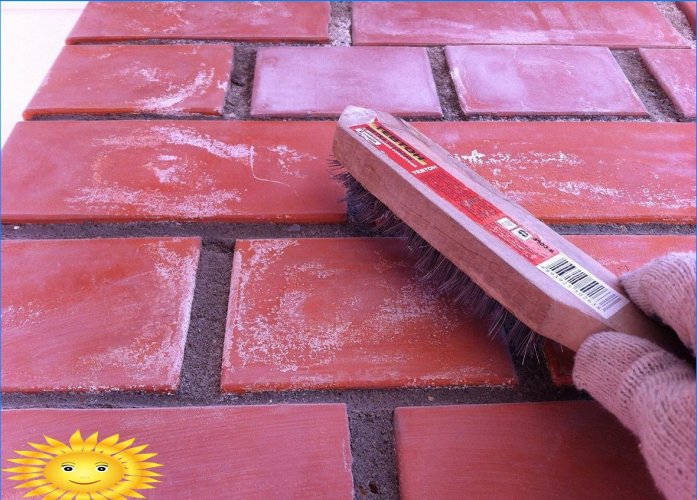
It is not very difficult to fit stones of irregular shape close to each other, but at the same time it is quite problematic to preserve the natural appearance of the edges. Most rocks are perfectly cut by a disc for angle grinders on concrete. It is possible to give the edges chips and breaks with a pickaxe, and a disc grinding disk, in the common people called a “turtle”, will also be a good help.
The stones must be soaked in water before cutting and grinding. This will not only save the workplace from dusting, but will also allow you to clearly see the finished result without color distortion from uneven refraction, and subsequently improve adhesion with the solution. The edges of each section to be cut should be kept even with an overlap of about 30–40 mm along the line of intersection of the planes. It is very good if you can provide an angular ligation: where there are gaps at the edge of the flat section of the sweep, stones of a suitable shape will be inserted from the adjacent plane.
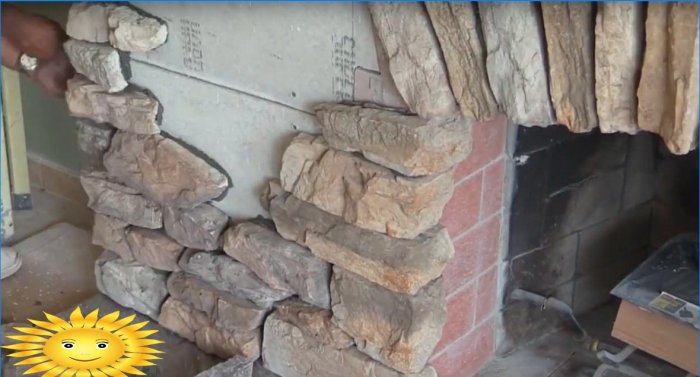
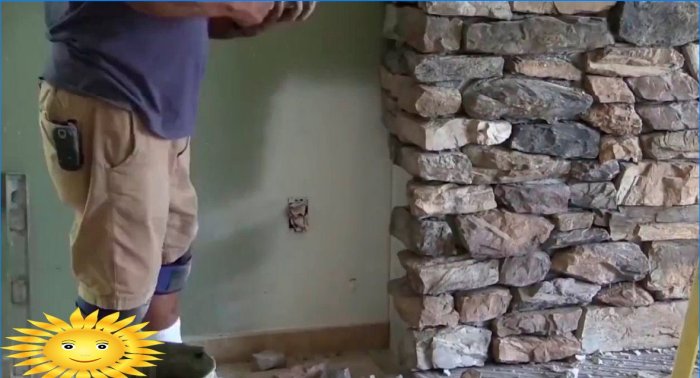
Cladding procedure
The cladding always starts from the bottom of the front of the fireplace, on which the firebox is located. A shelf made of solid wood or artificial stone should already be fixed, and the upper row of stones will be displayed and adjusted under it. On the front, when sorting, you should select the most beautiful stones that fit tightly together and are in harmony in shape and size.
Since the lifetime of the glue is quite long, it is recommended to first thoroughly wipe the entire surface, blocking the solution under the mesh, and then add the mixture in small portions during the laying process. The stones are planted on a continuous seam without voids, each element of the masonry has to be torn off several times to make sure that the glue has filled all the cavities.
When the front of the fireplace is tiled, protruding elements may remain at the edges and in the mouth of the fireplace. They will be removed after the mixture has dried, the easiest way to do this is to finalize with a backing pad. In the meantime, you should focus on facing the remaining planes. After the front, the sides of the fireplace are laid out, the lower zone is revetted last..
While the glue is still wet, the seams should be expanded. In its simplest form, the glue is simply wiped off with a finger, forming a semicircular hollow. It is also possible to scrape off the remaining glue with a scraper almost completely, they do not carry any payload. Instead of the standard jointing, in this case, the final trimming and grinding of the protruding elements is expected after they have dried. At the end, a tinted adhesive mixture is blown into the cracks between the stones using a pastry syringe or a garbage bag with a cut corner, which forms a convex seam with bizarre influxes.
How to lay out an arched vault
The greatest difficulty for amateurs is the facing of the semicircular arch of the firebox. To implement such an idea, it is required at the first stage of masonry, before facing the front, to lay out two wide columns in the lower corners of the opening. They should protrude above the common plane of the front part exactly as much as it is planned to make the protrusion of the arch.
Further, all the difficulties come down to the correct selection of stones. They should be wedge-shaped. It is also possible to compensate for circular masonry with variable thickness of seams, but it does not look as aesthetically pleasing as in a brick arch. To support the arch, as usual, a formwork is constructed from a bent sheet of kragis.
Keep in mind that the highlight of any arch is the large trapezoidal cornerstone set in the center of the top. It should be selected in advance from all the source material, it should be the most beautiful cladding element. If you fit the stones carefully enough and put the arch to dry several times, then it will hold, even if the glue mixture cracks: the central stone will keep the tightly folded arch from collapsing.

What steps should I follow to build a stone fireplace by hand? Could you provide any tips or advice for someone attempting this project for the first time?