Recommendation points
- Choosing the type and location for the stairs
- Calculation of a flight of stairs
- Interfloor opening device
- Step marking, preparation of beams
- Assembling marches
- We install an intermediate interfloor platform
- We mount marches
- Fencing
- Toning and varnishing
Due to their compactness and relatively low cost, multi-level houses have gained tremendous popularity in modern suburban construction. Naturally, to move people between floors, a reliable and functional staircase is required. Moreover, it can be not only a constructive necessity, but also be a real decoration of the interior, as well as the entire architecture of the cottage, if its external design is chosen.
As construction technologies improve in general, staircases are increasingly striking in their design novelty and diversity, which depends on the layout and architecture of the building, the skill of the builders, the materials from which they are made. The most widespread are structures made of wood, as a material with unsurpassed technological and operational characteristics, which Nature itself gives us.
Optimal constructive solutions in the manufacture of stairs, ensuring safety, durability and ease of use, have long been known, they have been developed by masters of the whole world for centuries.
Choosing the type and location for the stairs
Undoubtedly, the best place is an entrance hall or a spacious hall, where a large interfloor opening located in the middle will allow you to equip a large comfortable staircase with wide flights and platforms. More often, one has to deal with the limit of the free area of the lower floor, the presence of a relatively narrow interfloor opening and difficulties in an unobstructed approach to the stairs.
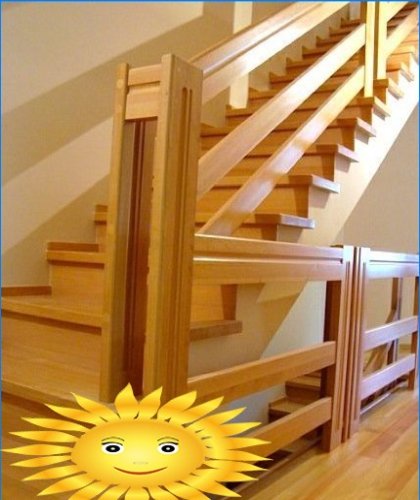
Reality forces one to resort to the installation of a compact “wall-mounted” structure with narrow flights, located in the corner of the room. As a rule, the safest and easiest to build – straight (in the direction of the centerline) stairs are very difficult to use, since they take up too much usable area, being long enough with a slight slope. The exit is the construction of a right or left turning staircase, which significantly saves usable space and is suitable for almost any layout.
Swivel staircase saves valuable space
In the design of a rotary staircase, intermediate platforms or run-in steps can be used, which have an inner side narrower than the outer one. The width of such steps in a narrow place should not be less than 100 mm, and in the middle – 200 mm.
The most compact is the spiral staircase, consisting only of winding steps. It is the least convenient and rarely used in places with low traffic. However, sometimes this is the only possible option..
The construction of an external staircase to enter the upper levels can also be considered a solution to the problem of limited space, however, it is also not devoid of some disadvantages..
One way or another, but the type of stairs is selected individually in each case, observing the traditional requirements for safety and functionality..
Calculation of a flight of stairs
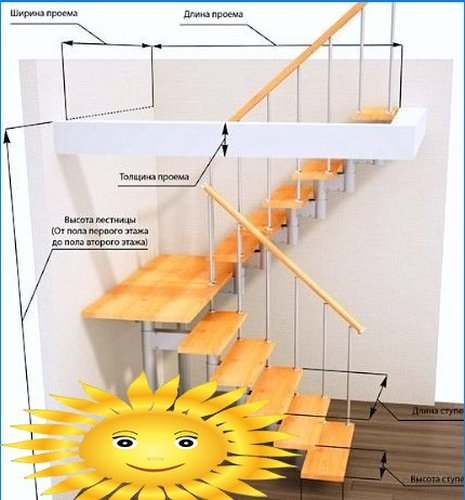
The staircase is, in fact, the main element of the staircase, depending on its parameters and it is determined how convenient it will be to use the staircase. The main factors affecting the functionality of the structure include the type of stairs, the height of the rise, the steepness, the occupied area, as well as the width, height and number of steps..
When designing a staircase, you should first of all pay attention to the problematic “clamped” parameters, they will be decisive for other indicators and the choice of the structure as a whole. All these parameters are interconnected, and you cannot choose them arbitrarily.
For comfortable stair climbing, it is necessary to maintain an adequate ratio between the height by which a person goes up or down and the distance of his forward movement. The slope (steepness) of the stairs, in fact, is determined by this ratio. The optimal slope is considered to be 30 degrees, this is the ratio of the height and the horizontal projection of the stairs 1: 2 or 1: 1.75.
To calculate the height of the riser (b) and the width of the tread (a), use the formula
2b + a = 570 – 640 mm (average step of a person)
In numbers, the optimal dimensions can be described as 150 – 180 mm for the riser height and about 270 – 320 mm for the tread width.
It is very important that the vertical distance from any step or landing to the ceiling and other protruding elements is at least 2 meters, in the most extreme case 1.8 meters. If the opening between the floors is too small, and there is no way to make the staircase sloping enough, then the only option would be to increase its steepness to 45 degrees, which will increase the distance from the ceiling to the steps.
In accordance with building codes, the width of the staircase must be made at least 900 mm, if the staircase is in the center of the room and there are no enclosing walls – a width of 800 mm is allowed.
Interfloor opening device
The construction of the staircase begins with the organization of the opening. Its location and size largely determine the main parameters of flights of stairs, and it, in turn, depends on the layout of the floors and the purpose of the stairs. The length of the interfloor opening should allow a person moving along the stairs to freely pass without touching the head of the ceiling.
As for the width, it depends on the estimated width of the march. Typically, one or more ceiling beams have to be cut. Between them, transverse bars of the same section as the floor beams are installed. The bars are attached to the supporting beams by means of galvanized corner brackets and inserted into the main wall by at least 100 mm, after which they are sealed with mortar.
It is important that the overlap after cutting / forming the opening does not lose its bearing capacity. Sometimes, with impressive floor spans and a large number of cut beams, it may be necessary to install a retaining column.
Step marking, preparation of beams
According to the type of design, the stairs are with bowstrings, stringers and a central post for the screw version. A bowstring is a supporting beam, to which the steps are adjacent to the side, and the kosour is the one on which the step is placed on top.
The material for the beams is a dry flat board with a thickness of 50 mm or more. The width of the bowstring or beam with stringers depends on the length of the flight of stairs and its slope, in any case it is better not to use a board less than 200 mm, especially when cutting out stringers. During operation, the staircase should not have deflections that can lead to serious deformations of the entire structure, so you cannot save here, but it is better to have a certain section margin.
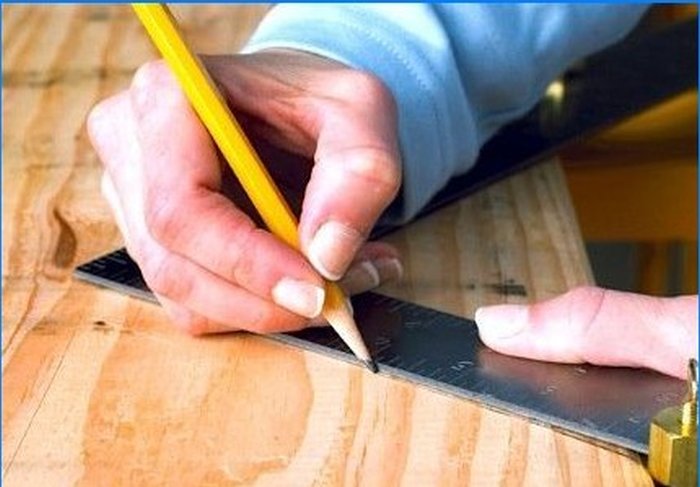
Correct marking of steps on load-bearing beams is a prerequisite for obtaining a solid and beautiful staircase. Having cut off the bowstring or kosour along the length, using a template, mark all the steps. The template is a right-angled triangle, where the legs indicate the height of the riser and the width of the tread, and the hypotenuse is the slope of the supporting beam.
If the staircase is made on kosoura, then triangular samples are cut out on the beam for fastening steps and risers, or triangles – “filly” are mounted on top of it for the same purposes. Using filly, you do not need to cut anything on the beam, so it does not loosen.
Having made one beam with stringers, it should be tried on at the installation site, after which, with its help, mark the rest as a template. There may be more than two of them, depending on the width of the marches.
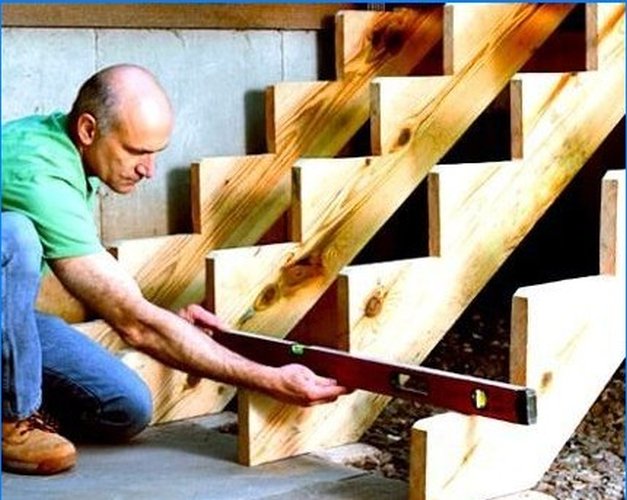
Assembling marches
It is advisable to assemble not very wide marches with two beams on a horizontal surface, and after that, in finished form, mount it in place. Steps for wide heavy marches are assembled after installing bowstrings and stringers to the ceiling.
For the steps of an inexpensive staircase, you can use a dry (moisture not more than 12%) board made of pine, larch or spruce with a thickness of 30 mm. Glued board has very good strength indicators. It can be of almost any width, while finding a board from an array of the required size is sometimes difficult. Risers are made of the same wood, from 20 mm thick. All lumber for steps must be planed and sanded on the rough (front side) before installation.
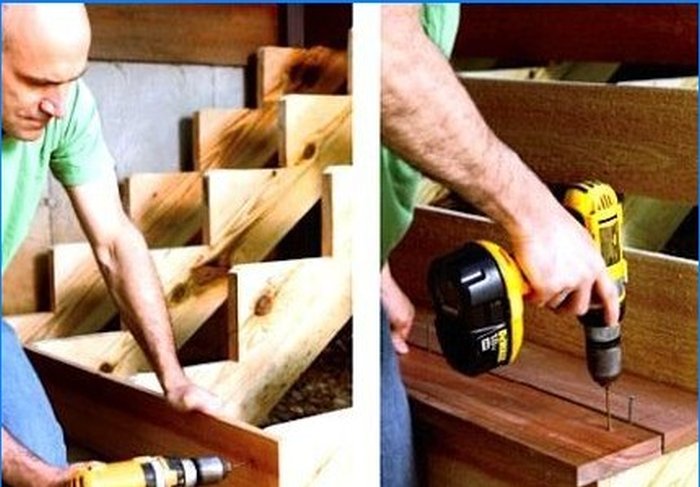
First of all, risers are attached to the braids, starting from the bottom step. This procedure is carried out with self-tapping screws with sweat “through the body”, after which the heads are sealed with wooden corks or wood putty. If the front side is needed with the perfect texture, then you will have to use various corners, brackets, ties from the inside of the structure. The choice of the type of connection depends on the requirements for the appearance and strength of the structure.
Sometimes the stairs are made “open”, without risers. They are somewhat more convenient with narrow steps (the leg does not rest). However, the design loses an important element that ensures the rigidity and reliability of the tread attachment, which is the riser.
Further, in the same way, through the body or with brackets from the inside, treads are attached. When assembling a ladder on bowstrings, they often resort to various groove and spike connections between steps and load-bearing beams..
All wooden parts of the stairs should be carefully adjusted, in the places where they rally together, use carpentry glue, liquid nails. Treads and risers must be placed strictly horizontally and vertically, respectively, with the exception of external stairs, where the steps are made with a slight slope of the leading edge to remove atmospheric moisture.
We install an intermediate interfloor platform
Before installing kosour or ready-made marches, if the structure is supposed to divide the stairs with intermediate platforms, they must be mounted in advance. Such a site, as a rule, is made of sawn timber of the same cross-section as the floor. It must be very securely fixed to the load-bearing wall by binding to the embedded elements. Usually, for the installation of an intermediate platform, support posts are used, one or more, if it is not possible to fix to the wall.
The frame of the landing is sewn up either with a board made of the same board that is used for the manufacture of treads, or with several layers of sheet materials (OSB, plywood, furniture board …), if it will be covered with tiles, parquet or other coverings.
The width of the platform should be no less than the width of the marches. She does not have to divide the staircase into equal parts. The place of installation of the landing is determined based on the convenience of placing the flights. Sometimes only a few steps can lead to it, and then a long straight flight of stairs begins..
We mount marches
The finished staircases are attached to the subfloor or intermediate platform with their lower part. Sometimes a transverse support beam is used for fastening to the floor or a solid foundation is arranged with various embedded elements. The upper part of the flights is attached to the floor by means of anchors or bolted connections.
If the ladder is against the wall, then the nearest stringer or bowstring should be attached to it with anchors. If there is a support post (rack), the outer stringer must be fixed on it through brackets or corners.
When mounting the load-bearing beams of the stairs to the floor before installing the steps, the thickness of the tread and the final floor covering should be taken into account. This is necessary so that the top of them is the same height as the rest..
Fencing
Almost any interfloor staircase will require railings. At the bottom and at the top of each march, as well as at the turns of the fence, balusters are mounted, between which, one or two per step, intermediate railing posts are attached. Balusters are installed either using a groove connection, or by means of metal studs from above or to the end of the steps with special fasteners. The extreme fence posts of the interfloor opening with anchors are fixed to the main wall.
Installed balusters are cut off at an angle corresponding to the slope of the stairs, and covered with a handrail that is attached from below.
The cross section of the posts can be square, rectangular and round. Balusters are often made by turning wood, rectangular pillars are decorated with carvings.
The height of the stair rail is regulated by building codes – it is from 900 to 1100 mm. The main thing is that the railings are strong and reliable..
Toning and varnishing
When the rails are in place, the ladder is almost complete. It remains only to wait until the end of the dirty work in the house, putty cracks, scratches and other irregularities, and then, after the putty has completely dried, carefully sand the outer surfaces and thoroughly clean them of dust.
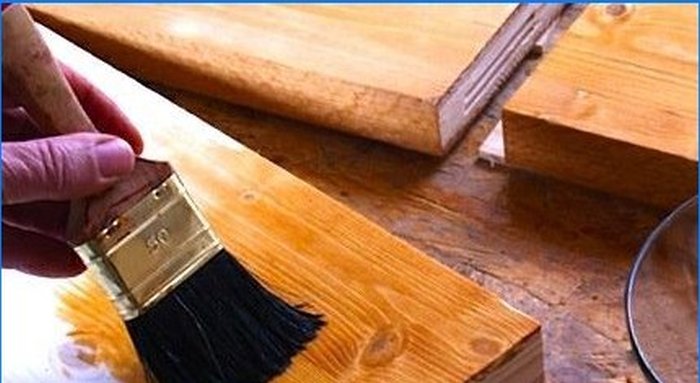
Now the entire structure can be treated with wood stain, which will accentuate the texture of the wood, sometimes imitating valuable species. The color of the impregnation for the stairs is often chosen to match the color of the windows or doors of the room..
It is better to varnish the stairs with alkyd-urethane parquet varnishes, matte or semi-matt by spraying. Each layer of varnish, except for the last one, after final drying, is carefully sanded with abrasive materials with very fine grain – from No. 220.
To ensure the uniformity of the coating for some compositions, manufacturers recommend using a primer for wood. Before starting work, do a test painting in a hidden place to make sure that the compositions are compatible and the actual color of the coating matches the desired.
In order to avoid unwanted surprises, it is advisable to purchase the entire range of paints and varnishes for the stairs from one manufacturer.
“Can someone provide detailed instructions on building a ladder for a summer residence? I’m eager to take up this DIY project but need guidance on materials, measurements, and step-by-step construction process. Any tips or suggestions would be greatly appreciated!”