Recommendation points
- Design selection
- Determining the size of the booth
- Selection and preparation of materials
- Base and frame
- Walls
- Roof
- Booth installation
The main stages of building a booth for your pet are choosing the optimal size, selecting materials and assembling. All the work can be completed in one day, which will be helped by our detailed instructions indicating all the important points. Measuring a dog can be difficult, especially if it is overly active..
Design selection
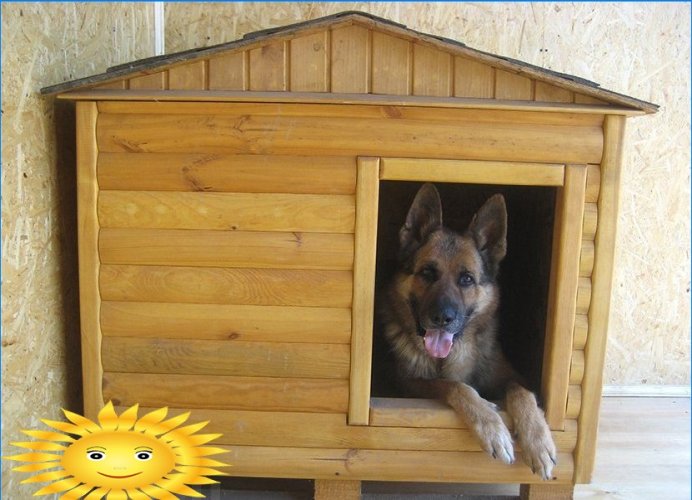
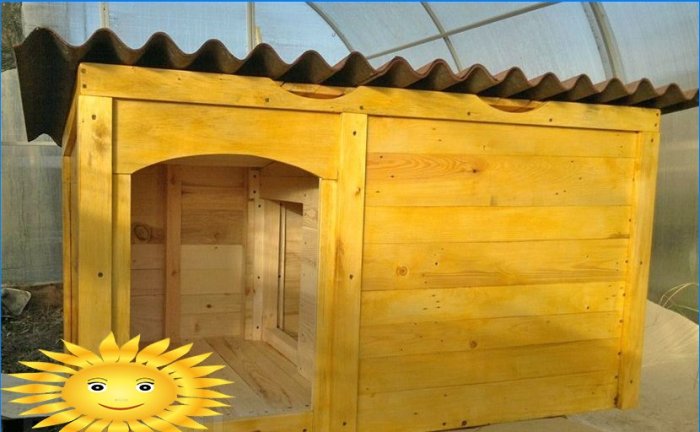
The construction of the booth can be one-volume or with a vestibule. The second option is preferable – the vestibule prevents cold wind and draft from blowing into the sleeping area. Zones are separated by a partition with an aisle or curtain.
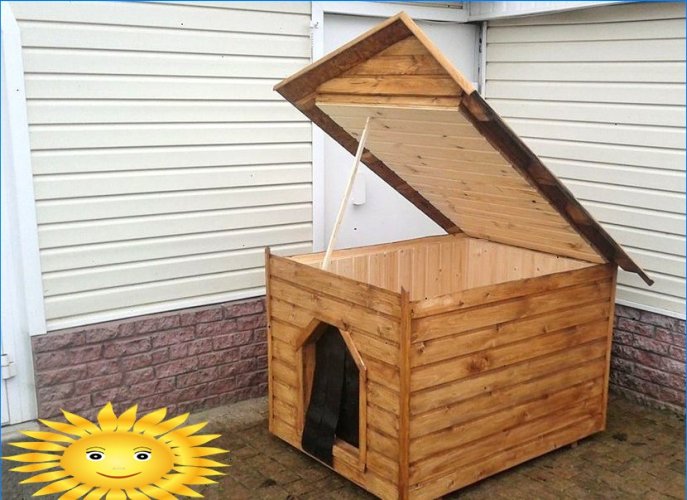
The ceiling needs to be removable. This will allow you to open the kennel if necessary for cleaning or to provide the animal with veterinary care. The roof can be pitched or gable. From a practical point of view, there is no difference. A pitched roof is easier to make, and the advantage of a gable roof is in additional storage space for dog toys.
Determining the size of the booth
The dimensions of the booth must correspond to the size of the dog and the climatic conditions. The dog should easily turn inside, lie freely and roll from side to side. But at the same time, the booth should not be very spacious if it will be used in the winter. In severe frosts, a large space is more difficult to warm up, the animal will freeze.
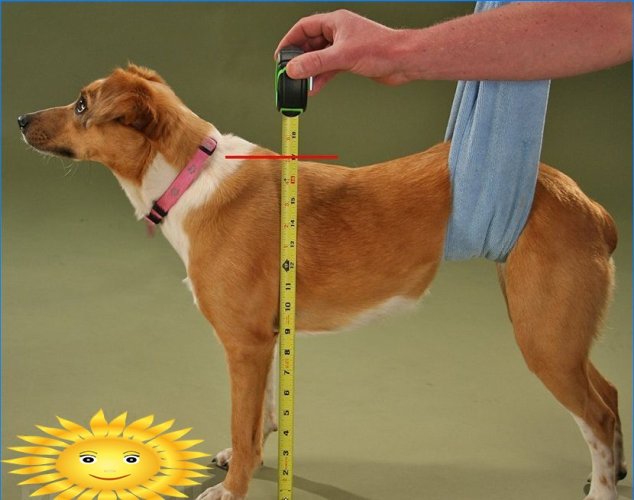
The calculation of the size of the kennel is carried out according to the following measurements:
- Width (berth) – the length of the dog from nose to tail. If the kennel is divided into a vestibule and a berth, then the size increases in accordance with the complexion of the animal by 400-600 mm.
- The height of the booth is the height of the dog in a sitting position plus the thickness of the bedding plus a margin of about 10 cm.The dog should sit without touching the ceiling, but walk inside with its head tilted.
- The depth of the booth is the length of the dog lying on its side with its paws extended forward from the tips of the paws to the withers plus a margin of 10 cm.
- Manhole height – height at the withers minus 5-8 cm.
- Manhole width – chest width plus 5–8 cm.
If you still have a puppy, you should be guided by the breed in building the booth. According to the size of the dogs, they are divided into three groups, respectively, and the recommendations for the dimensions of the booth for them differ:
- Small breeds (poodle, dachshund, pug, cocker spaniel, etc.). The height of the booth is taken 600 mm, width and length – 700 and 550 mm.
- Medium breeds (Doberman, Bobtail, Bull Terrier, etc.). Their height at the withers reaches 40–57 cm, so the height of the kennel is made up to 800 mm. Dimensions – 1200×750 mm.
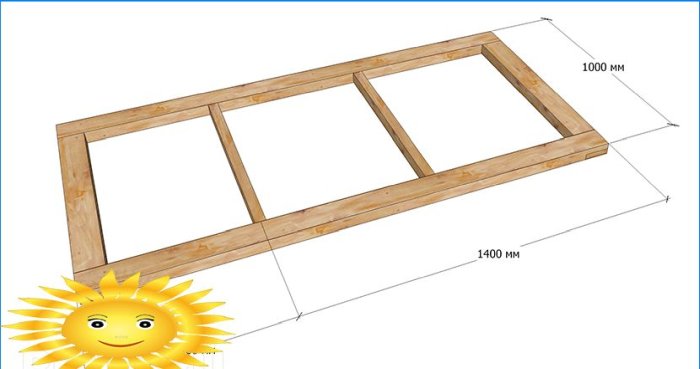
- Large breeds (Sheepdogs, Mastiffs, Dalmatians, etc.). Their height at the withers is more than 75 cm, so the booth should be spacious enough. Height 950 mm, width and length – 1400 and 1000 mm.
Selection and preparation of materials
The ideal solution for construction – softwood.
- For the frame you will need pine blocks 100×50 and 50×40 mm.
- Internal cladding is made of wooden lining or moisture-resistant plywood.
- The junction of the wall and floor cladding is closed with a board or plinth around the perimeter.
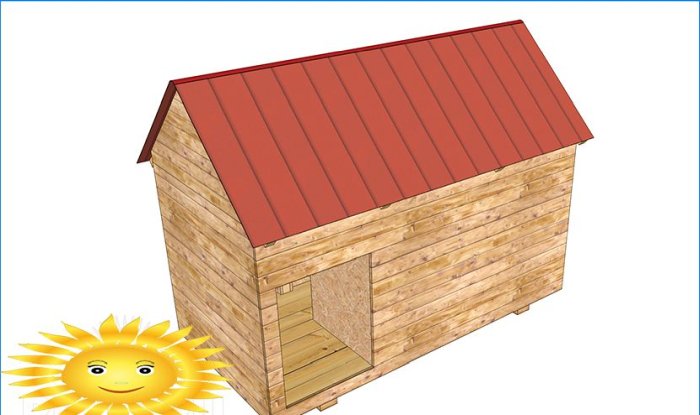
- The outer sheathing must be able to withstand precipitation and prevent blowing. Lining, block house, plastic euro lining, fiberboard covered with waterproof paint will do.
- The floor is solid, without holes and crevices. A grooved floorboard will work.
- For the ceiling, you will need 40×40 mm bars and a sheet of plywood. If the ceiling is insulated, then two sheets of plywood are taken, between which mineral wool or polystyrene and glassine are laid.
- The roof frame is made of 40×40 mm bars. It is sheathed with glassine, and a lining is attached on top. For protection from bad weather, the roof is covered with roofing felt, bituminous tiles or other moisture-proof material.
- Insulation: mineral wool, foam or sawdust mixed with clay.
The work will require:
- antiseptic impregnation;
- galvanized nails;
- saw;
- a hammer;
- screwdriver;
- self-tapping screws;
- stapler and staples;
- pencil and tape measure;
- level and building corner.
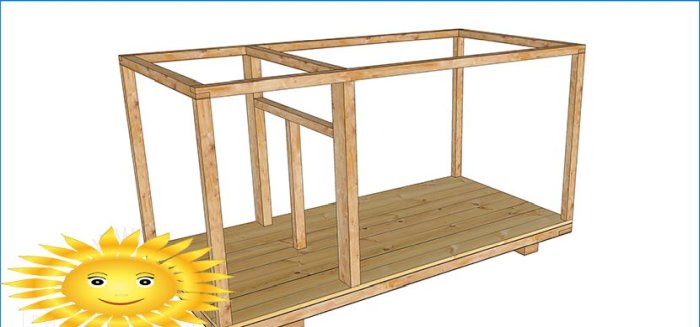
Base and frame
Cut two 100×50 beams along the length of the booth, two more beams are laid between them along the edges into the depth of the booth. A dovetail connection would be ideal, but a half-tree docking is sufficient, when a cut is made on top of the side beams and a lower groove on the longitudinal ones. Fix the connection with galvanized nails or hardened self-tapping screws.
In the place where the partition will be installed, a 50×40 bar is attached, inserted into the grooves on the base. Additionally, the jumper should be installed in the middle of the sleeping chamber..
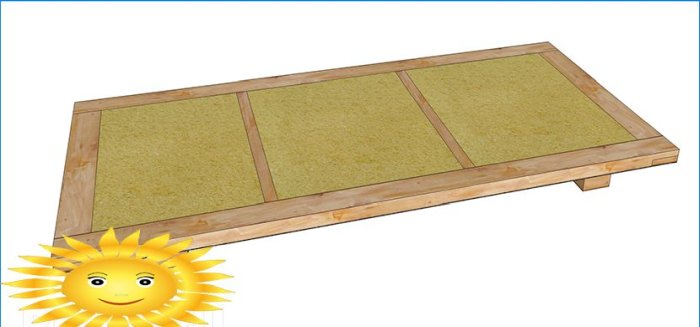
From below, the frame is hemmed with roofing material and glassine. Fasten the hem with two longitudinal beams in the overlay to the transverse beams of the base. They will provide ventilation of the bottom of the booth and the gap between the booth and the ground..
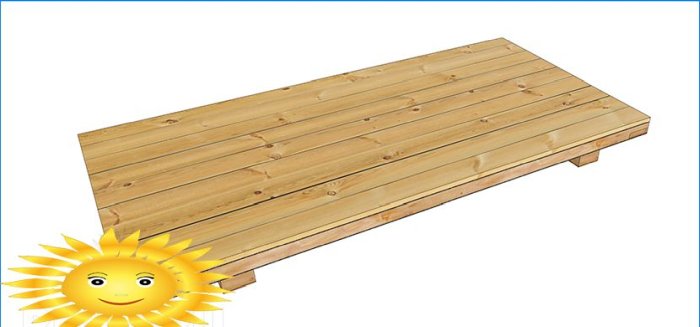
Lay the insulation tightly and cover the top with another layer of glassine. Next, lay the floorboard with the lock, securing it to the base with self-tapping screws.
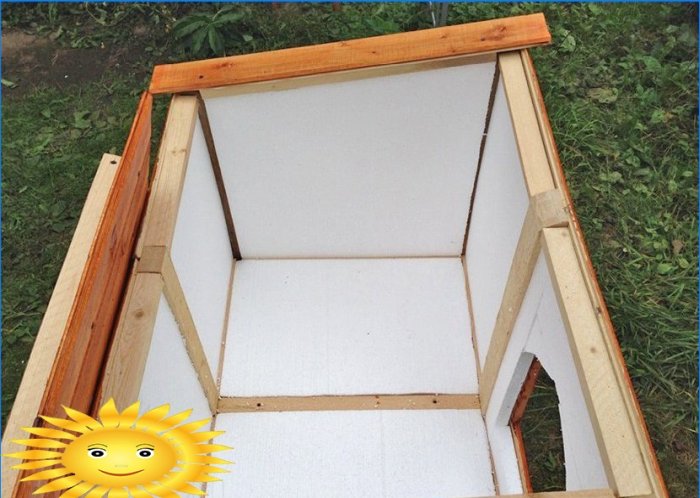
In the corners and on both sides of the manhole, vertical racks of 50 mm timber are installed along the booth height minus 50 mm. It is better to install a 100×50 beam under the partition with its wide side along the lintel so that it goes inside the booth. Fasten the timber along the upper border of the manhole between the posts.
Prepare a 50×40 timber frame for the upper part of the walls along with a lintel for the partition. Half-tree connection. Install and secure it to vertical posts.
Fix the vertical post in the partition, retreating from the edge to the width of the main manhole, forming a passage.
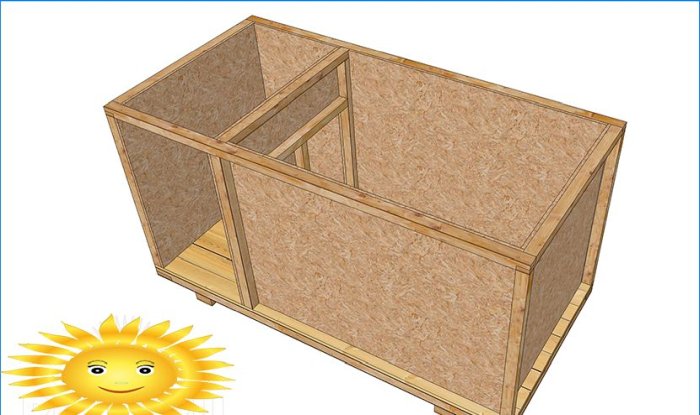
Walls
The frame is sheathed with sheets of plywood or dense moisture-resistant OSB, forming the inner surface of the booth from the inside. Cut an opening for the hole. Sheathe the partition, leaving a passage from the side of the main booth chamber.
Lay the glassine from the outside into the resulting niches and secure it with a stapler. Place the insulation tightly and cover it with another layer of glassine. From the outside, close the booth with clapboard, moisture-resistant plywood or OSB.
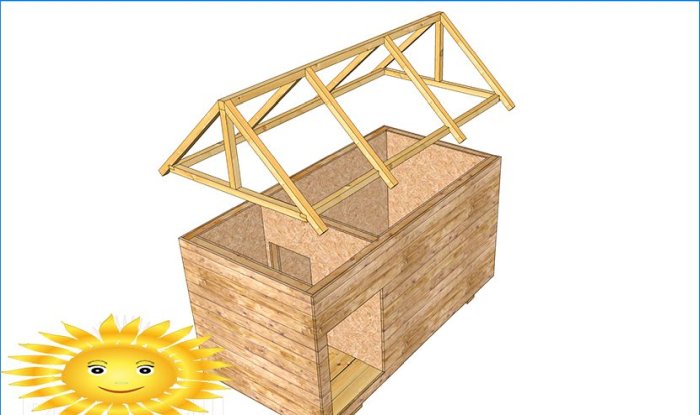
Roof
For the roof, a frame made of 40×40 mm timber and gables are prepared separately. For a pitched roof, the gables are a right-angled triangle. Racks on one side to the height of the roof made of timber and joists across the entire width of the frame.
For two slopes, a central post is installed on the long side of the frame and logs on the sides.
Cover the resulting planes with sheets of plywood, or better with lamellas, with a gap of 3-4 cm. Lay roofing material over it with at least 5 cm going over the edges and any available roofing material.
Sew the roof underneath with glassine and insulate. The insulation layer is closed with glassine and hemmed with plywood or clapboard. Pre-drill the vents in the plywood staggered or in rows with a distance of about 10-15 cm.
The roof is mounted on awnings to the main frame of the booth.
Booth installation
For the booth, find a level place on the rise so that the view from it falls on most of the yard or household. If there is no natural rise, then form an embankment of large crushed stone, and after a fine fraction. Smooth pebbles are preferred. Most of the time, the booth should be in the shade, but you should not additionally shade the space around it.


Could anyone share step-by-step instructions on how to construct a dog booth from scratch? I’d appreciate tips on the materials needed and the construction process. Thanks in advance!