Recommendation points
- Goals and problems of engineering hydrogeology
- Field work: removing soil samples
- Determination of GWL and soil properties
- Report generation
If you want to build a reliable and durable house with your own hands, you need to start with a construction project, for the preparation of which you need initial data, such as the composition and bearing capacity of the soil on the site. will tell you how to get this data yourself.
Goals and problems of engineering hydrogeology
To begin with, let’s figure out what problems construction hydrogeology solves. Any building is based on a foundation that provides form stability and distributes the load from the load-bearing walls along the ground. In order for the foundation to work correctly, it is required to accurately determine its weight, support area and other design features.
Of course, you can play it safe and provide a margin of reliability, but this will inevitably lead to an increase in the cost of the project, which is unacceptable. It is much more correct to carry out studies of the soil and the hydrogeological situation as a whole in order to be sure that the calculated parameters correspond to real conditions.
Hydrogeological research includes three stages:
- Taking soil samples.
- Laboratory studies of its physical properties.
- Drawing up a technical opinion, which is transferred to the construction designer.
Research on the composition and properties of the soil is carried out by special organizations, however, turning to their services has two negative aspects:
- The cost of hydrogeological research is quite high and amounts to about 30,000 rubles per 10 acres.
- The minimum size of the surveyed area is usually 10 acres.
In this regard, it makes sense for a private developer to think about doing engineering hydrogeology with their own hands. Fortunately, this requires a minimum of special equipment, and the methods of laboratory studies of soil properties are described in detail in the technical literature and can be reproduced at home..
Field work: removing soil samples
In individual housing construction, not much data is required on the soil composition under the construction site. It is enough to know:
- Groundwater level (GWL) and the dynamics of its change during the year.
- Depth and thickness of different types of soil (geological section).
- Soil density and compressibility.
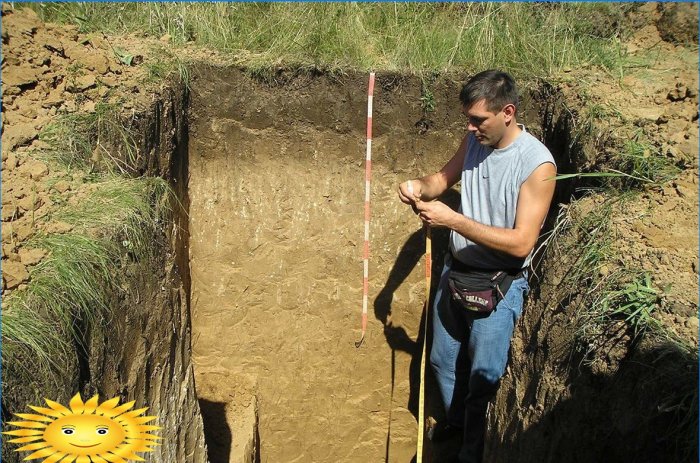
In order to obtain the necessary information, it is necessary to make several punctures in the soil between floods, taking out cores – samples of sedimentary rocks from different depths. At least four punctures are made at the extreme points of the construction site. If there is a strong slope or soil drainage is required, punctures are performed more often, in addition, some of them are located outside the construction site.
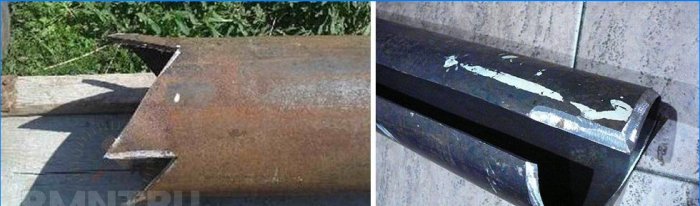
To make a puncture, you will need a piece of steel pipe with a diameter of 50-70 mm and a length of 1.5-2 meters. One edge needs to be sharpened in a specific way, which depends on the density and type of soil. The following options are possible here:
- Straight edge with sharpening is suitable for black soil, loam and other soils of medium density without stony inclusions.
- An oblique cut at an angle of 25-30 ° will easily pass through viscous clay soils saturated with water.
- The double inner cut is optimal for silty sands and sandy loams.
- Double outer cut allows for effortless piercing through rocky ground.
- Serrated sharpening is optimal in the presence of hard particles prone to crushing.
The upper edge of the pipe must have a straight cut, and an impact headstock will also need to be made. In the simplest case, a massive steel plate is suitable, to which a piece of pipe 5–7 cm long is welded, the diameter of which is equal to the nominal passage of the tubular needle. It is important that the weld seam is located inside the sleeve: this way the plate will press against the edge of the needle without a gap and will not jam from impacts.
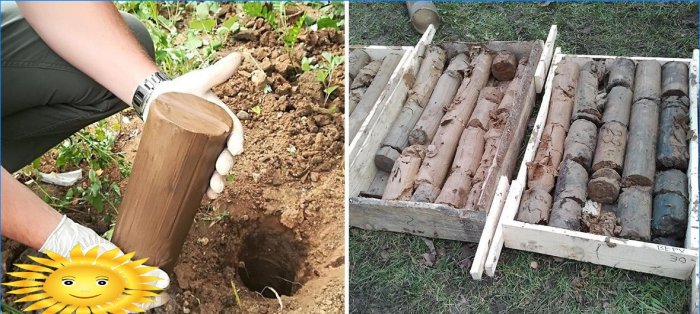
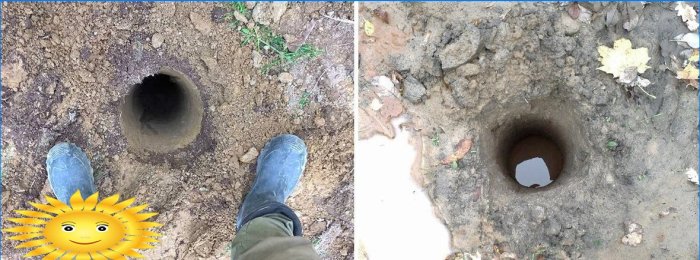
When puncturing the soil, the needle is immersed in the ground by 15–20 cm, and the core is periodically removed using a cleaning rod and packed in a sealed plastic bag. The seized samples must be laid out at the puncture site in the order of their occurrence, along the way recording the thickness of the soil layers. After making a puncture, the top layer of soil should be removed to the side, forming a small funnel, and then cover the well with plywood or metal sheet, protecting it from clogging.
Determination of GWL and soil properties
The wells remaining after punctures should be stored for a year in order to track the level of groundwater and the dynamics of its change. For these purposes, you need to make a wooden probe with a perpendicular crossbar.
GWL measurement should be carried out several times during the year. The optimal periods are considered to be the beginning and end of spring and autumn floods, as well as the middle of winter. It makes no sense to measure the groundwater level within a week after precipitation, since the level in the well will inevitably be higher due to the runoff of surface water into it.
To determine the physical properties of the soil, a small laboratory should be organized at home. First of all, it is necessary to take samples of each type of soil weighing 100–150 grams, dry it completely in the oven at a temperature of 70–80 ° C and grind it to a dusty fraction. With the help of a color chart for determining the type of sedimentary rocks, you can accurately determine the composition of layers in your area.
Determination of soil composition by color
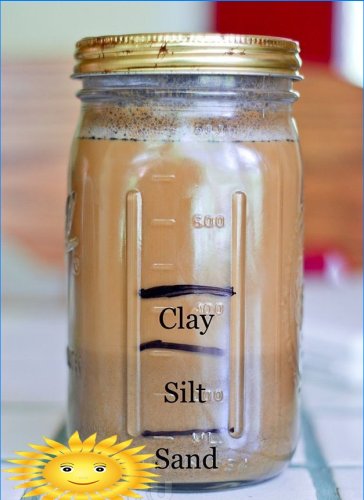
A more accurate method for determining the composition of the soil involves its division into fractions. The sample is poured into a glass container with lathered water, shaken thoroughly and left in a stationary position. The sand, as the heaviest fraction, will settle in 2–3 minutes, and silt will fall on top of it in 2 hours. Clay settling can be considered complete after the water becomes clear. By the thickness of each layer, it is easy to calculate the content of the three main components in the soil, for this it is convenient to use the classification from GOST 25100–95.
Determination of soil composition by the Ferré triangle
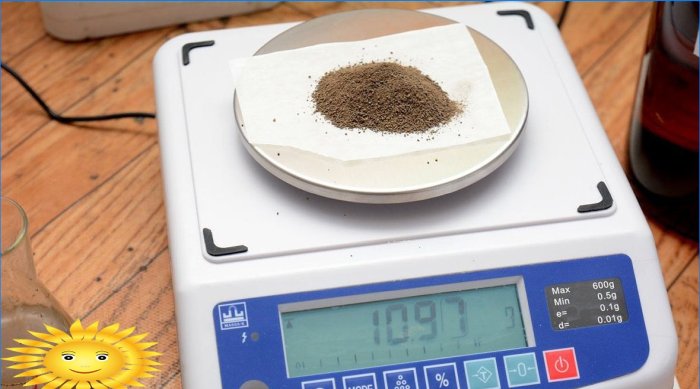
When the types of soil are known, you can begin to determine their bearing capacity. First, you need to determine the humidity according to the procedure described in GOST 5180–84. A fresh sample should be weighed on an electronic balance, calcined in an oven and weighed again, setting the moisture content by weight..
Load capacity tests should be carried out only after bringing the samples to the specified moisture level. In short, the whole process looks like this:
- A portion of the soil is placed in a mold and compacted to its natural state.
- A wooden cube with a side of 1 cm is placed on the surface of the sample.
- Weights are used to load the cube until a 1 mm deep impression is formed in the sample.
If the type of soil is known exactly, its compressive strength can be determined by calculation. For these purposes, you should use Appendix 3 from SNiP 2.02.01-83.
Report generation
The data obtained in the course of soil punctures – groundwater level, moisture content and supporting capacity – must be streamlined and transferred to the developer of the construction project in a convenient form. First, you should display the construction site on the site plan, mark on it the places where the punctures are made, their distance from each other and the anchor points. Each puncture is indicated by an individual alphanumeric index.
The second part of the report is a log in the form of a table, where a separate line is allocated for each puncture:
- The first column indicates the minimum and maximum groundwater levels.
- In the second, a geological section is recorded: the type of soil, as well as the upper and lower boundaries of each layer. For convenience, the column is divided into several cells.
- In the third column, opposite each cell of the previous one, indicate the natural moisture content and bearing capacity of the sample taken from a certain layer.
The data in this format will be sufficient for the designer to be able to choose the correct type and massiveness of the foundation without increasing the budget of the construction project..


What are some practical methodologies or tools that can be utilized to independently study the composition and properties of soil from a hydrogeological perspective? Additionally, are there any specific guidelines or resources available for individuals interested in conducting their own soil analysis in order to understand its characteristics without professional assistance?