Recommendation points
- Types of floor systems on beams and trusses
- Design and manufacture of a wooden truss
- Supporting trusses on the supporting structure
- Assembly of floors and laying of communications
- Which filler to use
- Is it possible to install a warm floor
The construction of buildings does not always allow for heavy reinforced concrete floors. It often makes sense to think about a prefabricated structure on timber beams, allowing for easy routing of ventilation ducts, piping and the electrical network. We will share the secrets of the device of such floors..
Types of floor systems on beams and trusses
The simplest timber flooring system is based on massive beams laid across the span at a specific pitch. The dimensions of the section of the beams and the step of their installation are determined by two key parameters:
- Design load in kg / m2 (usually from 300 to 700 kg / m2).
- Span length (up to 6 meters).
When calculating beams, it is necessary to take into account both the weight of the floor covering and the ceiling system on the lower floor, as well as the throughput, the weight of furniture and other interior details. The width and height of the beams can be varied within a fairly wide range: each of them acts as a stiffener, so vertical orientation is preferable.
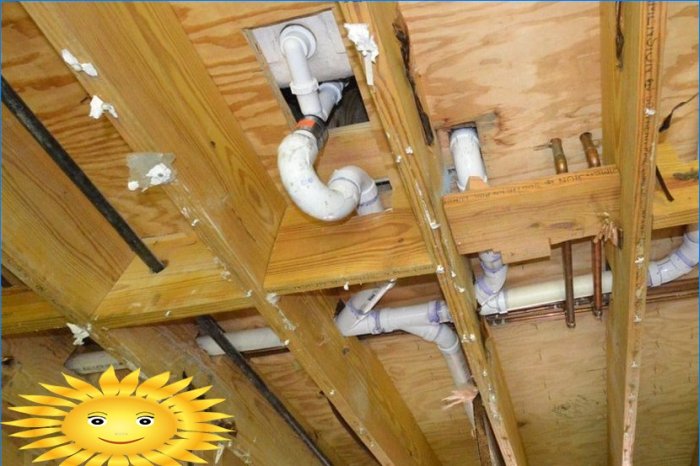
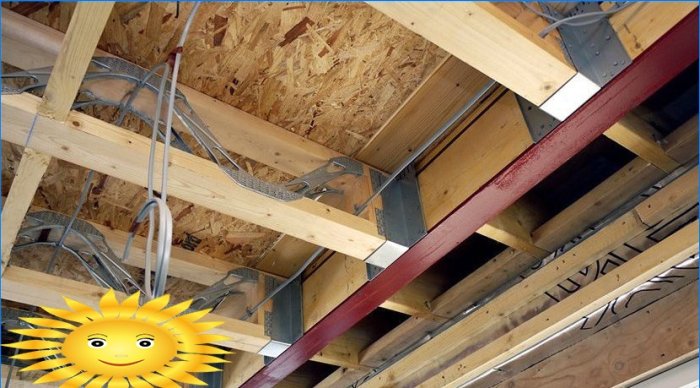
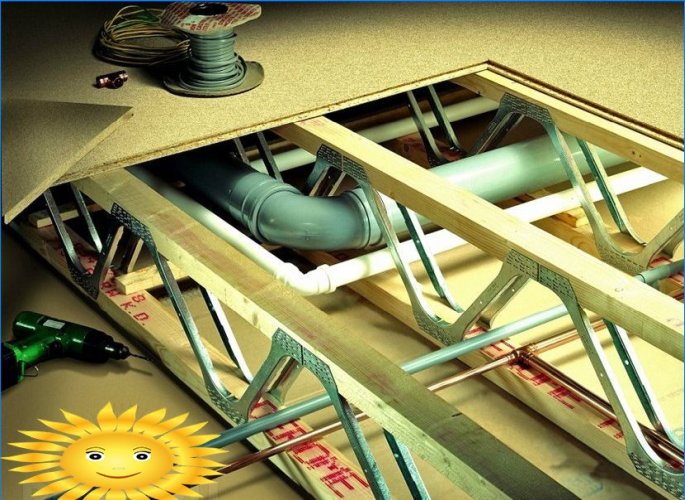
Overlapping on beams allows the laying of communications such as the power grid and the water supply and heating pipelines. To pass through the floor beams, they can be drilled, but the hole diameter should not exceed 1/4 of the beam section in height.
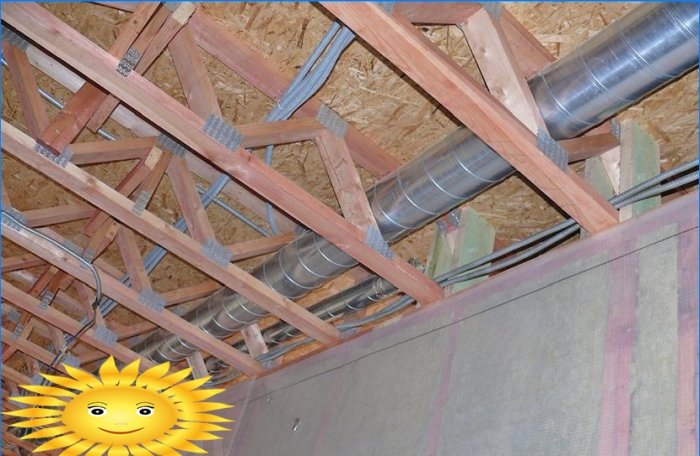
If there is a need to lay large-sized communications in the ceiling, such as ventilation and air heating channels, the beam system is not relevant. As with a span length of more than 6 meters, when the calculated cross-section of the beam becomes so high that its own mass is too pronounced not for the sake of accepting the load.
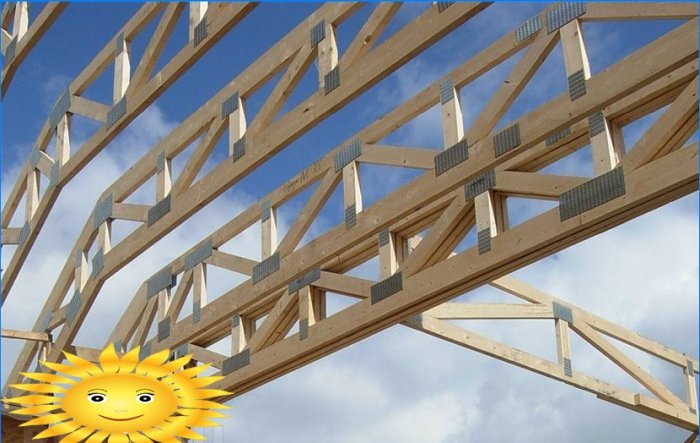
In such cases, wooden trusses are used instead of beams. Their main components are bearing belts and a system of ties, straight or inclined. In the cavities between the elements of the truss there is enough space for laying communications of any kind, moreover, they are lightweight: about 90% of the volume of the overlap is occupied by air or insulation, which contributes to good thermal and sound insulation between floors.
Design and manufacture of a wooden truss
In modern practice of construction of frame houses, the optimal height of the truss is up to 50 cm.With such structures, you can block spans up to 12 m, and with additional support – 20 m and more.
Calculation of the configuration of a wooden truss by load is a rather difficult engineering task. Fortunately, most of the research in this direction has long been completed: suppliers of such products take the calculations into their own hands, and those who want to reproduce the product with their own hands have access to both standard schemes and a description (size, material) of the elements that make up the truss.
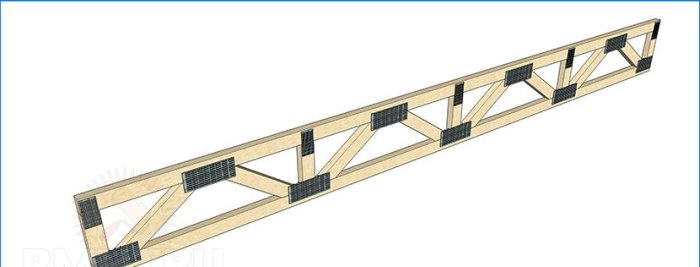
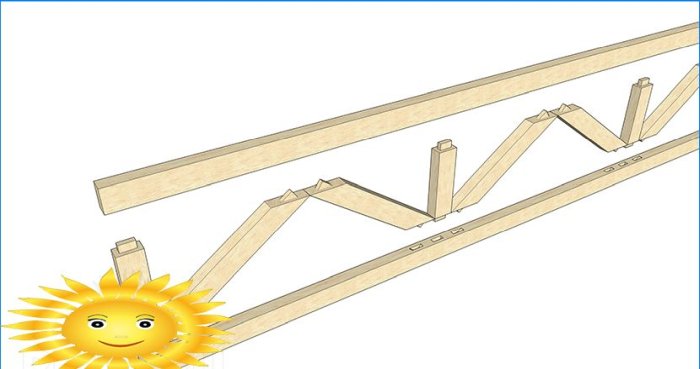
The first type of truss for overlapping is rectangular with two parallel belts. For them, one-piece glued laminated timber (board) of pine or larch is used, the cross-section of which is determined as a third of the calculation of a massive wooden beam. At the extreme points, the chords are connected by two straight vertical ties, then the formed frame is filled with inclined and straight crossbeams in accordance with the distribution of the load on the floor. Widths of lintels and belts are equivalent.
The second type of trusses is concave with a straight upper belt and a lower reinforcing strap. This configuration is designed to overcome the deflection of the beam under load, and is also used in floor systems with an intermediate support..
The connection of the ties with the chords is performed with a notch of a thorn at the edges of the lintel and a groove in the body of the chord, the mutual depth of which does not exceed a quarter of the section of the horizontal element. Each connecting unit is reinforced with MZP – a metal toothed plate.
Supporting trusses on the supporting structure
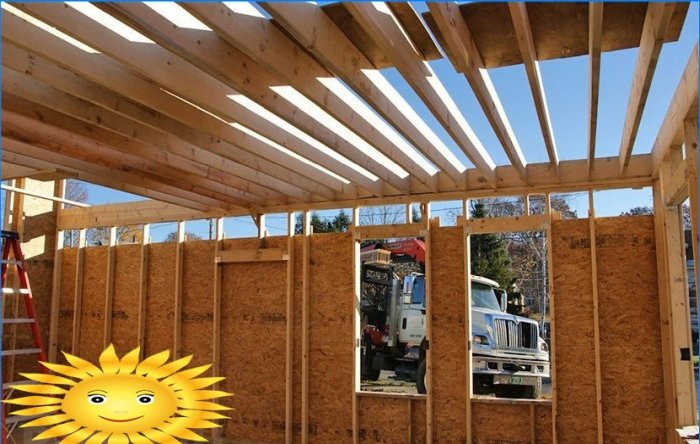
The load from the trusses and floor beams is taken over by the crown of the walls of the lower floor. Wooden floors can be successfully arranged both in masonry buildings and in frame structures, but the installation scheme will be different.
In frame houses, the upper edges of the load-bearing wall sections serve as a support for the floor, which forms a ready-made plane for the construction of the skeleton of the next floor. In more complex configurations, the building is surrounded by a second frame belt with a height from the foundation to the Mauerlat, while the trusses are supported on the inner sectional part, assembled individually for each tier.
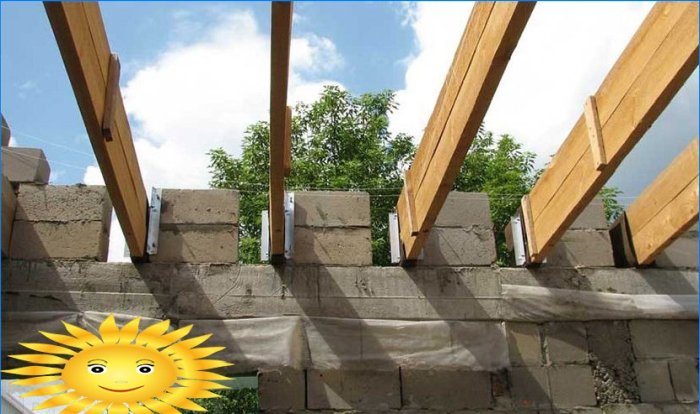
Masonry buildings should have a reinforced concrete belt to distribute the load from beams or trusses. The ceiling system is installed with an indent from the outside, where the protective and connecting masonry will subsequently be erected. At the same time, along the entire section, the walls in the truss plan are reinforced with additional transverse and vertical ties, which serve to support the walls above the ceiling, the space can also be filled with brickwork.
1 – wooden floor beam; 2 – armopoyas; 3 – anchor; 4 – brickwork; 5 – waterproofing (roofing material or mastic)
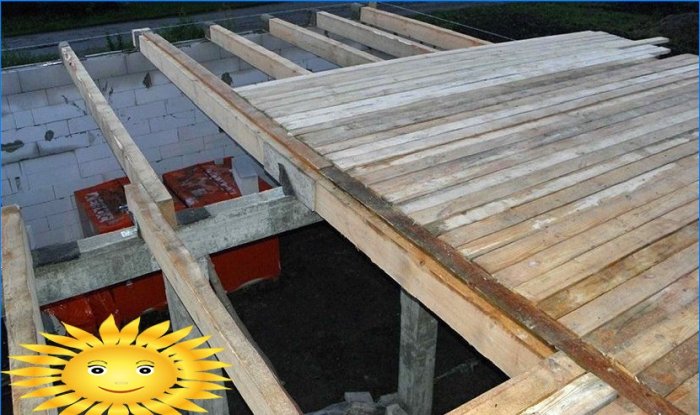
In special cases, an intermediate support is required for slabs. In this configuration, the building has a massive axial beam supported by a series of columns. They, in turn, are hidden behind the cladding of the pseudo-capital wall, this option is much more profitable in terms of material consumption.
Assembly of floors and laying of communications
In order to avoid linear discrepancies in the structure, the trusses, as they are installed, are fastened together by pieces of steel punched tape directed both transversely and diagonally. The bulk of additional ties are located from the bottom of the truss: this will allow laying the floor filler before filing the rough ceiling.
After the installation of all the trusses, their capital fixation is carried out to the armored belt or bearing sections. Then, in the central part of the span, the trusses are fastened with one or more distributed crossbars, if additional load distribution between the trusses is necessary, oblique horizontal and vertical ties are added.
The overlap acquires solidity after the subfloor boards are laid and the ceiling lathing is tamped. But these works are performed only after the laying of communications and filler. Actually, there are no special tricks in the installation of air ducts, pipes and electrical networks. The trusses form many ribs and shelves for the main and intermediate fastening, it is only important to leave a compensation sag and observe protective measures when laying electrical wiring.
Which filler to use
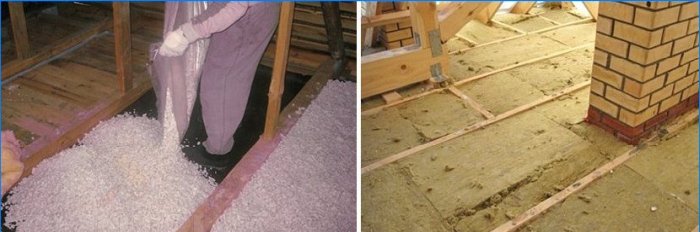
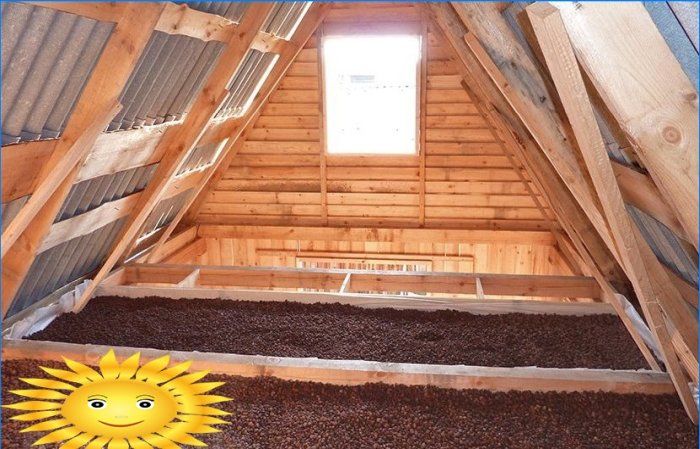
In a house for permanent residence, the floor is usually not filled with anything. And yet, the requirements for sound insulation and heat conservation can imply the use of both bulk and roll materials. The most common case is country houses, which, with periodic visits, it makes no sense to fully heat if the residents are located only on the first floor.
If the floor has a margin of deflection and its bottom is hemmed with a dense crate of a rough ceiling, it is recommended to fill in dried sand up to a third of the height of the trusses. Higher can be stacked as glass wool with a density of up to 60-80 kg / m3, and granular insulation made of non-combustible polystyrene foam, perlite or expanded clay fine fraction.
Is it possible to install a warm floor
It is often believed that the frame floor system does not allow water or electric floor heating. But there are technical solutions for such cases and they are applied everywhere..
The supply of communications to the heating, whether it be heating pipes or an electrical network, can be easily performed both in the ceiling on the beams and in the truss system. A completely different side of the issue is presented by the heat engineering part: the structure should direct the heat flow upward, preventing the heating of unused space.
1 – wooden beam; 2 – cranial bar; 3 – rough ceiling filing; 4 – waterproofing; 5 – sand; 6 – insulation (mineral wool); 7 – OSB; 8 – waterproofing; 9 – EPS; 10 – GVL; 11 – preparatory screed; 12 – floor heating pipes; 13 – reinforcing mesh; 14 – accumulating screed
For this, the floor requires a solid flooring, usually performed by OSB or edged board. After rolling out the roll waterproofing, 30 to 70 mm of extruded polystyrene foam is laid on the floor, then a preparatory and accumulating screed is poured.
To prevent the punching of the coating, a reinforcing steel stack with a cell of about 100–150 mm is installed over the heating system; it is also useful to separate the screed and insulation with a layer of GVL or LSU up to 10 mm thick. When installing a warm floor using a frame overlap system, the height loss will be about 50-70 mm, it is also necessary to take into account the additional load when calculating the trusses.


Can someone please provide guidance on how to install interfloor overlaps on wooden beams? Additionally, I would appreciate some advice on the device required to carry out this installation, as well as any recommendations on the proper laying of communications. Thank you in advance for your assistance!
To install interfloor overlaps on wooden beams, start by determining the required size and length of the overlaps. Cut the wooden beams accordingly and ensure they fit snugly between the floor joists. Next, secure the overlaps in place using screws or nails, ensuring a secure and flush installation. As for the device required, a drill or screwdriver would be suitable for fixing the overlaps.
When it comes to laying communications, it’s advisable to plan the routing in advance. Consider running cables alongside the beams or using cable trays to keep them organized and protected. Avoid placing communications directly on or under the overlaps to prevent damage or interference. Properly secure the communications in place using appropriate clips or ties.
Remember, it’s always recommended to consult a professional or reference building codes and regulations specific to your region to ensure a safe and compliant installation.