Recommendation points
- The choice of material for the head of the well
- Preparation for the construction of aboveground finishing of the well
- Stone well
- Stone cladding
- Wood cladding
- Bucket lifting mechanism
In this article, we will talk about how to design the appearance of a well. You will learn about the different ways to cover rings and how best to apply the decoration material. This article provides a step-by-step description of how to create a do-it-yourself overhead head structure.
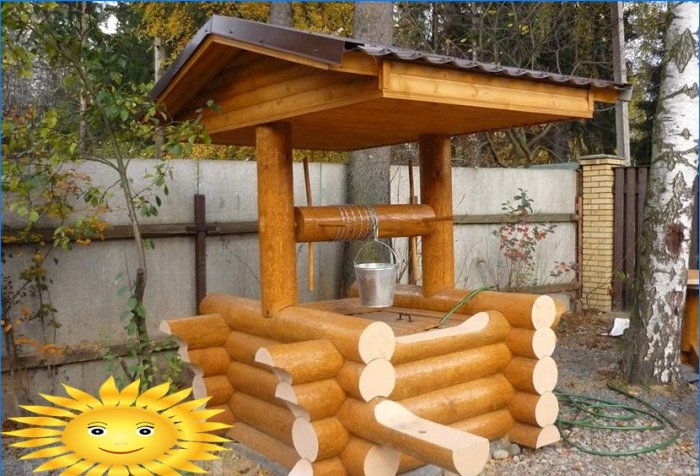
New construction is an excellent field for realizing your own ideas. This is especially interesting when it comes to functional and decorative forms – benches, barbecues or barbecues, lamp posts and, of course, wells. Of greatest interest in this sense is its overground part – the head.
The choice of material for the head of the well
The modern approach makes it possible to make the structure of the well invisible by placing all the nodes in the caisson underground, but such an advantageous element of the landscape should not be missed by anyone who loves to decorate the site..
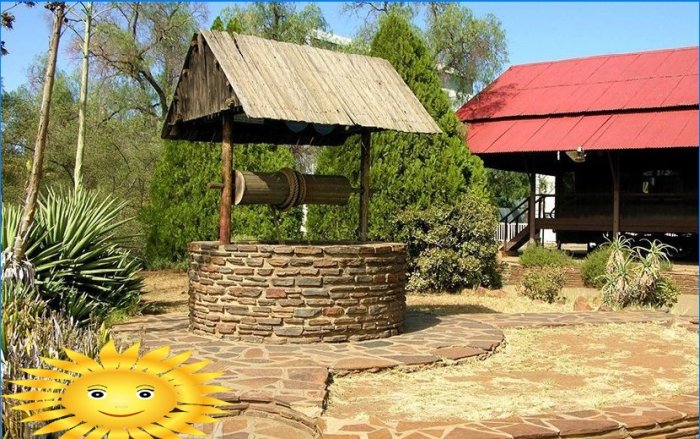
A rock.It looks solid and powerful. In turn, stone heads can be divided into two types:
- Stone. Laid from scratch around the well.
- Imitation. Top ring serves as the basis for decorative cladding.
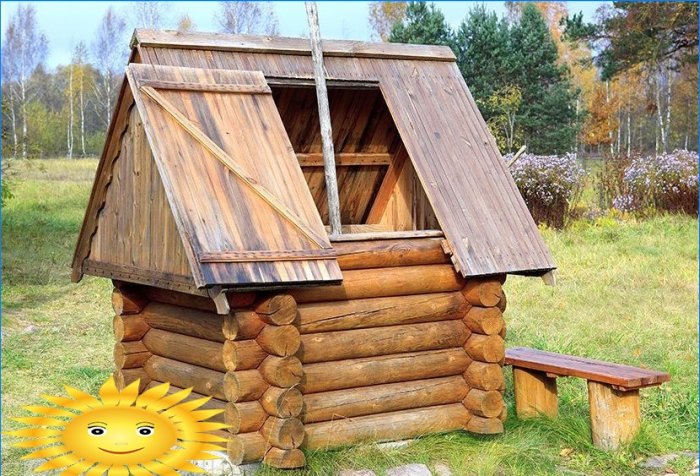
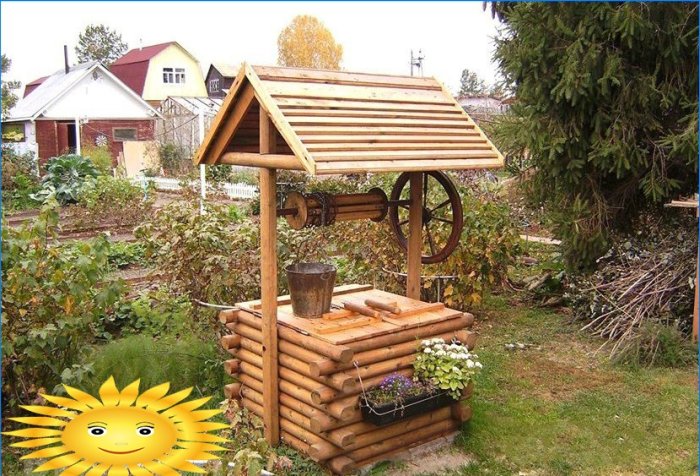
Wood.Looks great against the background of a chopped wooden house. Subdivided into:
- Log (lumber). Created in the same way as the walls of the house.
- Sheathed. A frame is fixed to the base, on which panels, blockhouse, siding or board are sewn.
Whatever the finishing material of the head, there are a number of requirements that apply to this type of water intake structures:
- Reliable walls. The finish should be strong, ideally, along the upper contour, run an armored belt or a screed of the base and finish in the form of a table top or a support platform. It will protect the finish from water and allow the bucket to be placed.
- Cap. Will prevent accidents with children and animals and keep the water clean from debris. A hole or hatch for the hose should be located in it..
- Warming. In areas with an average winter temperature below -18 ° C, you will have to do insulation, or select heat-insulating material. With mild winters (above -18 ° C), insulation is not required.
- Lifting mechanism (for a bucket of water). Usually this is a frame and a crank. They must be provided in the design from the very beginning..
Next, we will consider the nuances and features of all traditional types of construction and decoration of the aboveground part of the well..
Preparation for the construction of aboveground finishing of the well
If your well is “fresh”, then it is made of reinforced concrete well rings. To protect water from debris, and the master from water, you need to do the following.
From the inside, fasten the rings to the walls with bars, corners or anchors. Arrange a flooring on them that can support the weight of a person. This prevents water pollution and makes working more convenient..
If the construction of the main walls of the well is planned, the foundation will be required regardless of the material chosen. It is advisable to raise it by 30-50 mm from the ground to protect the structure from moisture.
Stone well
If the task is to lay out the base again, then the stone head is built like an ordinary house, only very small. Its difference from home is reinforced waterproofing.
Working process:
- Cut the ring with a grinder to the desired level.
- Then arrange a mini-concrete foundation around the perimeter.
- Lay the walls along the foundation in the usual way – laying in 1/2 cinder block or 1 brick with bandaging the seams. Masonry can be carried out immediately with finishing bricks.
Attention! Waterproofing between the foundation and walls must be of good quality. The humidity in the well is higher than in the atmosphere.
- On the top, arrange an armored belt with reinforcement (the same tabletop or support platform).
The base is ready. If finishing was done together with the base, then you can proceed to the next stage – the installation of the cover and the lifting mechanism. If the base is being built for finishing, then it is recommended to do this with the following materials:
- Foam / aerated concrete 200 mm.
- Hollow red brick.
- Cinder block.
These blocks will provide sufficient insulation so that condensation water does not form significant icing. “Liquid glass” applied to the plastered surface from the inside will finally help to get rid of this effect..
Stone cladding
The well ring is a factory product, on which, as you know, the solution is glued reluctantly and unreliable. Factory concrete is much denser than homemade concrete and has virtually no pores. Therefore, to reliably link the adhesive with the base (ring), you can resort to anchoring.
Working process:
- Cut the ring with a grinder to the desired height, observing the horizon (marking with a hydraulic level).
- Drill holes O 4–6 mm on the outer plane of the ring by 1 / 2–2 / 3 of the ring wall thickness. Location – in a chaotic or staggered pattern with a step (at a distance) of 100-120 mm.
Attention! Do not make holes deeper than 1/3 of the thickness – over time, the inner protective layer will wear out and the anchor may be exposed.
- Prepare a welded (masonry) mesh with a cell of 50 mm, a rod of 3 mm. The mesh sheet must completely cover the area to be cladding. In other words, the ring needs to be wrapped with this mesh and looped around it, and the outlets must be bent inward. The gap between the mesh and the ring – 10 mm.
- In the holes obtained, drive in scraps of wire Ø 4–6 mm, previously bent at 90 ° so that 5–10 mm remain between the free wire and the outer wall of the ring. Wire the mesh to the anchors.
Thus, a base has been created that allows you to create any type of heavy cladding – sandstone (savage) plates, boulders and semi-boulders, factory or homemade cast tiles, granite / marble and others..
Wood cladding
We will describe an original, fast and inexpensive way to create a base for lining a ring with any light finishing wood material – siding, clapboard, block house, shields, roofing material. In this case, the base will be reliably insulated – in winter there will be no problems with condensation.
Interesting fact.In the old days, wells were always laid out of logs precisely because of the heat-saving properties of wood..
The creation of the base is to enclose the ring in a wooden box, which makes it easy to attach the finishing material.
Working process:
- To make four shields with dimensions obviously slightly larger (by 50–70 mm) than required. Boards 25 mm, pre-antiseptic (ideally coated with a primer), sew together with a continuous flooring.
- Make a jig (stencil) according to the dimensions of the future base. Calculate deck orientation and corner placement.
- Mark the contact points of the base flanges with the ring. By level, strengthen vertical bars in these places – only 4 pieces.
- Install the shields on one self-tapping screw along the bars. Then align the shields to the horizon and tighten the corners with self-tapping screws.
- Finally unfasten the structure.
- Fill the sinuses with wood concrete – a mixture of solution with sawdust.
Such an insulated base will reliably protect the well from frost and will allow you to change the finish as often as required..
Bucket lifting mechanism
The easiest way is to install an ordinary crank – such as it happens in illustrations of Russian fairy tales. There are two fundamentally different options for its installation..
Racks based on.Vertical frame struts are mounted to the base of the well, rest on the foundation, or erected together with the base. They can be arbitrary in terms of material – wood, metal, brick. Each of the materials can be presented in excellent performance – forging, wood carving or decorative masonry.
The principal fastening device “rack-based” in the video
The racks are supported by an armored belt.The load from a bucket of water is small, so the racks with a crank can be easily supported on an armored belt (if the well is stone), or on a supporting tabletop (if it is wooden). Be sure to attach the heels of the posts with anchors. When made of wood, options are limited only by imagination.
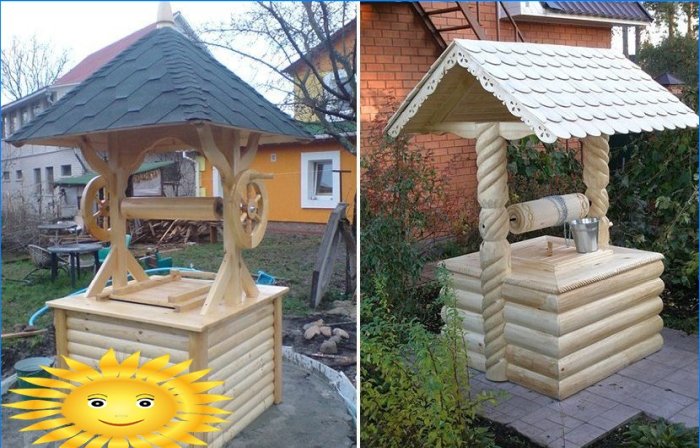
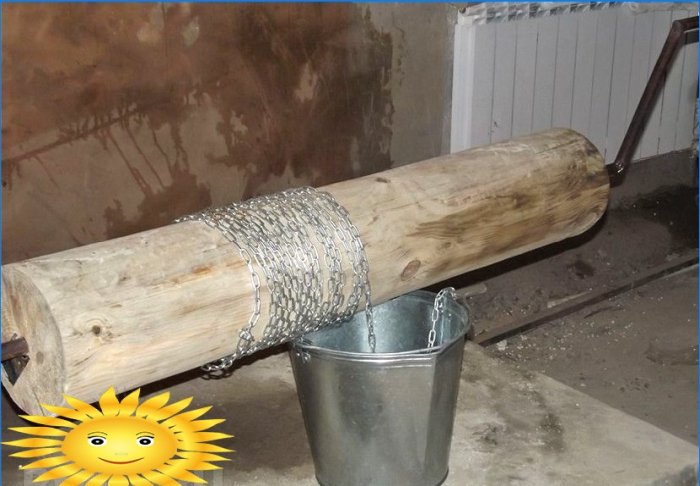
The knob itself can be made like this:
- Install bearings with an inner diameter of 20 mm in the struts.
- Find a flat log with a diameter of 180–200 mm and drill a longitudinal hole of ø 22 mm in it. Treat it with hydrophobic compounds and antiseptics. This will be a drum.
- Drive a metal pipe Ø 20 mm into the hole. Trim ends.
- Place the pipe in the bearings, mount the arm for rotation.
- Measure and fix the rope or chain, fix the bucket.
The well represents true freedom for creativity and skill development. Models made by craftsmen to order are simply amazing. If you have such an architectural reserve, you can turn it into a real exhibit by applying the knowledge from our article.


Could you provide detailed instructions on how to construct the head of a well or create the above-ground part of the well? I am curious to learn how to do it myself. Any tips or suggestions would be greatly appreciated!