Recommendation points
- Selection of the type and size of the window sill
- Site preparation
- Sill mount
- Sealing the bottom zone
- Sealing cracks in walls and slopes
- How to avoid condensation
The final stage of window installation is window sill installation. This process is ridiculously simple, nevertheless, it is quite easy to make a mistake. In our instructions, we will show by examples how to properly organize the junction of the window sill to the window frame, carry out the seal and exclude freezing of the lower zone.
Selection of the type and size of the window sill
Despite the fact that the products of most manufacturers of additional components for PVC windows are well unified, there are several types of plastic window sills. However, perhaps you will prefer natural wood, artificial stone window sills or veneered countertops? We will also consider such options, however, remember that often the choice of a particular type of product is dictated not by a whim, but by a clear need.
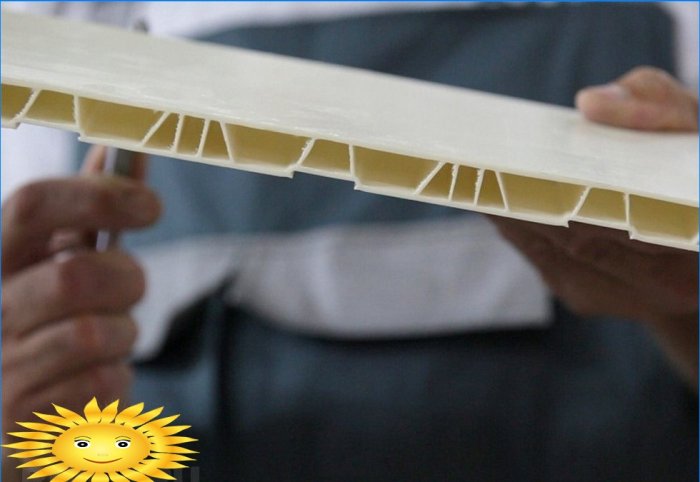
As an example, consider two types of plastic window sills – with and without an edge at the back. On the one hand, a window sill without an edge allows you to freely vary its depth and even tolerates oblique undercuts, which can correct the flaws in the installation of windows. However, in this case, fastening from the outside through the support profile may be required, but it is not available in all windows and it is not always convenient to dismantle the external ebb for fastening. The rest of the plastic window sills are almost identical with the exception of one sign – thickness. The larger it is, the, respectively, the higher the strength of the window sill and its more significant protrusion above the wall plane is allowed.
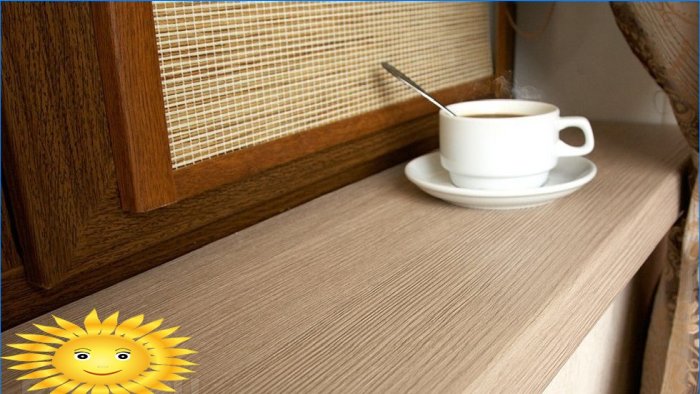
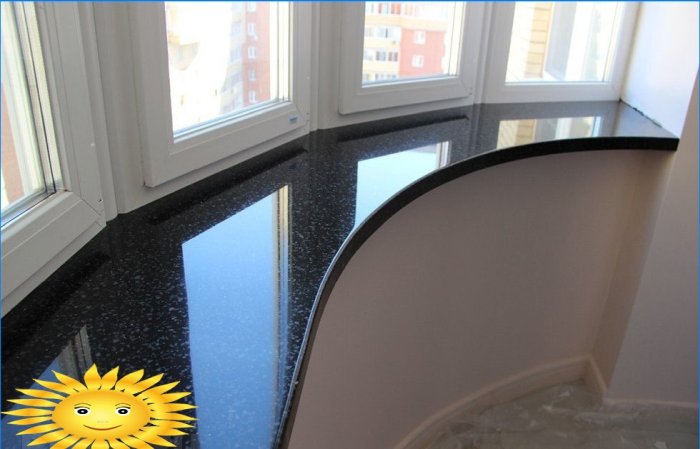
Plastic window sills are usually sufficient to meet most needs, however the benefits of other materials are worth considering. Basically, laminated chipboard and artificial stone slabs are used wherever it is necessary to add a special flavor to the color. “Non-plastic” window sills have no other advantages – they are afraid of moisture, dirt and ultraviolet radiation. However, one caveat still remains: if it is necessary to arrange a one-piece window sill for several windows, as is the case with the glazing of a bay window, a continuous curved contour can be created only with the help of a window sill-table top.
As for the sizes, everything is simple and obvious with them. The length of the profile should be at least 6 cm longer than the distance between the slopes at the widest part. The depth should provide a protrusion above the wall plane of at least 30 mm, and if a radiator is located under the window, “cover” it with a margin of 5-10 mm.
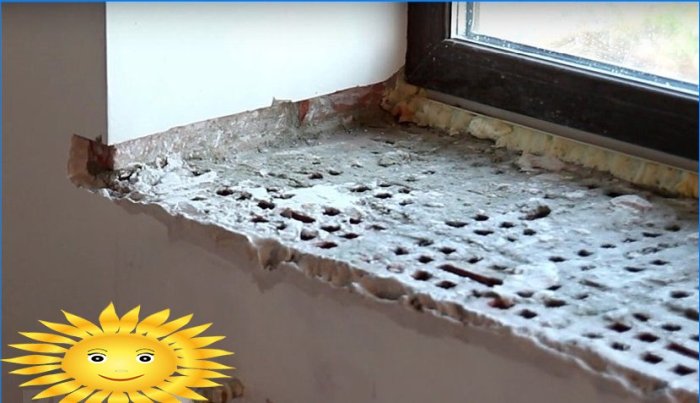
Site preparation
The opening must be prepared in a certain way for the installation of a window sill, and for each individual installation method, the preparation will have some differences. Let’s start with what is the same in all versions: we apply a square to the uprights, setting the edge along the lower edge of the frame profile, and draw two horizontal lines on the slopes that limit the undercut. Along the lines, you need to make undercuts with a grinder and a diamond disk to a depth of about 10-15 mm, if there is a plaster corner at the corner of the slope, it should be cut completely. Further, with a chisel or an old chisel, pockets with a depth of about 30-50 mm are selected in the slopes. It is possible more, but less than 30 mm is not worth, otherwise the abutment of the side plugs with the slope angle will be incorrect. If the slopes will be sheathed with panels, the ledge of the window sill behind the slope must correspond to the width of the closing corner profile.
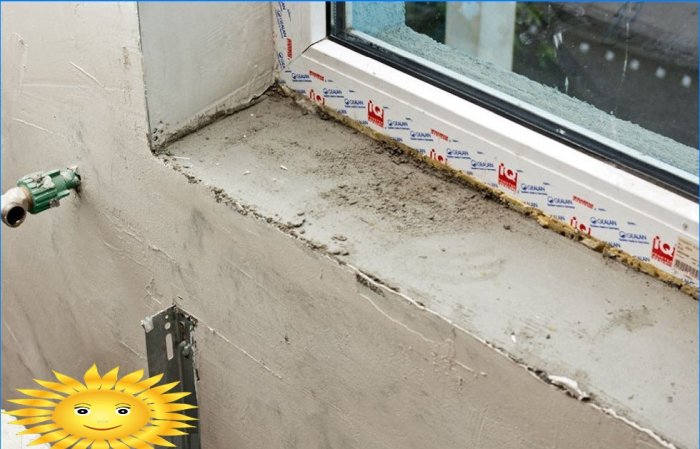
If instead of a light plastic profile, a heavy tabletop is installed, you need to prepare the lower plane of the window opening. First, a plaster beacon is installed under the side of the frame close to the support profile on the bumps of the cement mortar. The distance between the edge of the lighthouse and the window frame must exactly match the thickness of the window sill-table top. Along the lighthouse, a flat horizontal edge of the opening is displayed with cement mortar, on which the window sill will rest, it is desirable to strengthen the inner corner with a plaster corner.
Do not be surprised, but it also happens that the window is installed without a support profile. If, in this case, a window sill with a thickness of 18 mm or more is installed without a trailing edge, it is necessary to increase the thickness of the lower foam seam at least to the middle of the thickness of the used window sill profile. Also, in the lower part of the slope, a series of vertical notches are made in the wall, 30 mm wide, 20 mm deep and about 120–150 mm high. Notches must be made in increments of no more than 80 cm and at least two pieces per window sill.
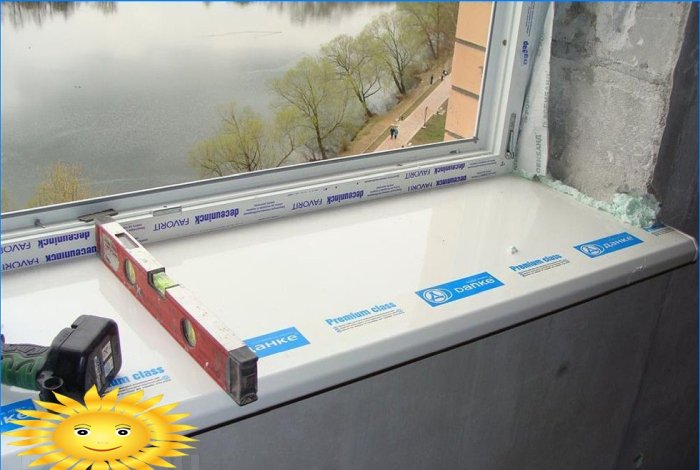
Sill mount
Unlike common practice, the window sill does not need to be fastened through the frame profile with self-tapping screws. In some cases, this will only do harm: metal rods serve as excellent cold bridges..
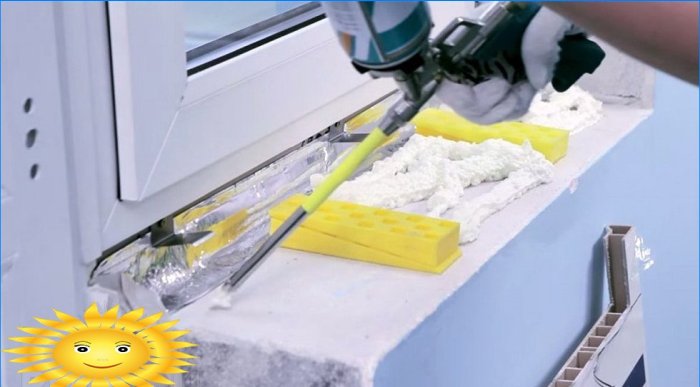
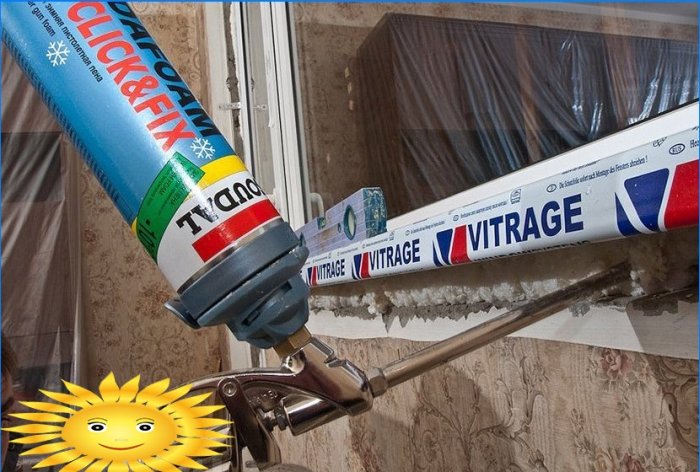
The most correct installation scheme is ridiculously simple: the window sill rests against the support profile, after which incompressible pads are installed under it, for example, mounting wedges, retreating 2/3 of the total depth from the front edge. A small protrusion of the frame above the support profile allows you to adjust the extension of the window sill above the wall plane if the window frame for some reason turns out to be unfolded. With this method of installation, mounting foam firmly binds the window sill to the opening, while tightly filling the entire space from below.
Fastening of a window sill without a support profile is carried out at the expense of the rear edge, which fits snugly into the mounting groove in the lower part of the frame. It is only important to clear the foam seam a little and cut off the side on the sides, otherwise you will have to perform a deeper cutting of the slopes. Window sills of increased thickness without a mounting flange have a dovetail-type longitudinal groove on the rear part. Light mounting plates are inserted into this groove, which are used to pre-align the windows. For the correct installation of the window sill under its rear part, the props are poured with wedges, then the window sill is put into place, the plates are bent and fastened deep into the notches in the wall, which ensures a tight pressing of the profile end to the frame.
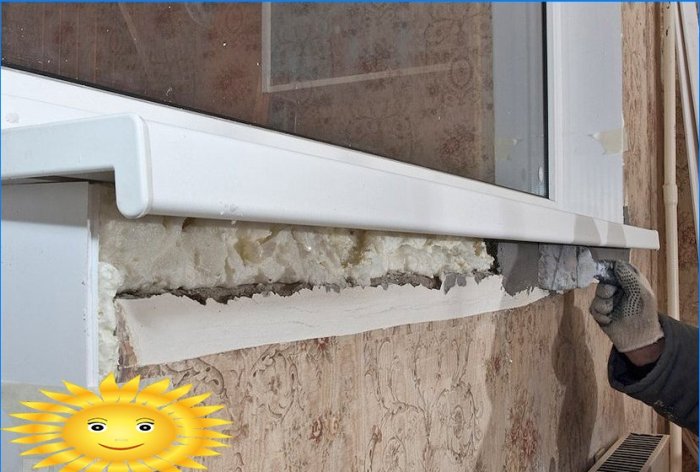
Sealing the bottom zone
The main trick when installing a window sill is the correct formation of the foam seam under it. The only exceptions are window sills-countertops, which are attached to the prepared plane of the opening using liquid nails.
In general, for a correct installation, a number of conditions must be met:
- The lower shelf of the opening is cut down with a slight bevel towards itself, dust-free and moistened with water.
- Incompressible linings are laid under the window sill; when you press on the front edge of the profile, it is tightly pressed to the bottom of the frame and remains strictly horizontal.
- From above, the sill is preloaded with a weight of about 20 kg per meter, the oppression is distributed along the entire length using a board.
- On the sides, the window sill rests on the upper plane against the notches on the slopes.
Then everything happens very simply. Polyurethane foam of the appropriate climatic regime fills the entire space between the window sill and the shelf of the opening, with the exception of the areas beyond the slope line. Blow out the foam at low pressure using an extension tube to fill the narrowest areas at the rear near the frame. After blowing out the foam, the window sill should remain loaded until the foam has finished polymerizing – about 1-1.5 hours.
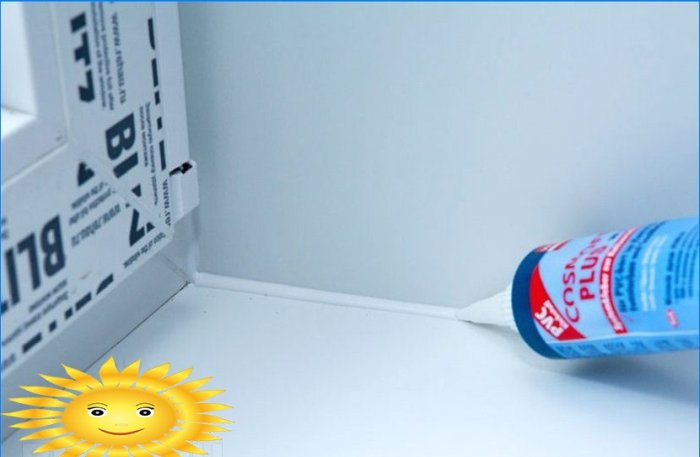
Sealing cracks in walls and slopes
After the foam has completely hardened, its excess must be cut off. If the foam is squeezed out into the area behind the line of the slopes, it must be dug out to a depth of at least 20 mm. Under the window, the foam is selected with a chisel or staple to a depth of about 10 mm. All formed cavities are wetted from a spray bottle with a strengthening soil.
The voids must be filled with cement mortar, to which alabaster is added in small portions to accelerate the setting. After the mortar has dried, the embedment areas are rubbed against the general plane of the wall using an abrasive mesh. The cracks between the window sill and the slope must be sealed, this is the main way for cold air to enter. If subsequently it is planned to finish the slope with plastic panels, the sealing of the cracks need not be leveled; in this case, sealing can be carried out using polyurethane foam.
If the trimming was done correctly in a single line with no gaps, the slopes need to be finished, painted, and then filled with white acrylic sealant. If the edge of the undercut is uneven, the sealant is pumped into the depth of the gap, not reaching the surface of 5–7 mm. The remaining gap is sealed with a finishing putty.
How to avoid condensation
Condensation is a typical consequence of installation errors. It can appear both on the windowsill itself and on the glass. Each case has its own reason.
Overcooling of the sill occurs due to the violation of the foam seam in the lower zone. The best thing to do in this case is to disassemble the ebb from the outside and scrape the remaining foam from under the frame. After cleaning, the bottom seam is filled with foam again.
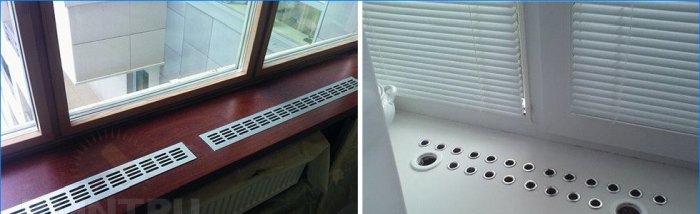
Condensation on the glass appears mainly when using single-chamber double-glazed windows with high thermal conductivity. Such windows require a continuous heat curtain from the radiators during the cold season. If the window sill protrudes too much, it will block the hot air flow and the glass will not warm up properly. The problem can be solved by inserting 2-3 convection sleeves into the windowsill, which are also used to pull cables through the walls of cabinet furniture.


Can you provide step-by-step instructions for DIY window sill installation along with visual references like photos or videos?
Are there any specific tools or materials I need to gather before attempting a DIY window sill installation? And where can I find reliable photo and video instructions to guide me through the process step by step?