Recommendation points
- Choosing lumber
- Work order
- We connect floors with different laying directions
- Connecting the new wood floor to the old
- We check the result of the work performed
In this master class, you will learn how to lay a wooden floor on logs quickly and efficiently. We will also tell you about the techniques for working with a profile board, which allow you to connect adjacent rooms with different directions of laying the floor, correctly mate the new floor with the already laid.
Choosing lumber
A timber of any type of wood without significant flaws and curvature with a moisture content of no more than 14% is suitable as lags.
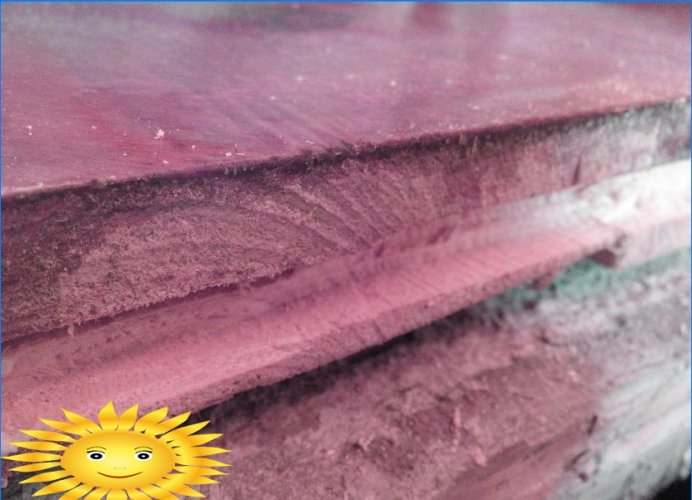
Board selection. It is necessary to decide on the type of wood. Pine is cheaper, but it is also more mobile: over time, small cracks and irregularities will appear. A larch board is good for a type-setting floor. If the length of the board is more than 3 meters, it is better to choose not a rectangular groove, but a trapezoidal or rounded.
Work order
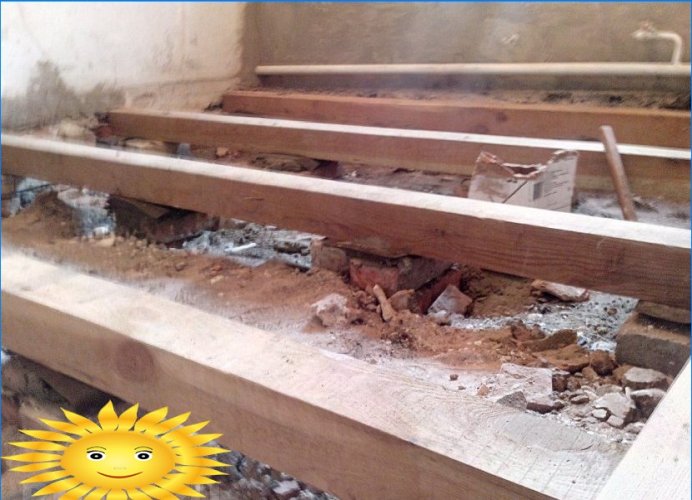
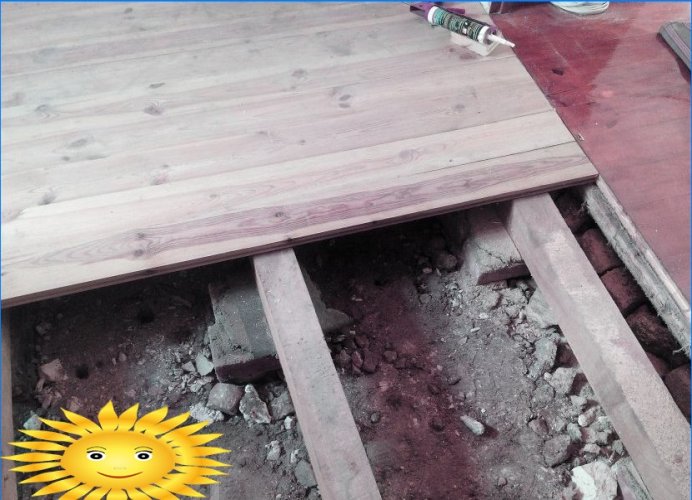
First, you need to mark the general horizontal level on the walls, dismantle the old floor and plan the soil.
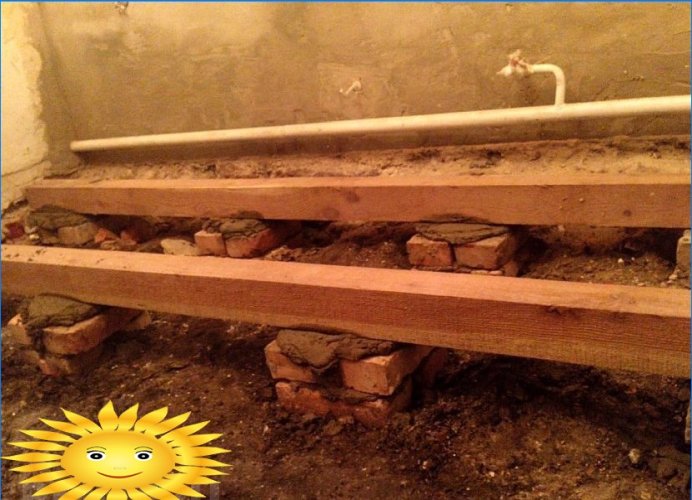
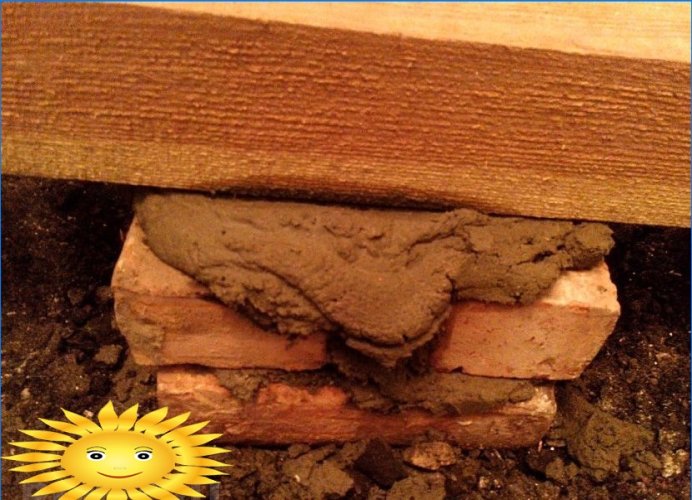
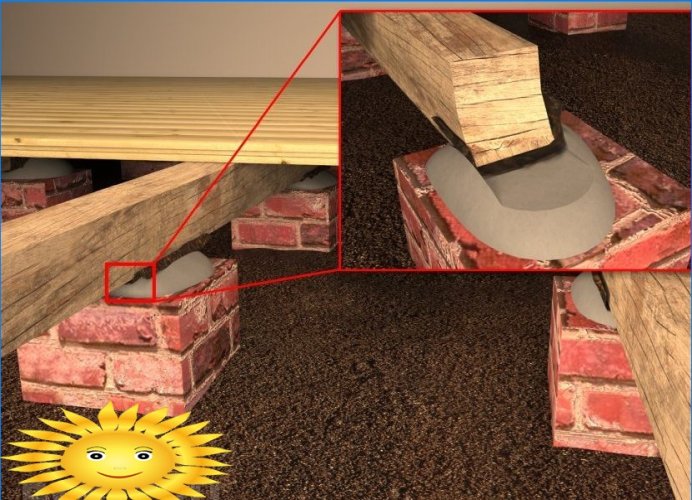
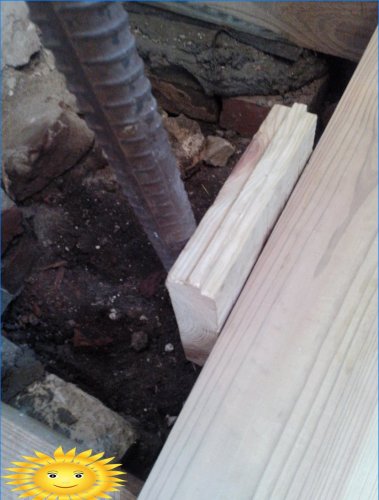
Then we make grillages from bricks bound with cement mortar of the M400 brand. They are mounted in rows according to the number of lags, the distance between the rows is about 90-110 centimeters. In each row, the grillages are at a smaller distance – about 750 cm.The upper row of bricks should be below the level of the finished floor by the height of the timber and the thickness of the board, plus a few centimeters of the cement mortar head.
The grillages should stand for a day after laying, after which they are covered with a cement cap, on which the logs are laid. The thickness of the hat should be no more than 4-5 centimeters.
The bar is installed in one stage: it is lowered onto the cement cap and nailed with a sledgehammer, it is leveled in three parameters:
- stacking height;
- longitudinal tilt;
- lateral tilt.
In case of failure, the timber can be torn off and re-laid. A height difference of no more than 1.5 mm per meter of plane is allowed, the distance between the bars is not standardized so rigidly: a deviation of 2–3 cm is allowed.
The laid bars are left for 2-3 hours, after which they are torn off, evenly lifting from both sides. A waterproofing agent is put into the formed niches – roofing material or several layers of polyethylene, after which the logs are returned to their place.
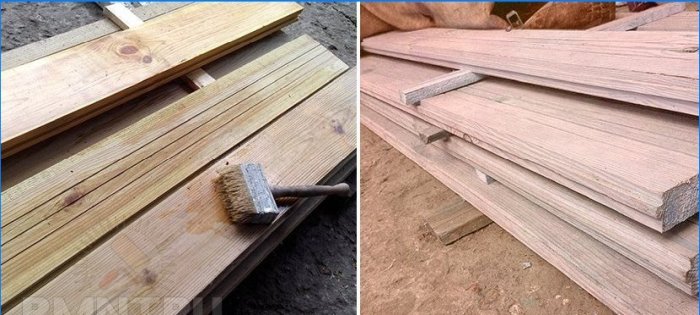
Before laying the floor, you need to wait 2-3 days until the brickwork and the cement cap are firmly seized, meanwhile they are preparing the boards: they are treated with an antiseptic and stacked in stacks, shifting the layers with boards of equal thickness..
In this state, the board is stored until completely dry, sometimes it is impregnated several times with antiseptics on alkyd resins. They cover only the ends and the seamy side of the board, which has a ventilation groove, since the antiseptic forms a hard film on the front side, which will complicate the mechanical processing of the surface. The bars are also dismantled and processed.
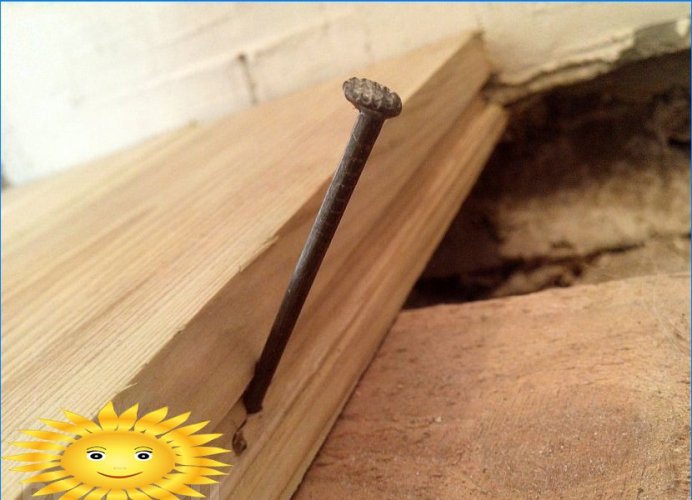
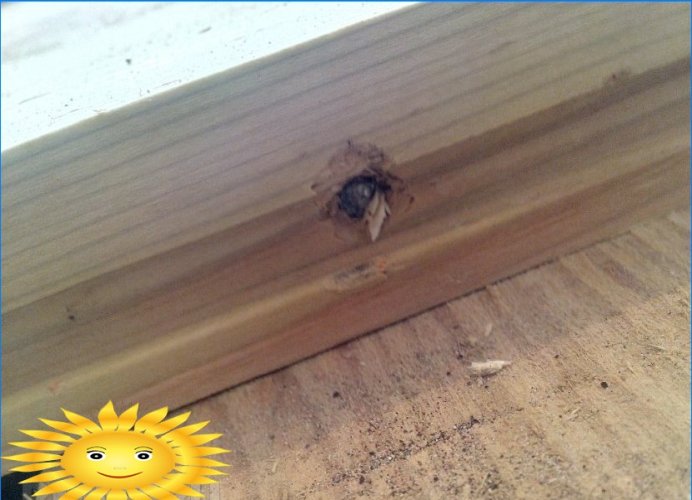
After the grillages have dried, the first board is laid, cutting off the comb from it and adjusting its edge with a plane under the protrusions and irregularities on the wall. The board is fastened with nails, hammering them into the groove at an angle of 35-50 °.
In order not to inadvertently damage the outer edge, the nail is finished off, instructing the drummer.
You should not try to clear the groove from chips, you can drive a large splinter.
At the end of the fastening, the groove is visually inspected to make sure that the nail heads are sunk deep enough into the wood..
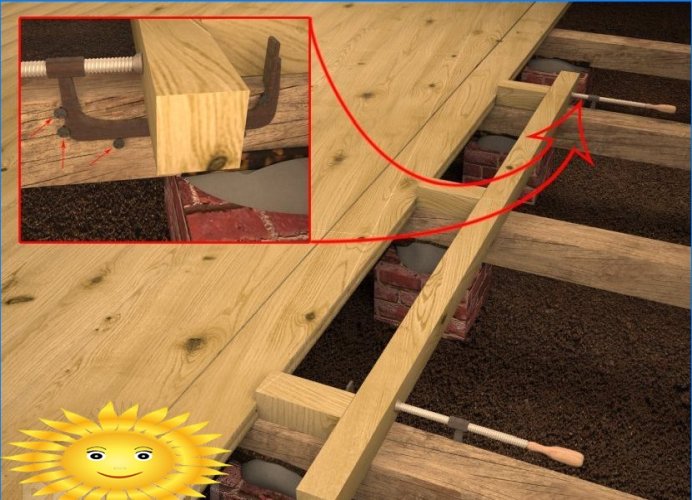
Each subsequent row is installed with a comb in the groove of the previous one and pressed with a crowbar, resting it on the ground. In order not to damage the board, be sure to put a piece of board.
If there is no assistant nearby, you can eliminate the gap between the boards using an impromptu jack. The clamps are temporarily stuck to the log with self-tapping screws.
When laying the floor in doorways, it is better to knock off some of the plaster from the walls in order to prevent the formation of cracks after installing the door kit.
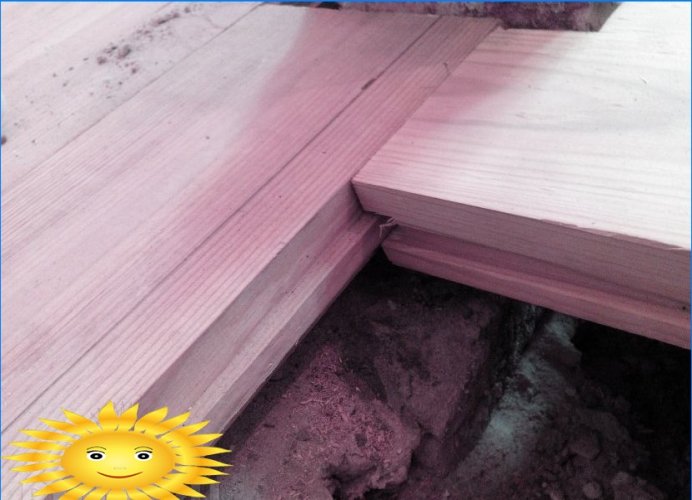
We connect floors with different laying directions
If the board changes direction in an adjacent room, you will need to make a groove connection using a hand tool.
When laying the board parallel to the doorway, the groove of the board usually remains free, which means that its ends will need to be processed by cutting out the comb. This is done like this:
- Having retreated from the narrow edge of the board to the depth of the groove, a cut is made. The cutting depth is equal to the distance from the front surface to the ridge shelf.
- Excess wood is chiselled.
- The same operation is performed from the back of the board..
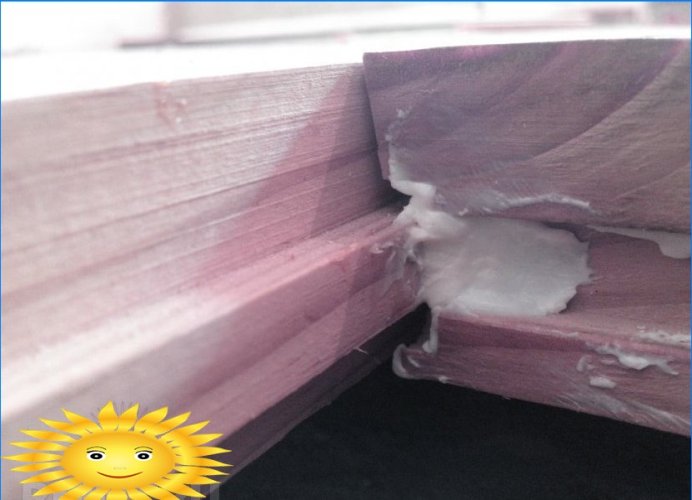
If the groove remains free for the connection, cut at the end of the board with a circular saw to the desired depth.
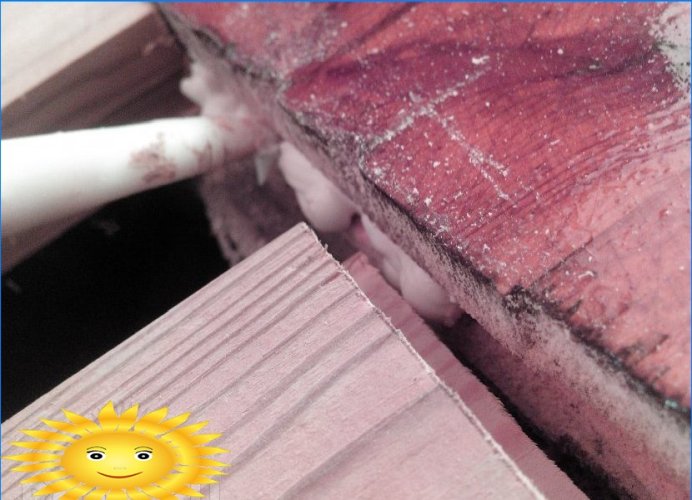
Since high accuracy is unlikely to be achieved, especially with a trapezoidal ridge, the joint is filled with glue “liquid nails”.
Connecting the new wood floor to the old
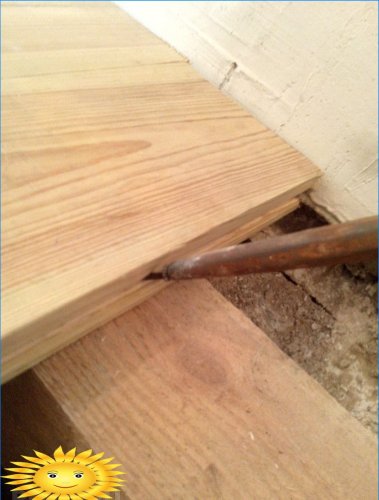
If it is necessary to connect a new floor with an old one that has a flat end, a more meticulous approach will be required. A ridge is cut at the end of each laid board.
The ends of the finished floor boards must be leveled, then a groove of the specified dimensions must be selected in them. In this case, it was quickly done with a hand mill; in its absence, you can do with a hammer and a chisel.
The connection must also be filled with plastic glue..
We check the result of the work performed
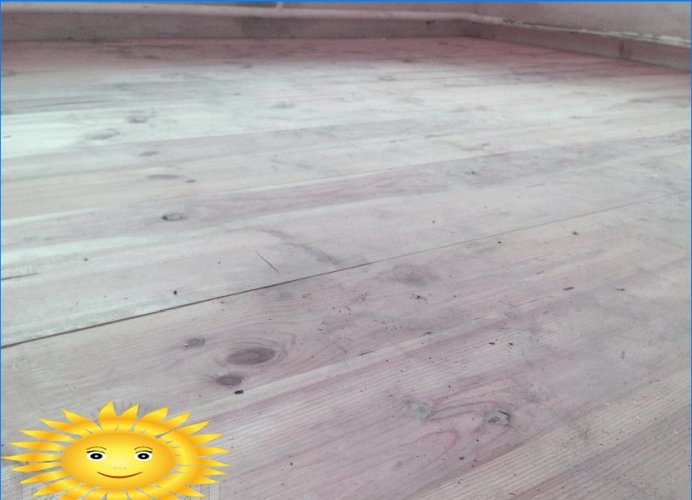
After laying the boards, the difference in height should not exceed 0.5 mm, the presence of high “sills” indicates the marriage of lumber, such a board must be replaced. Small differences are removed during the floor sanding process.
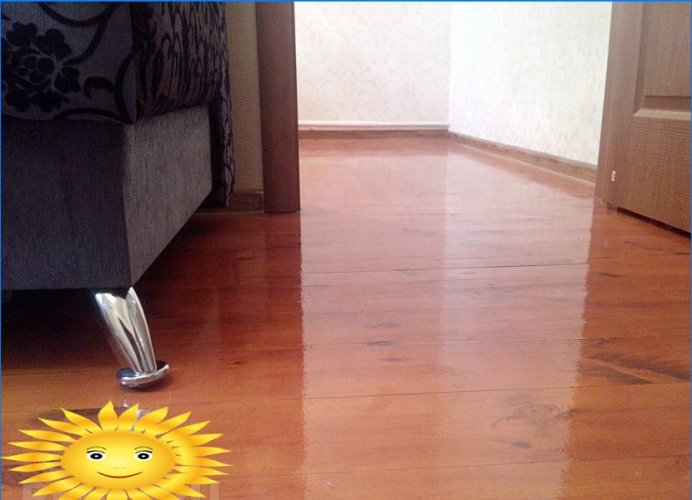
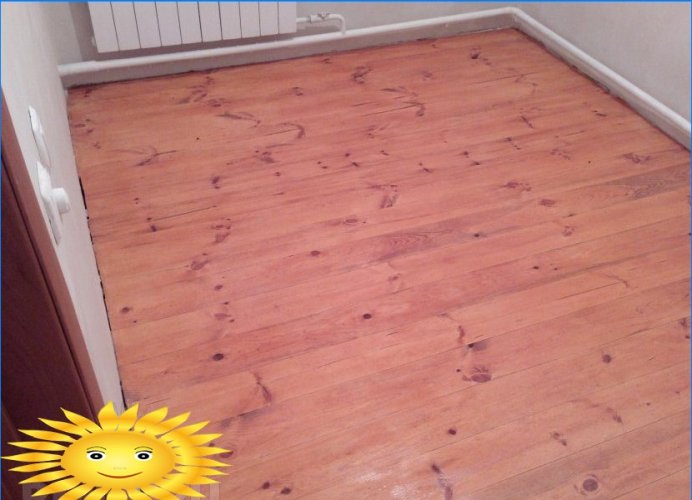
After rough grinding with K120 grit sandpaper, the gaps between the boards and traces of wood defects are sealed with a wood-colored putty. Next, the sealed depressions are processed and the floor is sanded with finer sandpaper. This is how the floor looks after one opening with varnish:
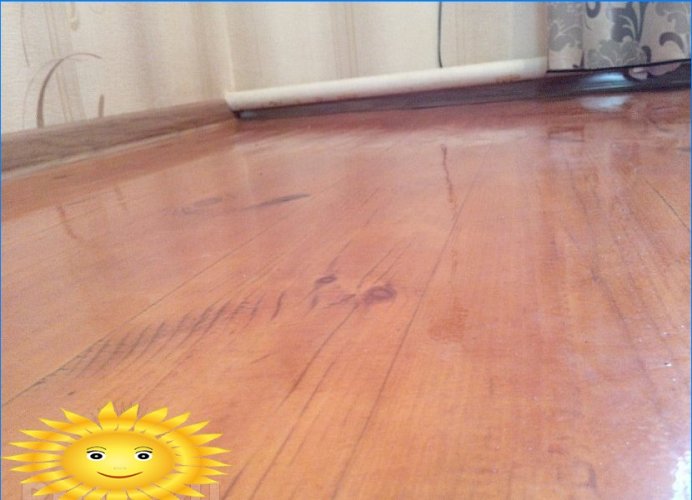
A thick alkyd yacht varnish is used to cover the floor. Before applying each subsequent coat, check the floor for adhering insects or debris. Appearance after the second application:
It is not necessary to wash the floor, it is recommended to do this if each layer of varnish will be polished. They wash the floor in such cases with a weak vinegar solution – a glass on a bucket of water.
With each subsequent application of varnish, the floor will become more dark and glossy. A total of 4–5 coats of varnish are required to ensure good durability of the coating. This must be taken into account when choosing the color of the varnish. You can also tint the floor with the first layer, and carry out all other applications with clear varnish..

Can you provide step-by-step instructions on how to properly lay a wooden floor on logs? I’m curious to learn the best techniques and any tips or tricks that can ensure a successful and durable installation. Thanks in advance for your guidance!
I am a reader of this text and I would like to know the step-by-step procedure for laying a wooden floor on logs. Can you provide detailed instructions or a master class on this topic?
I’m curious about the process of laying a wooden floor on logs. Could you please share some insights on the technique and materials required? Are there any specific steps or precautions to keep in mind for a successful installation? Additionally, are there any recommended resources or tutorials that you could suggest for further guidance? Thanks in advance for any information you can provide!