Recommendation points
The article will help to independently master the art of wall and floor cladding with tiles of any person who is not even particularly versed in construction, will help him overcome all the difficulties that any novice tiler undoubtedly experiences.
Tiling work has always been quite expensive, and not everyone can afford to hire a good tiler, whose work will cost you about the same as buying a tile. Why not learn how to lay the tiles yourself, thereby saving the precious family budget?
Tiling is painstaking work that requires high precision and scrupulousness. Any inaccuracy made at the initial stage of the work will affect later and will be reflected throughout the work. Therefore, if you are a restless person, and are not used to doing everything carefully, then you better not tackle the laying of tiles, and use other finishing materials. But if you feel a hidden potential in yourself, which only a lack of knowledge prevents you from realizing, then this article will help you to fill this gap in the best way possible, and will tell you in detail how to lay the tiles yourself.
Required tool
To work on laying tiles, we need the following tool:
- Construction mixer (electric drill with attachment);
- Building level (preferably two: long and short);
- Notched spatula (comb with a tooth height of about 8 – 12 cm);
- Tile cutter (can be replaced with a glass cutter);
- A small “Bulgarian” with a smooth diamond circle;
- Ballerina with carbide tips (for round holes).
Materials
Materials will be needed:
- Tiled glue;
- Grout for joints;
- Tiled distance crosses and wedges (for the formation of expansion joints);
- Tile.
Surface preparation
It is necessary to lay the tiles on a prepared perfectly flat surface. Such a surface can be a wall leveled (built) with plasterboard, or a wall plastered over beacons (a floor with a flat screed). How to properly plaster a wall is described in detail in the article “How to plaster walls yourself”.
Before starting work, the surface must be cleaned of dust and thoroughly primed with a deep-penetrating primer. I deliberately miss the option with uneven walls or floors, as in practice I have already made sure that it is much easier and cheaper to plaster the wall first and make a semi-dry screed on the floor than later spend large sums of money on glue overruns and try to “catch” with tiles level.
If tiles on the floor are normally laid on any layer of glue, then tiles on the wall, laid on a thick layer, begin to “float”, and it becomes very difficult to achieve an even surface. And the consumption of glue from one bag for about 8-10 square meters sometimes grows up to one bag per square meter.
Styling
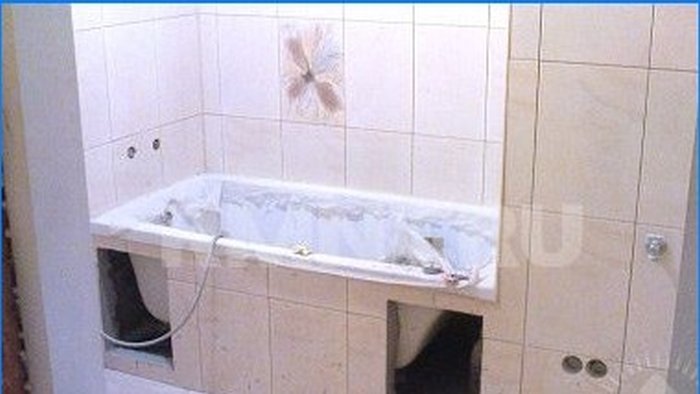
So, the walls are even, primed twice – we proceed to laying the tiles: I advise you to start from the walls, since in the process of work, the tiles laid primarily on the floor can become very dirty, and construction debris will get into the expansion joints. In addition, the possibility of falling heavy tools or materials should not be ruled out, which will lead to cracking of the tiles. Therefore, we retreat from the surface of the screed to a distance equal to the sum of the thickness of the floor tiles, the layer of glue (it can be determined experimentally), and the expansion gap. It is best to use a lath of the required thickness for this – it will not allow the tiles to slide down under load, the essence is that the entire row of tiles recedes from the floor at the same distance.
We knead the glue – for this we collect about two liters of water in a bucket, and gradually add the glue mixture, periodically stirring the solution with a mixer. It is necessary to achieve such a consistency so that the solution is both plastic and not liquid. Then let it “ripen” for about five minutes, and mix again – the glue is ready.
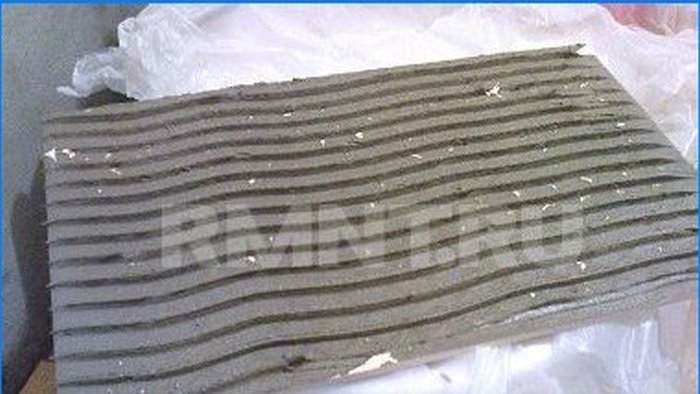
We take a tile in our hands and determine the direction in which it should be placed – most manufacturers draw an arrow on the back of the tile – and so, the arrows on the entire tile should “look” in one direction. Using a flat surface of a notched trowel, apply glue to the back of the tile, and then remove excess glue with the notched side of the trowel. In this case, the spatula should be held strictly perpendicular to the tile surface so that the height of the ridges is the same.
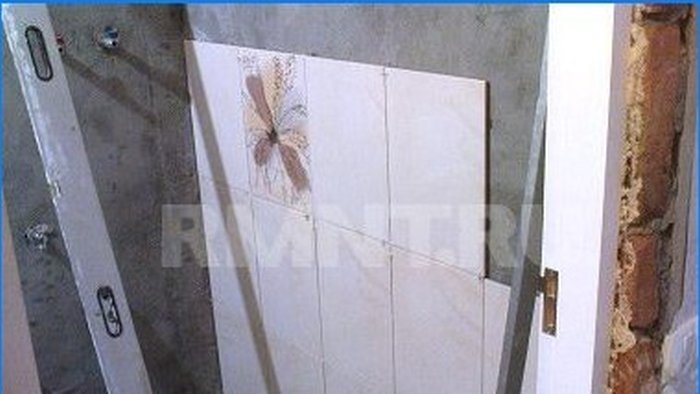
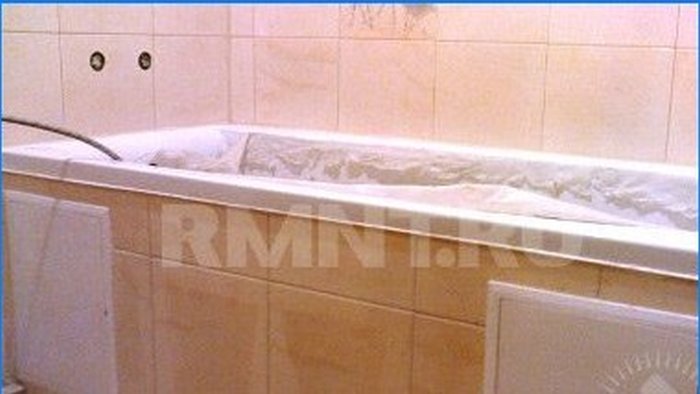
After that, the tiles are set in place and pressed against the wall by lightly tapping the surface. In the same way, adjacent tiles are installed, and with the help of a level, their position relative to the vertical, horizontal, as well as the stay of the entire tile in one plane is controlled. Minor deviations from the plane can be corrected by pressing several tiles simultaneously against the wall with a long level. Distance plastic crosses are inserted between the tiles, and if some tile is not entirely even, then you should use a wedge and set the tile so that it does not affect the subsequent ones..
Further, the remaining rows are laid in the same way, and crosses are inserted at the intersection of the seams so that the seams do not shift and form clear, even lines.
Cutting
Of course, it is almost never possible to do without trimming. Smooth cutting is carried out using a tile cutter (or, in its absence, a glass cutter). The tiles are marked out, laid on the bed, drawn with a roller made of a hard-cutting alloy, and then easily broken into two parts with a special “foot”. With a glass cutter, tiles are cut like ordinary glass. But, in addition to even cutting, it is necessary to carry out complex cutting: L-shaped, U-shaped, or even cut out a window in the tile.
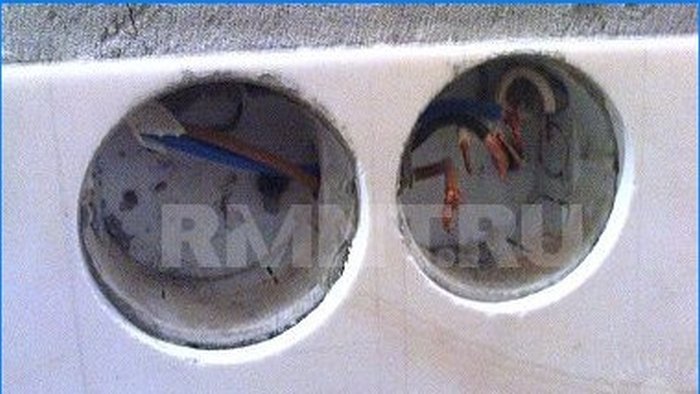
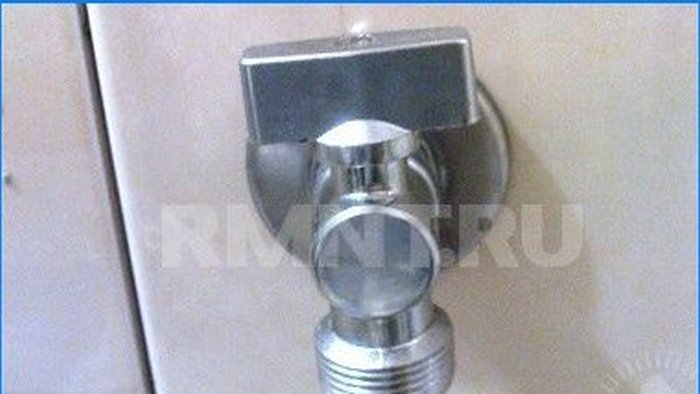
This cutting is done with a grinder with an even diamond circle. If possible, it is best to cut tiles with a grinder on the street, since the cutting process is accompanied by a lot of dust and noise. Also, in addition to the above cutting, it is very often necessary to cut round holes for sockets, pipes, various plumbing – then a ballerina is used – this is an adjustable cutting tool with carbide taps, which is attached to a drill, and, by rotation, cuts holes of various diameters in the tiles. When performing cutting work, you need to very carefully measure out all sizes, and cut very carefully, since the slightest deviation will inevitably lead to damage to expensive tiles..
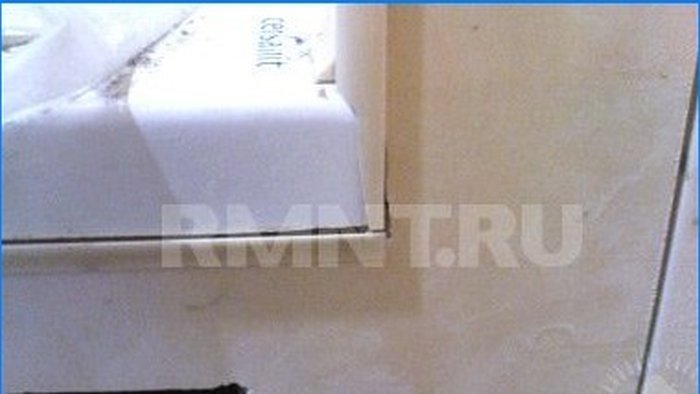
But, no matter how carefully you cut, your cut still cannot be compared to the factory cut, and it must be hidden. The corner cut is hidden under the flat edge of the adjacent wall tile adjacent to it, or under a special corner. It is advisable to hide the rest of the cut under various “cups”, cashier and other accessories.
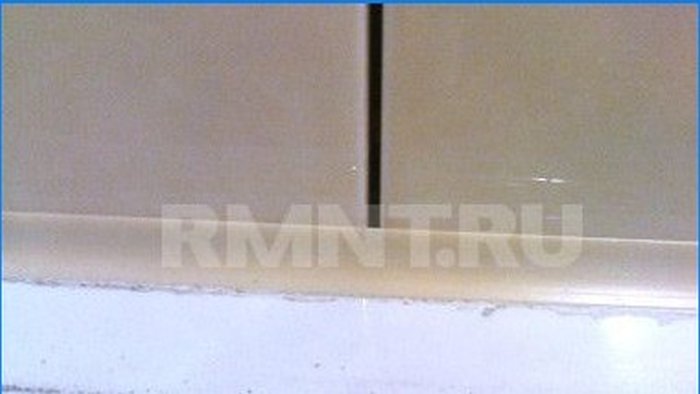
The tiles are laid on the floor in the same way, on a previously measured and marked surface. It is desirable to mark it so that in the most visible places the seams run parallel to the walls, and the entire slanting cut is hidden under furniture or in hard-to-reach places. With floor tiles, we “dive” under the cut of the wall tiles (for this we left a distance between the wall tiles and the screed), and a smooth seam is obtained along the entire perimeter, which does not require the use of a plinth.
Grouting
A couple of days after laying the tiles on the floor (not less than a day later), you can start grouting expansion joints. The seams are pre-cleaned from dust and glue residues, the floor tiles are washed. The grout is diluted with water like glue, only in a much smaller amount, and rubbed into the seams with a rubber spatula.
Excess grout is removed from the tile surface with a slightly damp sponge, with light longitudinal and diagonal movements in relation to the joint. Carefully and correctly rubbed seams will help hide minor styling imperfections, and carelessly rubbed seams will reduce all your efforts to zero. Therefore, grouting is no less important than laying tiles..
In general, working with tiles is more difficult and painstaking than working with other finishing materials, so each stage of work must be treated responsibly and with full dedication..
Well, that’s, in general, that’s all. The next day, all that remains is to wash the tiles, and bring in furniture, install plumbing, use the results of your labor.
And this is nice, agree!

I’d like to know what are some common mistakes to avoid when laying tiles, especially for those who are new to the process. Can you provide any step-by-step instructions or tips to ensure a successful tile installation from start to finish?
When laying tiles, there are some common mistakes to avoid for beginners. Firstly, make sure the surface is clean, dry, and level. Use a notched trowel to apply an even layer of adhesive, working in small sections. Place tiles with a slight twisting motion to ensure full coverage. Avoid using too much adhesive as it can cause tiles to slide or crack. Keep spacing consistent by using tile spacers or crosses. Use a level often to ensure the tiles are straight and aligned. Be careful with cutting tiles, making precise measurements and using a wet tile saw for straight cuts. Grout the tiles after adhesive has dried completely, using a grout float at a 45-degree angle. Remove excess grout with a damp sponge, and once dried, apply a sealer for protection. Finally, regularly clean and maintain the tiled surface to preserve its appearance and durability.
When laying tiles, there are several common mistakes to avoid, especially for beginners. Firstly, ensure that the surface you’re tiling is clean, level, and properly prepared. Use a level to check for any unevenness and fix it before proceeding. Secondly, don’t rush the tile layout. Plan the pattern and placement before starting to avoid awkward or small cuts. Thirdly, using the wrong adhesive or grout is a common mistake. Select the appropriate products for your tile type and application. Additionally, avoid placing tiles too close together or improperly spacing them. Use spacers to ensure consistent gaps for grout. Another mistake is neglecting to back butter the tiles. Apply a thin layer of adhesive to the back of each tile before placing it. Lastly, not properly sealing the grout is a mistake. Use a grout sealer to protect it from staining and moisture. Following these tips and taking your time will help ensure a successful tile installation.
One common mistake to avoid when laying tiles is not properly preparing the surface before installation. Make sure the area is clean, level, and dry to ensure the tiles adhere properly. Another mistake is not using the correct adhesive or grout for the type of tile being installed.
Here are some step-by-step tips for a successful tile installation:
1. Measure the area where the tiles will be installed and calculate the amount of tiles needed.
2. Start by laying out the tiles without adhesive to determine the best layout.
3. Mix the adhesive according to the manufacturer’s instructions and apply it to the surface using a trowel.
4. Press the tiles firmly into the adhesive, making sure they are level and evenly spaced.
5. Use tile spacers to maintain consistent spacing between tiles.
6. Allow the adhesive to dry completely before grouting the tiles.
7. Mix the grout according to the manufacturer’s instructions and apply it with a grout float, pressing it into the spaces between the tiles.
8. Wipe away excess grout with a damp sponge before it dries.
9. Allow the grout to cure for the recommended time before sealing the tiles if necessary.
Following these steps and avoiding common mistakes will help ensure a successful tile installation.
I appreciate the valuable tips from a progressive builder on laying tiles correctly. However, I would like to know if there are any specific considerations or techniques for a beginner in tile installation. Are there certain tools or materials that are essential for a successful tile project? Any additional advice for ensuring even and durable tile placement is highly welcomed. Thank you!
I have recently taken up a DIY project of laying tiles, but I’m a bit clueless on how to do it right. Can anyone share some useful tips and techniques for laying tiles correctly? I want to make sure I achieve a professional-looking finish, and any advice or guidance from an experienced builder would be highly appreciated. Thanks!