Recommendation points
- Why is it better to choose fiberglass under the wallpaper
- DIY fiberglass sticker
- Operating procedure
The article contains guidance on the construction of an intermediate finishing layer made of fiberglass. We will tell you what the advantage of this material is and how best to use it. Also in the article you will find step-by-step photos of the glass fiber sticker on the drywall ceiling with professional comments.
Fiberglass is an excellent alternative to putty under certain conditions. In modern construction, drywall is widely used, which serves only as a basis for further finishing. In the future, it is either putty with wet gypsum mixtures, or pasted over with piece material – ceramic tiles, soft wall panels and other materials.
Why is it better to choose fiberglass under the wallpaper
The putty in half of the cases is an intermediate layer between the base (gypsum plasterboard) and the finish (wallpaper). The procedure for filling walls, and even more so for the ceiling, is a time consuming and “dirty” process. This requires tools (including an electric mixer), equipment (several buckets), water and qualified specialists. Quite heavy dusty bags make delivery a separate line in the estimate. But even with all the listed disadvantages to the gypsum putty, there is no alternative yet, but only if we are not talking about the subsequent pasting of the surface with wallpaper.
The base under the wallpaper does not have to be applied with a layer of liquid mixture. There is an excellent alternative for leveling the plane of drywall under the wallpaper – fiberglass or non-woven fabric. Both of these materials are glued in about the same way, but they work in different ways – the fiberglass keeps the plane, and the non-woven fabric is stretched during deformation. The second option is good if there is a risk of base mobility..
If the base is stable (created anew), then there is nothing to worry about and you can use a “spider web” fiberglass. This is the best solution considering the significant difference in price: 1 sq. m “cobweb” X-Glass (Belgium) costs an average of 0.5-0.8 cu. e., but for 1 sq. m of flizelin Fliz (Germany) will have to pay 1.2–1.5 cu. e.
DIY fiberglass sticker
A special responsibility is the finishing of the plasterboard ceiling. Usually there are built-in lamps, which perfectly reveal the flaws in the finish. Therefore, ceiling putty is the most difficult stage of applying the preparatory layer, which is done 3-4 times and is cleaned each time. We propose to align the plane with fiberglass – it is much easier and faster.
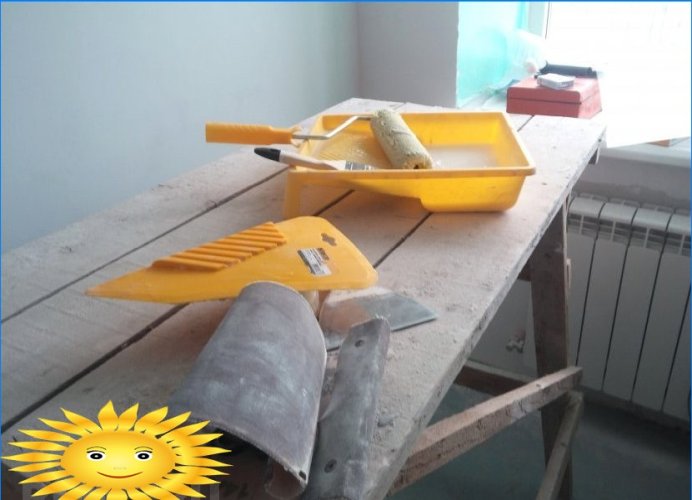
To work you need a minimum of tools:
- Glue tray.
- Long handle roller.
- Metal spatula.
- Wallpaper spatula.
- Brush, sandpaper.
Of the materials, only glue is needed (QUELYD was chosen for glass wallpaper, since it does not require a primer for gypsum board) and the fiberglass itself (Oscar, Russia, 0.7 cu per 1 sq. M).
Operating procedure
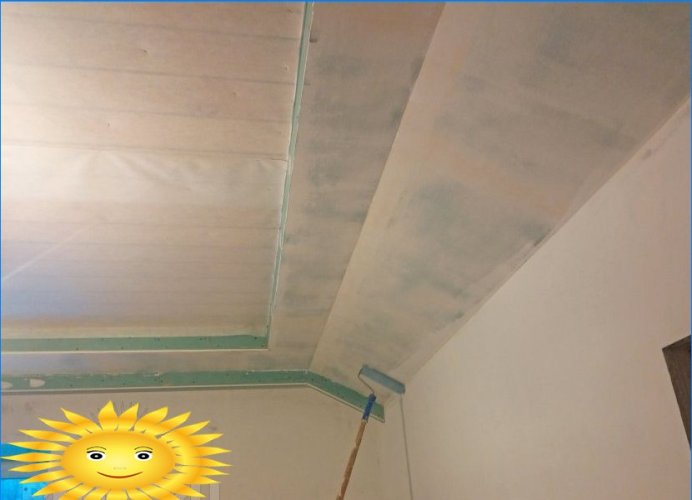
1. We dilute the glue according to the instructions.
2. Apply a primer layer with a roller over the entire gluing plane – it is needed so that the bonding layer is not absorbed into the cardboard. We wait until dry.
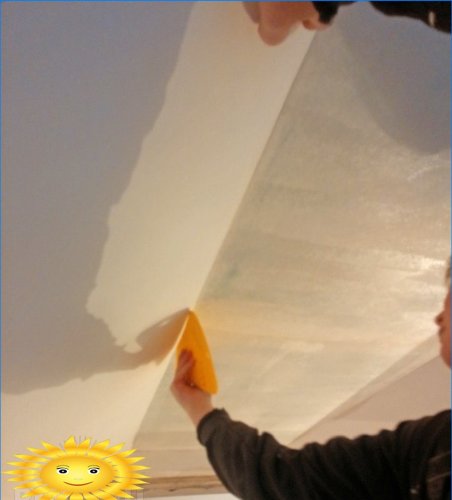
3. Apply a bonding layer of glue and carefully apply the previously cut sheet to the plane.
Attention! Don’t cut the canvas exactly to size – it’s much easier to cut it in place more accurately.
4. Press the corners with gentle movements using a wallpaper spatula.
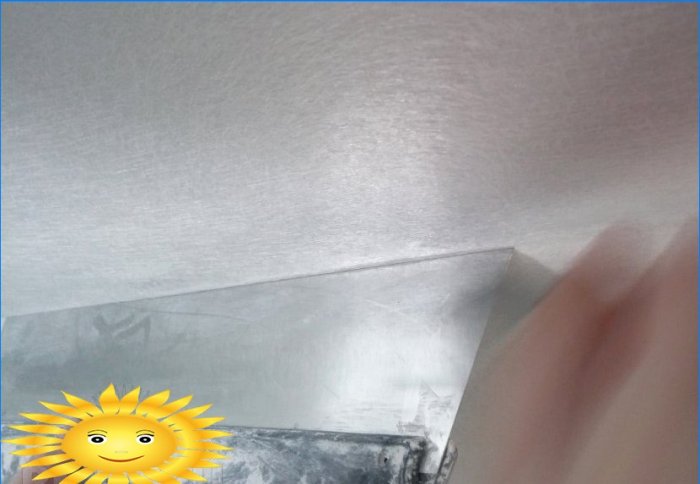
5. Then we iron the plane. At this stage, you need to evenly distribute the contact layer and squeeze out excess glue. The fiberglass should be completely saturated with glue and be damp to the touch.
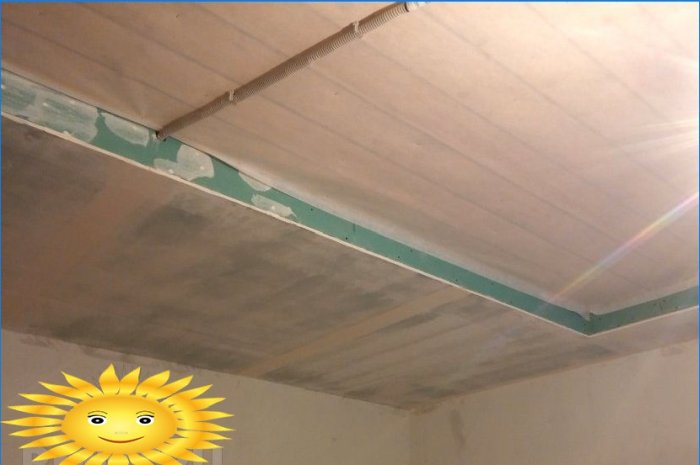
6. Subsequent sheets of canvas should be laid with an overlap of 50 mm.
7. Trim the edges with a knife or spatula.
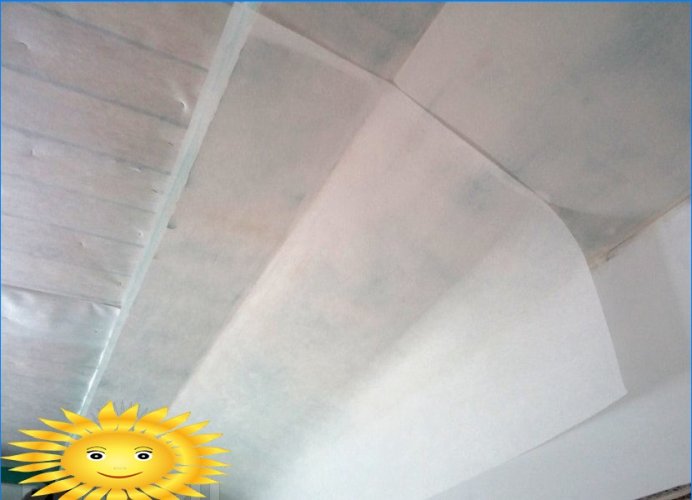
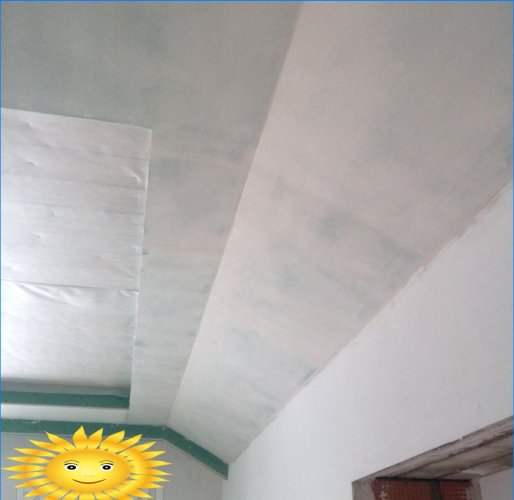
8. The final view of the finished plane:
After complete drying, you can glue the wallpaper or apply other subsequent layers – decorative putty or paint.
The given method is not only less time consuming, it is safer, because when filling, grinding with abrasives must be done. Gypsum dust is very fine and can get into the respiratory system, moreover, it is difficult to remove during cleaning. Fiberglass is easy to bring, store and use, and the glue for it is water-based and can be easily washed off with water.

I’m not sure if I understood correctly, but are you looking for advice on how to install fiberglass on the ceiling by yourself? If so, I would suggest researching online tutorials or seeking guidance from a professional. Installing fiberglass can be a challenging task and requires proper knowledge and tools. Safety should also be a priority, so make sure to take necessary precautions and follow appropriate guidelines. Have you considered seeking help from an expert or consulting a DIY manual?
“Could you please provide some guidance on the steps involved in installing fiberglass on a ceiling without professional assistance? I would appreciate any tips, techniques, or recommendations to ensure a successful DIY project. Thank you!”