The content of the article
- DIY cushions
- The size
- The form
- Filler
- the cloth
- Pillow decor
- How to sew a pillow on a sofa with your own hands
- How to sew a pillowcase on a sofa cushion
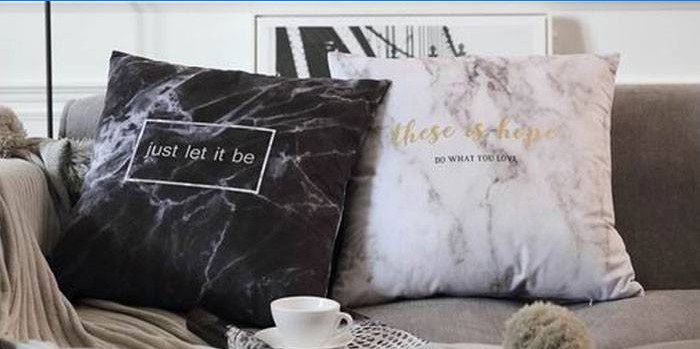
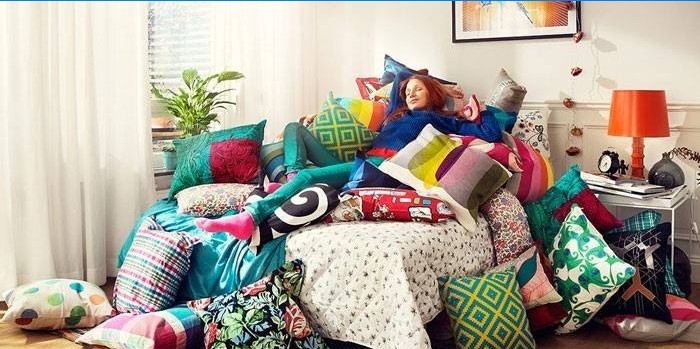
Such pleasant trifles as pillows for a sofa can give home decor a special cosiness, decorate a room, correctly place bright accents and become a great decor. The design of the products allows you to place them anywhere: on the sofa, armchairs, even on the floor. You can choose to sew pillows for the sofa to order, but it is much more pleasant and cheaper to try to sew them yourself.
DIY cushions
Pillows for a sofa will make any home attractive. This decorative element can not only decorate the home, but also delight loved ones with a stylish and original gift. Making such a surprise with your own hands is not so difficult. All that is needed, except for materials and tools, is a little perseverance, imagination, the desire to do a beautiful thing. A master class in sewing pillows for a sofa will help to do it right, carefully.
The size
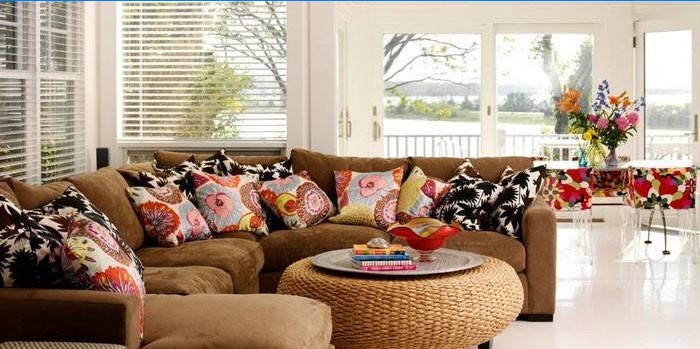
A set of pillows of several sizes will look stylish: small, medium and large. All of these options fit perfectly into the interior of one room. Small are considered products whose side size or diameter is 30-40 cm, the average size is 40-70 cm, the large is 70 or more centimeters.
The form
Pillows for a sofa are different. One of the most popular types is the thought. This ordinary pillow has a square, round and rectangular shape, has a small size: facets from twenty to forty centimeters. It can be used as a soft lining on the chair seat or to the back. A modern little thought is of absolutely any kind – from classical to the form of fairy-tale characters, animals, bottles, vehicles.
The classic shape of a thought is square, round, rectangular. But there are other, unusual and interesting options:
- Sectional – the parts are connected using side inserts of different stiffness, used on wicker furniture.
- Turkish – with oriental ornaments, folds in the corners, rounded shape.
- Quilted – the model is decorated with a decorative stitch from one or two sides.
- Oxford – decorated with a border, tassels.
- Dumka-roller – the most common type.
- Custom shape – flowers, letters, in the shape of animals, etc..
Filler
The sofa cushion should be soft, soft to the touch. Of no small importance is the filler. In addition to comfort, it is necessary to take into account its hypoallergenic properties. When choosing the filling of an accessory, you immediately need to exclude old fabric items or cotton wool. These materials come together over time, form hard lumps. Optimal options: synthetic winterizer, firebitech, foam rubber, holofiber, fluff. Foam or synthetic pillow filler is characterized by the absence of allergic properties, softness.
the cloth
The first step in tailoring a little thought is the choice of fabric. The material must be durable. Beginners are advised to choose simpler fabrics, for example, chintz, cotton. In the manufacture of pillows, fabrics such as silk, linen, felt, denim, calico, bike, and upholstery are often used. Sometimes, to create knitted pillows, an old knitted sweater, a voluminous pullover, is used. The most important thing is that the colors of the material are resistant, the surface is dense and does not allow the filler to fall out.
Each type of fabric used has its pros and cons:
- Flax – does not cause irritation, persistent, “breathes”. Less: it is easy to wrinkle, a little harsh, it sits quickly.
- Silk – durable, pleasant, wear-resistant (can withstand washing at 110 degrees), it passes air well. Less: expensive, crumpled quickly.
- Chintz is breathable, easy to care for. Disadvantages: short-lived, afraid of high temperatures, wrinkles easily and sits down.
Dense fabrics have their own characteristics. These include Firth, jeans, bike.
- Felt – a wide color palette, easy to use, no front or back side, composition: 90-100% wool. Less: afraid of high temperatures, may lose shape when improperly washed, spools appear.
- Denim (denim) – durable, breathable, eco-friendly, fashionable. Minuses: sits after washing, hardens, fades.
- The bike is hypoallergenic, low cost, practical, pleasant tactile. Less: inelasticity, difficulty in tailoring (crumbles).
When sewing decorative pillows, you can combine fabrics: for example, one part is made of silk, the other part is made of felt, as a result, the option is “winter-summer”. Inserts from several types of fabric look beautiful. If the material has fallen into disrepair, there is no need to rush to throw away the little thought – the sewed color flap will not spoil the appearance. Dummies of different sizes from colored upholstery give a highlight to the furniture.
Pillow decor
To decorate the finished pillows for furniture, you can choose any jewelry you like. Various accessories, applique, embroidery will look great. Looks interesting in the style of patchwork, sewn from knitwear. The finished thought is decorated with soft decorative elements: braid, flap, ribbon, less commonly used lightning, beads, buttons.
Product design is performed by any means. The most common decoration options:
- Application and print. Photo printing is available today, the image is durable and high quality. Printed patches can be part of the applique.
- The key element is the center of the decoration: a simple button, one or framed by a fabric, brushes, pompons, etc..
- Knitting, embroidery, lace can give an interesting and very expensive appearance.
- Embossed decor – bows, flowers, fringe, puffs.
How to sew a pillow on a sofa with your own hands
If an experienced needlewoman is able to sew a pillow without much difficulty, then beginners need to know the principles and sequence of work. The first thing to do is prepare everything you need in your work. Beautiful pillows on a sofa are made in two stages:
- Sewing the little thought, work with the selected filler.
- Making a pillowcase or cover for her.
First you need to prepare a set of necessary tools and materials:
- sewing machine;
- dense fabric for a bedrock – satin, calico;
- stuffing;
- tailor centimeter, pencil or chalk for marking the fabric;
- scissors, needle, pins, threads.
- cardboard, pattern paper, schemes, ruler,
- materials for decor;
- hoops, special threads or knitting needles if you plan to embroider or knit elements.
When all the materials and tools are assembled, the idea of a sofa cushion is ready, you need to move on to the sewing process.
- It is necessary to determine the size, shape. Suppose that a little thought is square, 45×45 cm.
- Draw 2 identical squares on the wrong side of the fabric. Along the perimeter add 2 cm for the seams.
- Fold the squares inward, pierce them with pins along the lines so that the fabric does not slip. Cut every detail.
Next, everything needs to be sewn:
- Sew three sides, stepping back from each edge of 2 cm. You can scribble on pins, this will not interfere with the machine needle, but will prevent the fabric from slipping.
- To bend suture allowances on one side and iron, to turn out a bedcloth “face” out.
- Fill the resulting bag with a filler, sew a hole manually, bending inwards the seams.
How to sew a pillowcase on a sofa cushion
To sew pillowcases for sofa cushions from the fabric that will be outside, you need to cut out the square details of a slightly larger size. The base was 45×45 cm, which means that the removable cover is 46×46 centimeters. A cover that is too small will not fit into a pouch filled with filler, or make it hard. It is best to cut out the main details (sides of the sofa cushions) from different fabrics: pattern, texture on the one hand will make it face, more simple material on the other – wrong side. Do not forget to leave seam allowances of 1-1.5 cm.
The sequence of making the pillowcase is similar to the process of working on a bed:
- Fold cut parts face inward.
- Chip with pins (photo).
- Sew along the perimeter with a machine line on three sides. For durability it is recommended to make 2-3 lines.
- All seams are ironed.
- Excess tissue is cut at a distance of at least 3 mm from the seam.
After the product is turned on the front side, corners are additionally formed. This is done with a needle: the fabric is gently stretched to the desired sharpness of the angle:
- The edges of the 4th side are bent inward by 1-1.5 cm, ironed.
- A little thought is inserted into the case, everything is aligned, adjusted to the corners.
- The hole is sewn manually with a blind seam.
At the stage of sewing pillowcases, it can be decorated with braid, scallops, a combined cover, borders, buttons, etc. Determining the decor, the first thing you need to pay attention to is the quality, color of the threads. They should ideally fit not only in color, but also in density, thickness. For example, denim, raincoat fabric involves the use of threads No. 40 (for finishing seams, dense fabrics), calico, flannel, bike – No. 60 (for linen and lightweight materials), silk, batiste, chintz – No. 80 (for thin fabrics).
Decorative braid is sewn to the pillowcase from the front side until the 4th side is stitched and the cover is put on a bedcloth. This is done manually:
- Decorative ribbons of any width are sewn to each side along the edges of the little thought.
- All decorative elements are attached to the bases (squares) on the front side with a simple seam.
- The pillow is sewn together, while the seams, fastening tapes are refilled inside.
- If the braid is not located on the edge, but on one of the bases, it can be attached before the sides of the pillow are sewn.
For border decoration, squares are cut with a large margin. The width of the stock is equal to the width of the borders, plus 2 cm for allowances for seams:
- Initially, borders are sewn along the edge on three sides.
- Next, the cover turns over.
- The line is made according to the size of the thought, also on three sides..
- The finished napkin is inserted into the hole.
- To close it, a line is kept on the fourth side, slightly departing from the edge of the thought inserted.
- The last part of the border is processed: the edges are bent inwards, ironed.
- They are stitched manually with a blind seam.
Pillow with scallops is performed on a different principle. Feston is a decorative element, an ornamental strip with a downward-facing pattern in the form of leaves, flowers, stepped teeth, waves. First, all the details are made, then they get together. Fabric festoons are serrated, rectangular, rounded. Plain or contrasting fabrics are used. It will take material for decoration (festoons), warp (squares for covers), zipper, compass or glass to draw the edges, a regular sewing kit.
Work begins with the markup of parts:
- Make a pattern. Leave 1-1.5 cm on the seams. To retreat so much from the edges of the fabric so that after cutting the squares 10-11 cm are left.
- Cut the resulting squares. The remaining square-hole fabric will be used when marking and cutting scallops.
- Mark the paper for scallops. Flat and equal edges will help to make a glass or compass. All cut.
- Pin the resulting pattern with pins around the perimeter to the edges of the fabric remaining from cutting the squares. Cut to pattern.
After that, he starts processing and grinding the edges of the festivals:
- Fold the cut parts together inward..
- Sew a machine along wavy lines (edges of festoons).
- Trim the pattern, at least 3 mm from the seams. Turn face out.
- To align the edges, make a line on all sides of the festivals. You need to do this from the outside, but very carefully and evenly.
- The resulting finish is sewn to the main part: the edges of the square are bent inward, superimposed on the scallop.
Each square is sewn on the front side from 3 sides. Further, the process is normal: a pillow is inserted inside. The fabric is aligned, the corners are straightened. The fourth side can be flashed with the machine immediately on top. But it is better to insert a zipper into it first. The clasp may not necessarily be sewn around the perimeter, sometimes it is sewn directly into the square.
Is it difficult to sew cushions for a sofa on your own? Can you provide some step-by-step instructions or tips on how to successfully tackle this DIY project?