The content of the article
- Step-by-step instructions and patterns for weaving bulk animals from beads
- How to weave a Dolphin figurine
- How to weave “Turtle” from beads and fishing line
- Crocodile weaving from beads
- How to make a volumetric “Monkey”
- We make a figure in the form of “Frogs” from beads and wire
- Video tutorials for beginners on weaving flat animals from beads
- Weave a cat-shaped keychain
- How to make a “Dog” from beads
- Lesson weaving brooches from beads in the form of an “Owl”
Weaving all kinds of animals is a very popular hobby. The resulting crafts look very attractive, cute, interesting. They can look very realistic, causing admiration of others. This new needlework is ideal for involving a child, a teenager. How to make animals from beads? Weaving figures is very easy, especially when there are visual master classes and video lessons in front of your eyes. Flat, voluminous products can become toys for little children, key chains, an original gift, a souvenir.
Step-by-step instructions and patterns for weaving bulk animals from beads
Beadwork is a useful activity for children, which involves in a bright world of creativity, develops imagination, fine motor skills of hands, trains patience, perseverance. The painstaking work with small beads is liked even by adults. Below you will find many step-by-step video tutorials to make volumetric and flat animals from beads. Bright butterflies, turtles, crocodiles, monkeys, cats, frogs, owls can become an original decoration of a schoolchild’s workplace, a lovely pendant for a phone, a backpack.
How to weave a Dolphin figurine
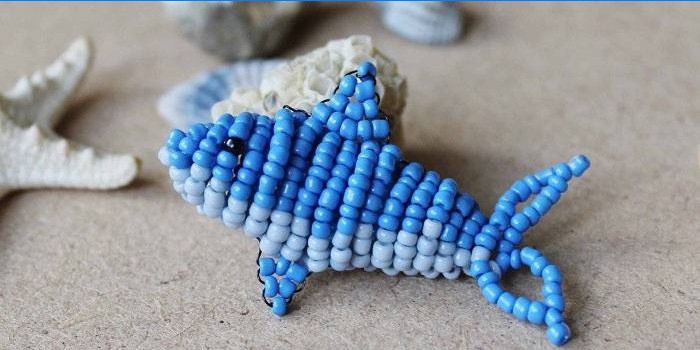
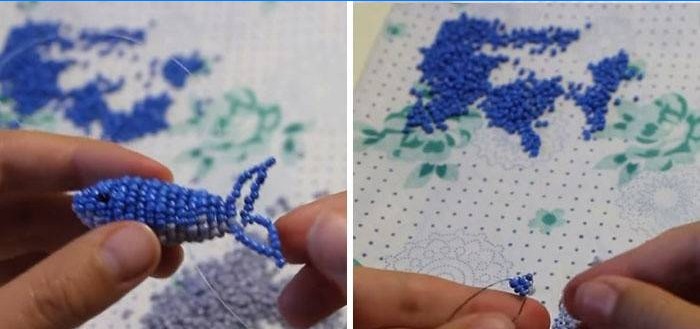
Volumetric weaving through beads allows you to create original, funny animal figures. Dolphin can become an interior decoration, a toy for a child, a gift for any occasion, a keychain for a backpack, bag, keys. It is better to use a fishing line, which is tightened tightly, while not tearing. But you can use the wire, which is much easier for beginners to work with. You will need a fishing line, a thin wire for fins, scissors, a scheme, three colors of beads: black, bright blue, blue.
Instructions step by step:
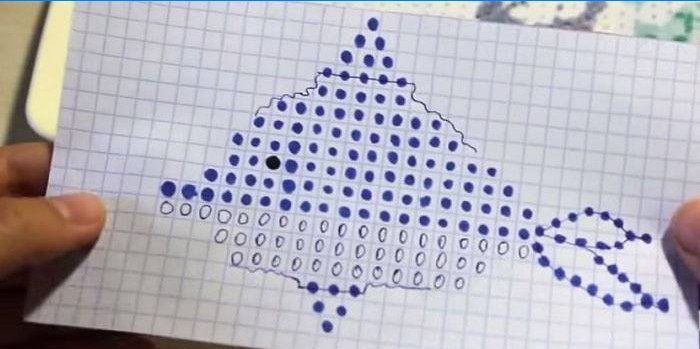
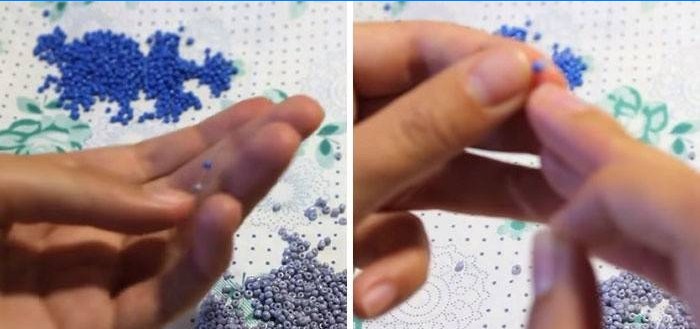
- Pour the beads into the tray for easy handling. Put the circuit before your eyes. Cut a large piece of fishing line. We begin to weave from the nose according to the pattern. Each layer in it will be performed by repeating twice, so that the product is voluminous. We collect one bead for the abdomen of the animal, one for the top.
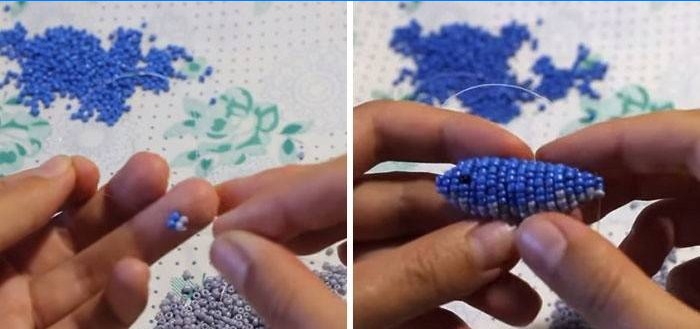
- Repeat the first layer in reverse order. In the resulting two beads we thread the second end of the fishing line, stretch to the end. In this way the whole figure will be woven.
- We continue to put on two, according to the scheme. Thread the second tip into beads, tighten.
- We continue to work according to the scheme to the tail.
- To make the tail of the animal, we collect 6 blue lines on one end of the line. To rotate, we string two more, we introduce a fishing line into the penultimate one. We pull to the body. Stringing six blue again. To finish, thread the line into the layer where the tail began. So do the second part.
- We make fins according to the scheme. Take a small piece of wire. We string from the end of the fin, weave like the body.
- Fasten the fins to the dolphin.
How to weave “Turtle” from beads and fishing line
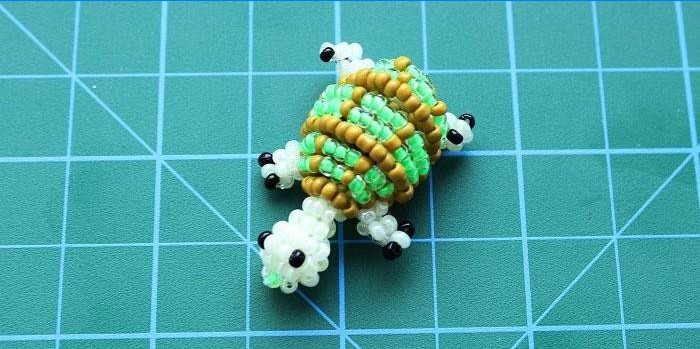
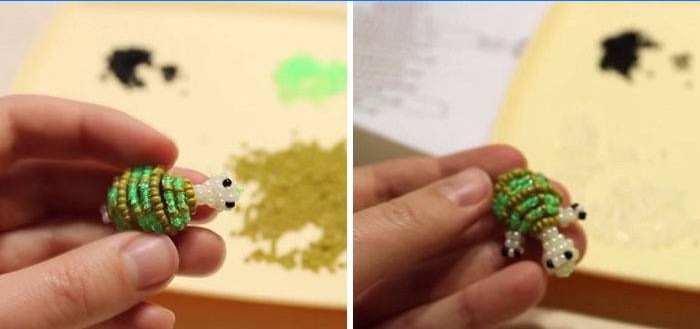
The next thing you learn is weaving a turtle. Such a cute figure is made very easy. For it you will need a fishing line, black, olive, bright green, transparent white beads. The creation of the animal will begin with the tail. Cut off 1 meter of fishing line and start:
- String one light bead, followed by two more, thread the fishing line.
- Go to the next row: string three light ones, thread a fishing line, tighten.
- We continue to weave the entire body of the animal according to the scheme, at the end we make a knot.
- According to the scheme, weave the legs, we attach to the body: two – near the head, two more – near the tail.
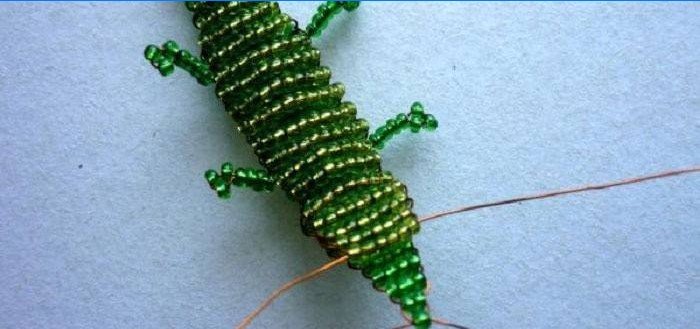
Crocodile weaving from beads
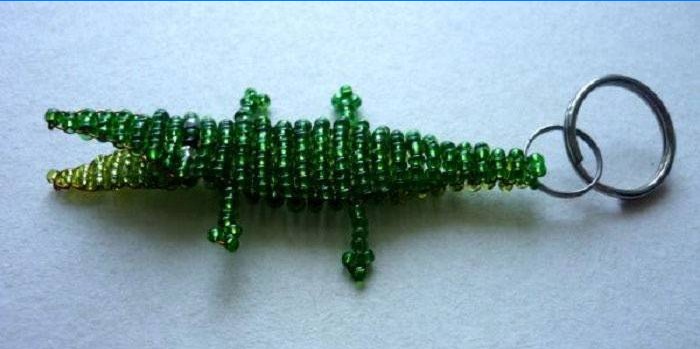
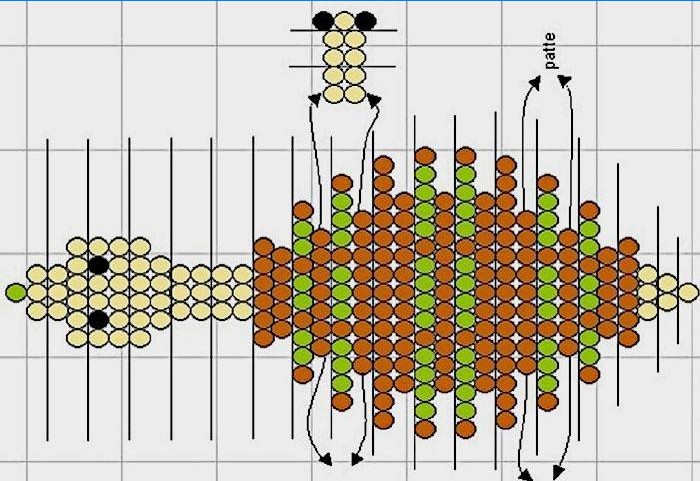
The guide below will help you weave a green crocodile. To create, you will need several colors of beads: yellow or light green for the tummy, dark green for the back, black and white for the eyes. Cut 30 cm of wire to make the lower jaw, 180 cm – for the body of the animal. Step-by-step instruction:
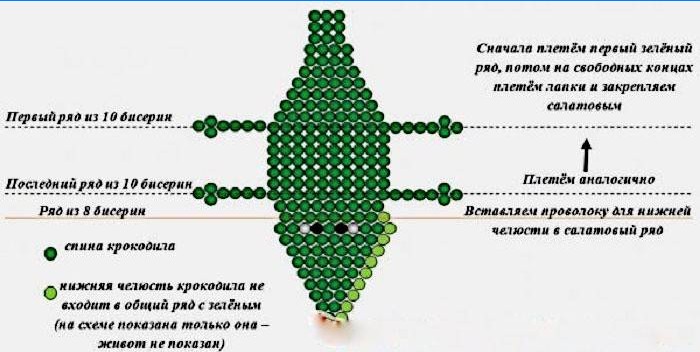
- Take a long wire, start weaving from the tail. We pick up three green, three light green, thread through the last ends of the wire, tighten.
- We continue to weave so that the green layer is above the light green. String three rows of three beads.

- Weave to a row consisting of 9 beads. String 10 green, thread the end. We turn to the legs: put 7 beads on the free ends, skip the last 3, thread through the remaining 4. When the legs are finished, string the lower green layer of 10 beads.
- We make 5 rows to 10. On the last layer weave paws. Adhesive row, consisting of 8, insert into the lower wire for the lower jaw.
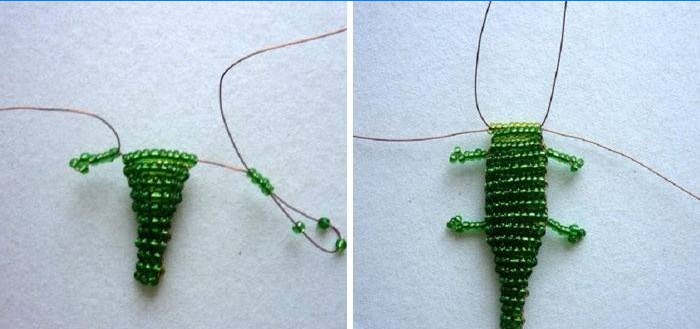
- Finish the upper and lower jaws. We fix the ends, the crocodile is ready.
How to make a volumetric “Monkey”
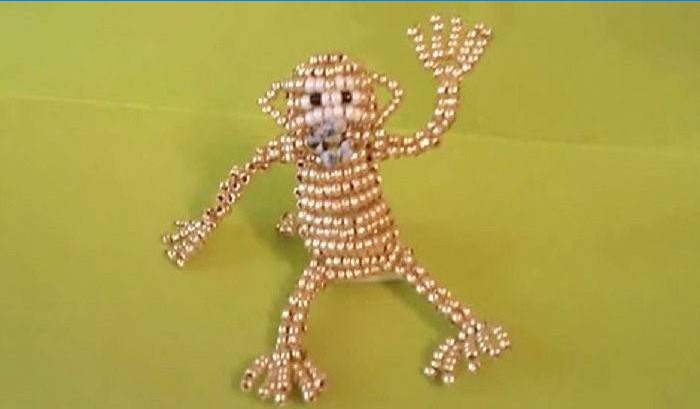
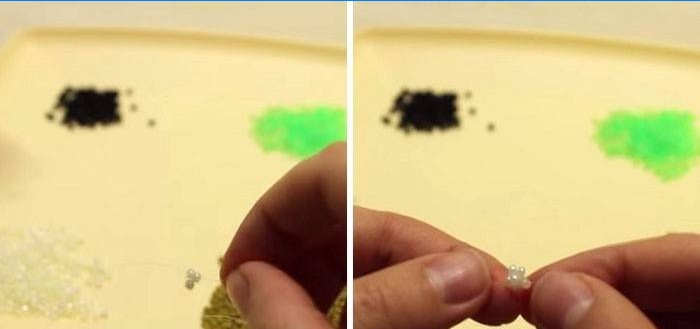
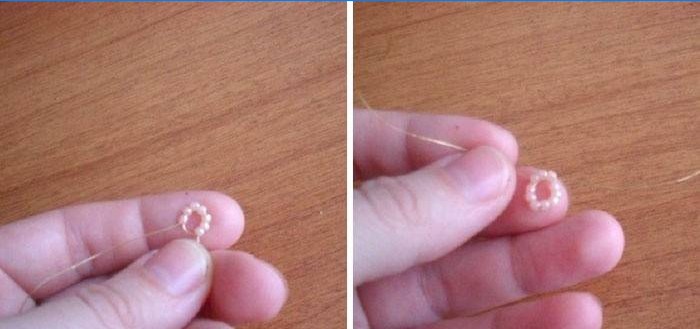
The next animal that you learn to make from beads is a monkey. Small, funny, it will be a great gift for a child or friend. The volumetric diagram of the animal implies the use of parallel weaving, as in all previous master classes. For making, prepare a dark color of beads that imitates wool, light for ears, eyebrows, muzzle, and a larger bead for nose. We cut the wire 90 cm long and begin to make the animal:
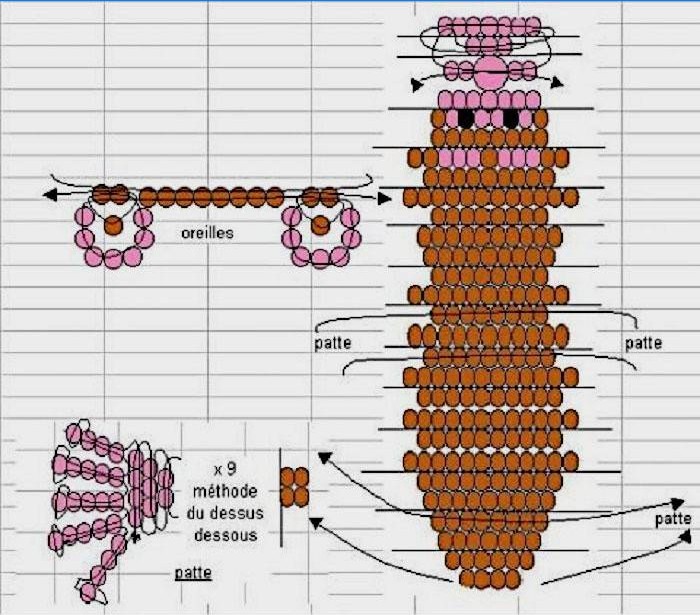
- String the first row, which includes 7 beads. We stretch the ends of the wire, forming a ringlet. This is the future lip.
- Next row including three beads.
- Weave that part of the face where the nose will be located. Stringed so that there is a large bead in the center.
- The bottom row includes 7 beads, the top row – taking into account the eyes.
- On the next row weave the ears of the animal.
- We weave the body, inserting an additional wire in the places of the future legs of the animal.
- After completing the torso of an animal, weave its legs in 9 pairs of rows of 4 beads.
- We make the foot flat: the first row – 2 beads, the second row – 3, the third row – 4.
- We throw out the fingers, the animal is ready.
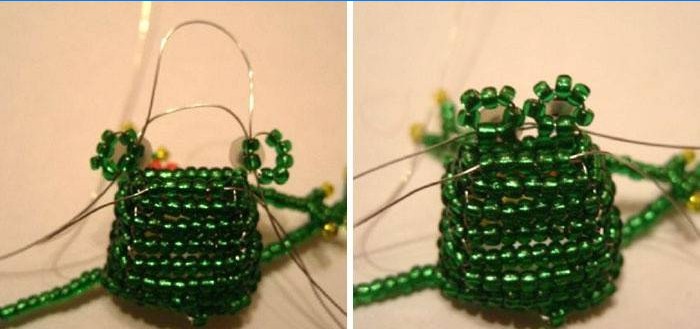
We make a figure in the form of “Frogs” from beads and wire
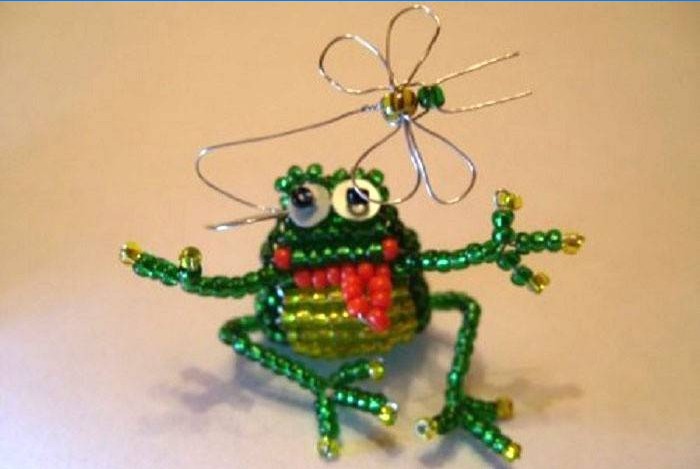
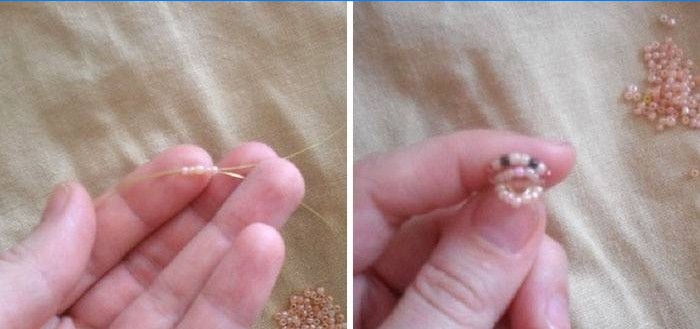
The next lesson is about creating a funny frog. For work you will need black, green, red, yellow beads. The basis is parallel weaving, which makes it possible to obtain a voluminous animal. If you wish, you can attach a wire fly to the top of the frog at the end. The phased instructions of the animal:
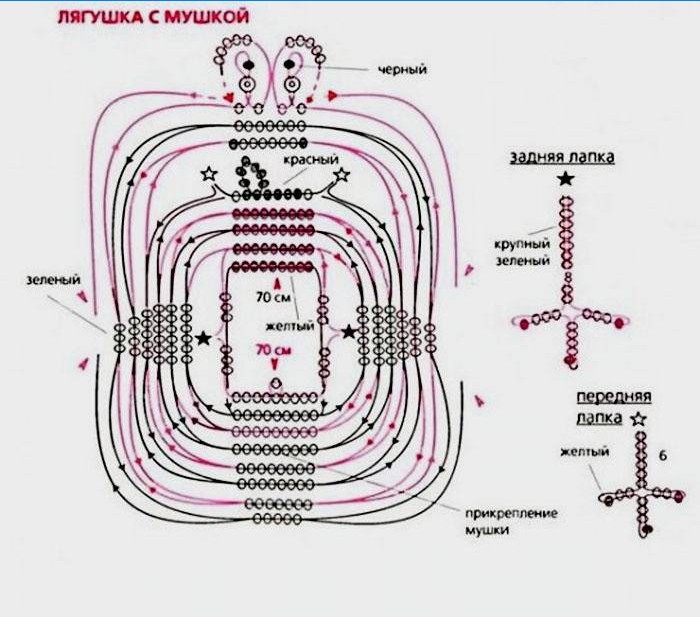
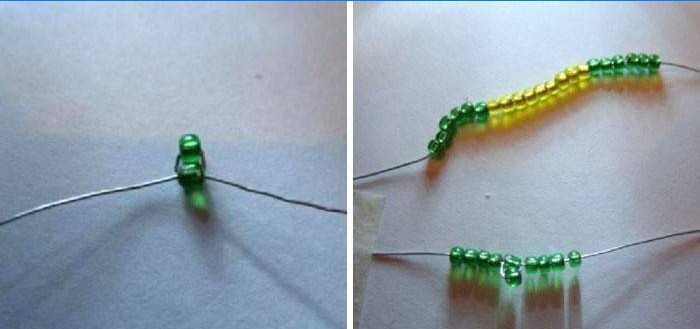
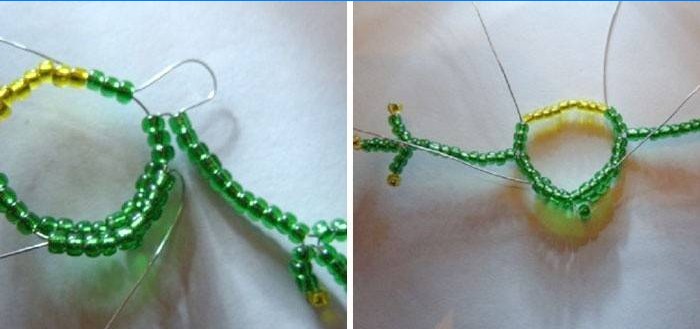
- We begin to weave with a ponytail, stringing two beads, sending it to the middle of the wire, crossing the ends on the second bead.
- On each end we put on 4 green, on the second piece of wire we string 6 green, 9 yellow, 6 green.
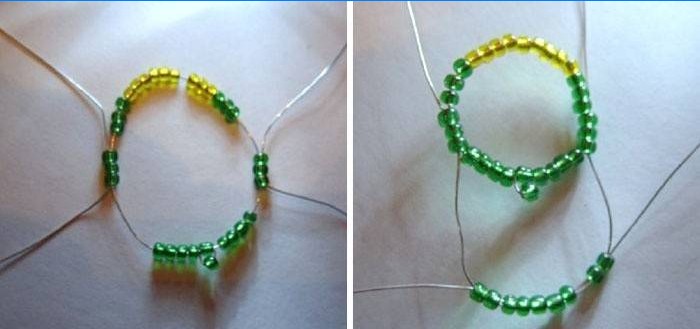
- We connect as shown in the photo. We cross the ends in three beads.
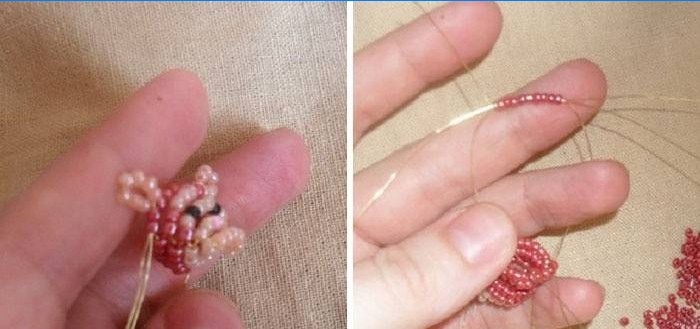
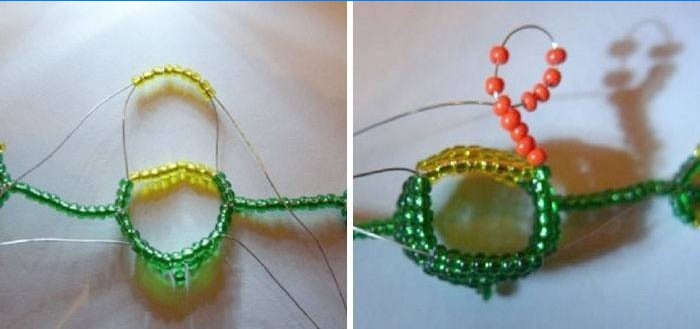
- We make the next row, weaving in parallel 9 green.
- We made the back, we turn the product in our direction. We make a foot: we type 14 green, 1 yellow, we pass the end through the last 3 green. So you get the first finger. So do the second and third.
- We return the end through the whole foot and 3 green ones on the belly.
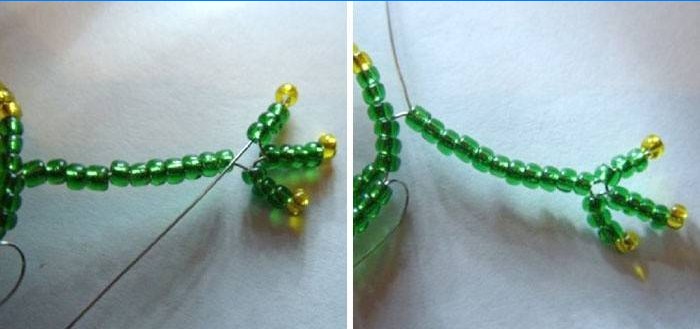
- We make a paw on the other hand.
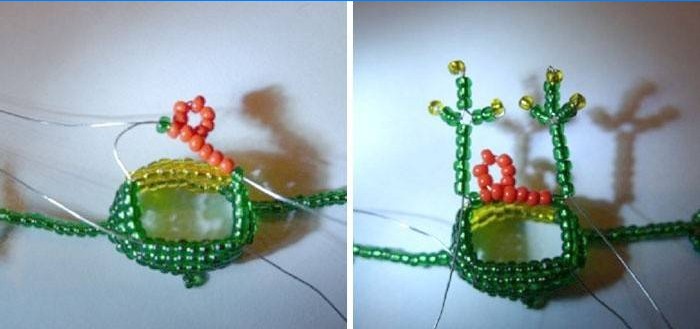
- Weave tummy.
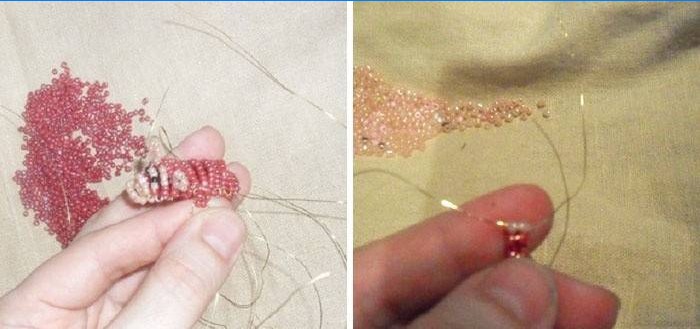
- We form 5 layers, weave the tongue with red.
- When the loop is formed, string one red and green.
- We continue to weave the body, forming the front legs, like the hind legs.
- We continue to weave according to the pattern, make eyes, stringing beads, sequins, black beads. We fix the sequin, returning the wire to it. String 6 green, return to the first green.
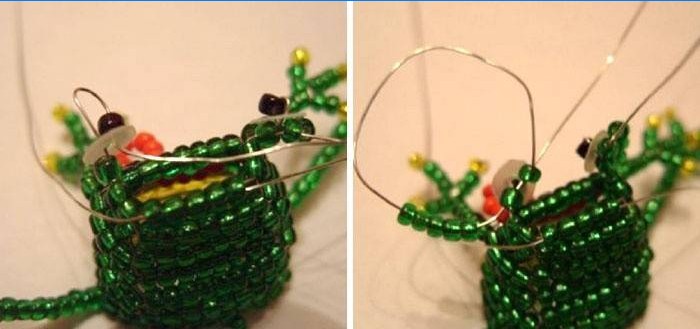
- Poke the wire in opposite pairs.
- Fasten, cut off the excess. Animal is ready.

Video tutorials for beginners on weaving flat animals from beads
Beadwork of animals allows you to create a lot of original crafts that you can use in a variety of compositions, sew on clothes, bag. They can become decoration on flowers, decor, various accessories. The main materials that may be needed during the work are beads, fishing line, wire, scissors, thread. Particular attention should be paid to the quality of the beads, because the final form of the product depends on this. To make the animals beautiful, neat, it is better to purchase Japanese or Czech beads.
For beginners, we offer you to master weaving flat animals from video tutorials. To do this, it is better to use a wire that allows the finished animal to bend. In the technique of flat beadwork of animals, schemes are used that are a color image where all the colors are highlighted, the number of beads in each row, the attachment points of individual parts. Watch the videos below to quickly learn how to create animals in a simple way to weave flat.
I’m really intrigued by the art of making animals from beads! Could someone please share some tips or a step-by-step guide on how to create these adorable bead animals? What materials would I need and what techniques are involved? Any recommended resources or YouTube tutorials would be greatly appreciated. Thanks in advance for your help!