Recommendation points
- 1. How to drive a very small nail without hammering your finger
- 2. How to screw a self-tapping screw into the edge of a rail or board and not split it
- 3. How to transfer a large area sheet alone
- 4. How to bring a long forest to a height
- 5. How to do operations for the installation of frame elements alone
- 6. How to cut the exact size on thin wood pieces
- 7. How to make a shank or a round bar

Every conscientious craftsman strives not only to constantly improve quality, but also to reduce the time spent. To achieve this goal, each specialist develops his own techniques and tricks, which are often kept secret. We will reveal some simple solutions to help you with your carpentry and finishing work.
1. How to drive a very small nail without hammering your finger
It’s easy, just replace your fingers with more “patient” material. Take a piece of cardboard or paper and make a hard strip out of it. Pierce this strip at the end with a nail. It will stick in the cardboard, you can direct and hammer, and then just tear out the cardboard.
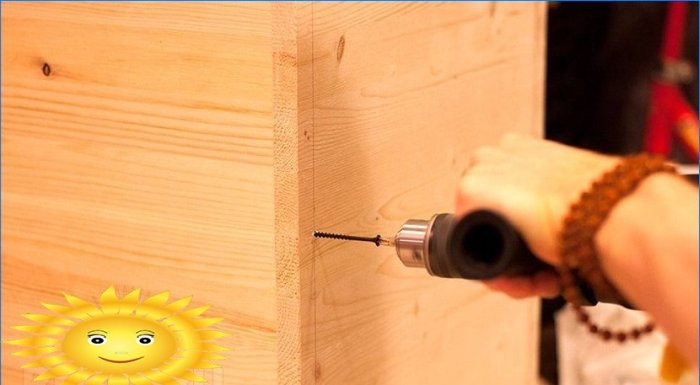
2. How to screw a self-tapping screw into the edge of a rail or board and not split it
Usually this problem occurs during the creation of the batten after cutting to size. The secret is to screw on a lath or board of a larger size – the stock of wood after the self-tapping screw will keep it from splitting. Trim in place after fixing. Pre-drilling the hole is ideal.
3. How to transfer a large area sheet alone
We are talking about plywood, gypsum board, OSB, magnesite slab. Lift a sheet from the pack, stand with your back to it, take it by the edges and put it on your back. In this case, the route must be planned in advance, because visibility will be limited. The method is good on large sites in calm weather. Narrow places won’t help.
4. How to bring a long forest to a height
If the task is to deliver a board or timber more than 4.5 m to the second floor window, you should not try to feed the front end directly to the recipients. It is much easier to rest it on the ground (it is better to first drive a stopper) and gradually raise the far end until the board stands upright. The receiver will receive the top end of the board at this time. Then, while nudging, help the recipients tighten the board inward..
5. How to do operations for the installation of frame elements alone
There are several techniques for working on wooden frames, using which you can assemble the frame of a small house by the efforts of one master. These are “general purpose” techniques and can be useful at any site of work.
Use temporary shelves to hold the board or timber in place for alignment and fixation. It is convenient to make them from improvised material or metal plates (corners).
Installing the board alone, video
It is quite difficult to move a tree along a tree – the fibrous structure of the wood clings and does not give free play. To eliminate the frictional force, make a bed of sand – so even a heavy bar 200×200 mm can be moved by one.
Moving the board with sand filling, see the video
Use casters, blocks and all kinds of wheels, in particular, furniture ones, to the maximum. By creating pass-through roller bearings, you can easily and accurately handle long and heavy material. Such a support can be installed when feeding the board up, this will significantly speed up the process.
Videos with supporting clips
6. How to cut the exact size on thin wood pieces
Oddly enough, this can be done with paper. To do this, glue an even circle of thick paper onto a regular metal disk and install this cutter in a drill or drill. Most often, this precision is required for artistic performance or large-scale modeling..
Cutting wood with a paper disk, video
7. How to make a shank or a round bar
This carpentry trick is known to many experts. The device allows you to grind cuttings, round slats and dowels from small-caliber timber (up to 50×50). To do this, you need to make holes of a suitable diameter in a 100×100 bar – more than the specified diameter of the product by 20 mm. Then the cut is made with a circular saw. The bar itself is installed on the circular in such a way that the cutting edge is at a distance of a given product diameter from the inner plane of the hole. Place the workpiece in a drill or hammer drill (in drilling mode) and run it into the hole with the saw and hammer turned on. Feed carefully, avoiding distortions and excessive pressure.
Round handle with your own hands – video instruction
Using this principle, you can experiment with the shapes of the blanks..
Of course, it is impossible to find out all the tricks, since the masters are reluctant to disclose their methods – they get it by trial and error. The best experience is your own, so everyone can collect their own collection of secrets.
What are some practical tips or techniques that professional carpenters use to ensure their work is of high quality and craftsmanship?