Recommendation points
- Basic principles of lightning protection construction
- Installation of a lightning rod
- Catenary wire lightning protection device
- Down conductors and ground loop
To protect electrical equipment and prevent fire hazardous situations, it is recommended to protect buildings and equipment with lightning protection systems. Since the services of specialized teams are quite expensive, there is a desire to do everything yourself. In this article we will tell you how to make a full lightning protection.
In regions with difficult climatic conditions, where ground lightning strikes are frequent, lightning protection systems are becoming a prerequisite for safety. Every year in Russia there are 6-10 lightning strikes per km2. And although most regions can be conditionally considered lightning-proof, the damage from a potential strike is in no way comparable to the cost of basic protective devices. Buildings that rise above the surrounding area are at greatest risk. The presence of protection against lightning is, of course, mandatory for buildings with a height of over 20 m, objects with a high degree of explosion hazard, such as gas stations and boiler houses, warehouses with flammable materials. Other objects require an individual approach to the organization of lightning protection.
A lightning rod is a device that serves to protect buildings and structures from lightning strikes. As a rule, it consists of a lightning rod (lightning rod), a down conductor and a ground loop. Popularly, this device is often called a lightning rod..
Basic principles of lightning protection construction
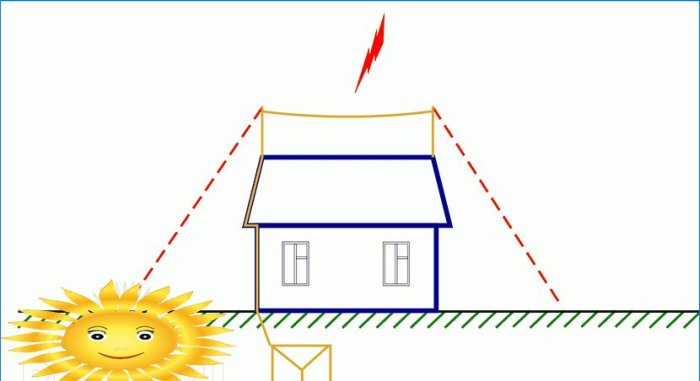
In a broad sense, a lightning protection device is a conductor towering over a protected object or territory. Its task is to take a lightning strike on itself and lead it to the ground, where it will be distributed along the ground through the ground loop.
Using a rod lightning rod: 1 – lightning rod; 2 – protected area; 3 – down conductor; 4 – ground loop
A rod lightning rod protects not only the area directly below itself, but also the area of a certain size around it. The protective zone has the shape of a cone with a top at 85% of the height of the lightning rod. The base radius is related to the height of the cone 1: 1.73.
If the lightning rod is installed at the corner of a building with an opposite corner distance of 5 m and a height of 3 m, the spire height will be approximately 8.7 m plus the height of the building itself. The protective zone of a catenary wire lightning rod stretched horizontally is also calculated. However, in this case, the safety space is defined by a triangle, which is 85% of the distance from the ground to the lowest point of the rope sag. The width of the protection zone refers to the height of the suspension of the cable as 1: 1.67.
The cross-section of the lightning rod and down conductors for lightning protection systems up to 50 m in height must be at least 80 mm2. The main materials in the manufacture of system elements are:
- Galvanized pipe with a diameter of 25 mm.
- Smooth reinforcement from 12 mm.
- Steel strip 40×4 mm.
- Steel cable from 14 mm thick.
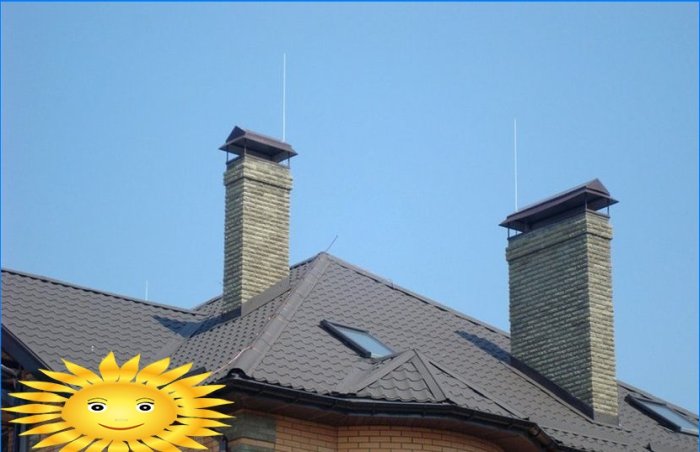
In addition to the conductivity of the conductors, there is also a requirement for high resistance to wind loads. For this reason, the spiers of lightning rods are sectional with successive expansion of the pipe in the lower tiers, and cable ties on the ridge of the roofs provide intermediate fastening..
Installation of a lightning rod
There are several options for manufacturing a lightning protection capstan and several methods for its stable fastening. The most common spiers are attached to the gables, walls and corners of buildings; free-standing lightning rods are also used..
To facilitate installation, only the upper tier of the spire is made of solid material, the lower expanding tiers are made of a pipe. The length of the longline is determined by the resistance of the material to bending under the influence of hurricane wind. On average, the restrictions on segment length for different materials are as follows:
- Pipe 25 mm – no more than 5.5 m.
- Pipe 32 mm – no more than 8 m.
- Pipe 40 mm – no more than 11.5 m.
In this case, the length of the unsecured end of the spire cannot be more than 14 m, regardless of the material of manufacture. To maintain high lightning rods, a system of three cables with a thickness of 3.5 mm or more can be used, which are stretched and fixed to the spire below the functional height of the lightning rod (less than 85% of the total length) and angle steel crutches driven into the ground.
The lightning rod segments are connected with bolted flanges. The thickness of the threaded part and the number of bolts should be selected based on the principle that the total cross-section of the connecting elements should not be less than 1.4 cross-section of the pipe profile. It is also possible to join by welding with the imposition of a reinforcing band made of steel strip.
If the lightning rod is installed on a solid foundation (screed, paving slabs, asphalt), to fix the foundation, it is enough to drive a pipe with a diameter smaller than the base of the lightning rod into the ground under the coating to a depth of at least 15% of the spire height. Above the ground, 50–70 cm of pipes are left, a lightning rod with support elements welded to the end is put on it. If the lightning rod is installed on bare ground, it is required to pour a concrete pedestal to a depth of at least 5–7% of the lightning rod height and weighing at least 35 kg for each meter of the spire height.
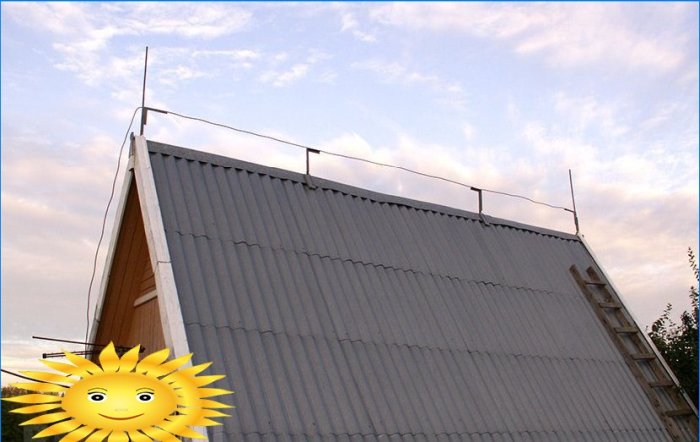
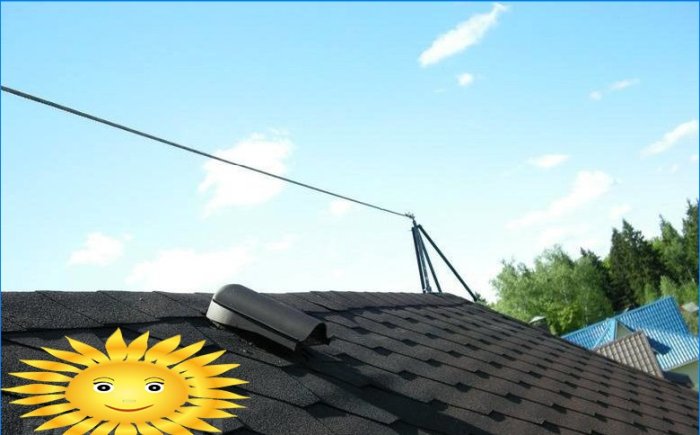
Catenary wire lightning protection device
For large buildings, catenary wire protection is more attractive than a lightning rod. It is presented in the form of two sturdy pillars fixed to the roof gables and protruding above the ridge to a sufficient height for the roof profile to fit into the protective zone. A cable with a thickness of:
- 12 mm at length up to 20 m.
- 14 mm up to 35 m length.
- 16 mm at length up to 50 m.
For maximum tension, the racks must have struts rigidly fixed to the ridge, and the cable must have screw ties. The presence of cable spans over 15 m is undesirable, therefore it is recommended to install additional supports with a wire ring at the end into which the cable is passed.
If it is not possible to securely fix the extreme posts, the ends of the cable are lowered from the roof and fixed to stationary structures. Therefore, the roof pillars are only subject to axial loads..
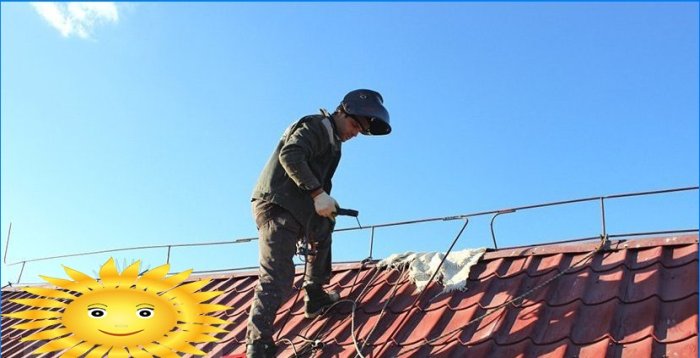
Instead of a wire rope, galvanized steel wire can be used; this option is more acceptable from an economic point of view and is used in loop catenary wire lightning protection. The structure consists of a wire stretched at a low height (not less than 35-40 cm) along the lines of the gable overhangs, ridge, valleys and cornices.
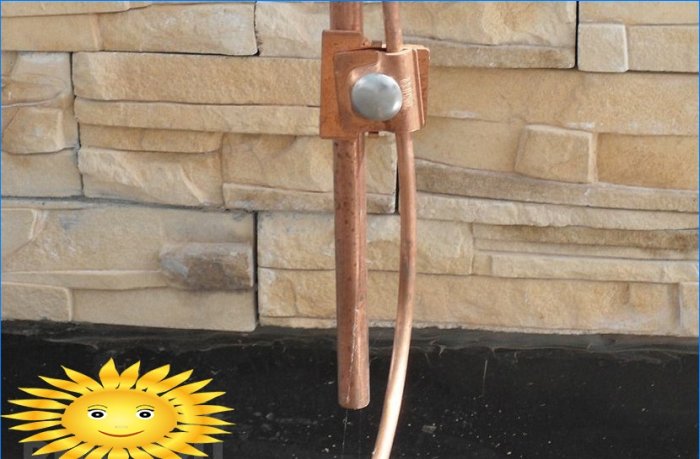
The cable protection elements are connected by welding, the seam section is at least three times higher than the nominal section of the conductive parts. The cables are connected to the posts and down conductors with bolted clamps in the amount of 2 pieces per one connection point. Extension of the cable is possible only by the method of bending with an overlap length of at least 1.5 m.
Down conductors and ground loop
To spread the current over the ground, a deep ground loop is used, connected to the lightning protection system by a down conductor. Usually it is 40×4 mm steel strip or 14 mm hot rolled wire. It is important that the resistance between the extreme point of the lightning protection system and the point of entry into the ground does not exceed 2-4 ohms.
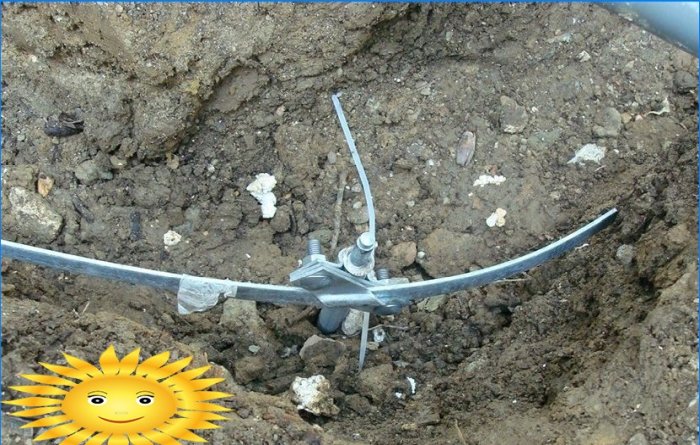
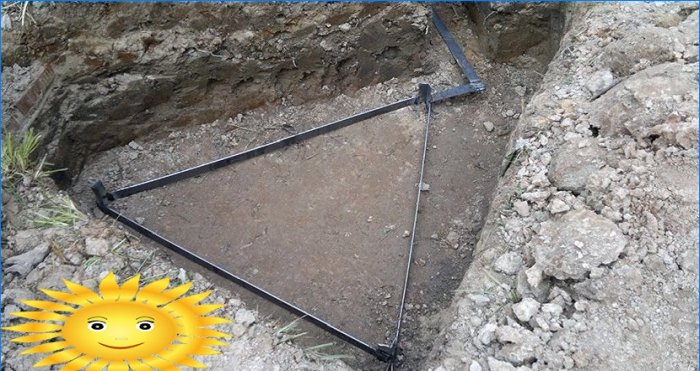
The grounding system is represented by three angle steel electrodes with a shelf of 50 mm, driven into the ground by at least 2.5 meters and at a distance of at least 2 meters from each other. The electrodes are immersed by the shock method, the tails are scalded with a steel strip of 40×4 mm. Usually tails and harness are hidden in a trench 30-40 cm deep.
An independently made circuit will not be superfluous to test by an electrical laboratory for the effectiveness of current spreading over the main ground electrodes. If the spreading resistance exceeds the standard values, additional electrodes will need to be hammered.
Can anyone offer guidance on how to set up DIY lightning protection? I’m looking for professional advice to ensure the safety of my property and loved ones. Any tips or recommendations would be greatly appreciated. Thank you in advance!
Can someone provide professional advice on DIY lightning protection methods? I’m interested in protecting my home from lightning strikes, but I’m not sure where to start or what steps to take. Any suggestions or recommendations would be greatly appreciated!
Can anyone provide some professional advice on DIY lightning protection? I’m interested in learning more about how to safeguard my property during storms, but want to make sure I’m approaching it correctly. Are there any tips or specific measures I should consider? Any input would be greatly appreciated. Thanks in advance!