Recommendation points
- Tool selection
- Corner trim
- Attachment connections
- Straight joints
- Adjoining walls and ceilings
- Working with small fragments
Today we will talk about how to cut a ceiling plinth. The operation is simple, for master finishers with a set of professional tools, but a beginner often has questions. We have prepared for you the best techniques for trimming, joining and sealing the gaps between the individual segments of the ceiling plinth.
Tool selection
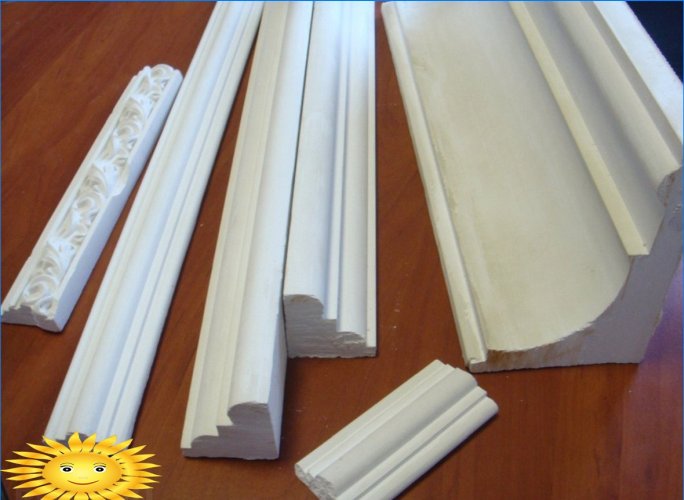
Ceiling skirting boards are made of expanded polystyrene. A wide range of tools can be used for its processing: both highly specialized and general-purpose. The choice depends on the extent to which the work is planned to be carried out: to be used in the course of the professional activity of a finisher or one-time when renovating your own apartment. With due diligence, there will be no difference in trimming quality, but the time it takes to complete the work can be quite different..
The effectiveness of tools for cutting foam is determined by two factors: the speed of the cut and its cleanliness. Both factors are extremely important for professional repairmen: in some cases, a large amount of work is required in a short time, in others, accuracy of fit is important to create complex applications that simulate stucco molding. Only one tool fully meets both requirements – a foam cutter, which is based on the separation of a part with a heated Teflon string. Optionally, you can mount the tool above the turntable or use a miter box made of non-consumable material.
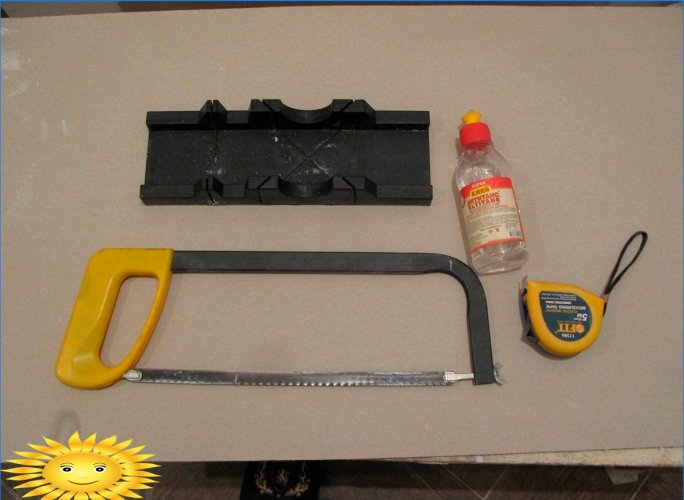
At home, cutting the foam moldings can be done in a regular hacksaw miter box. The use of the saw itself will not lead to a positive result: a too large tooth will tear the smooth extruded surface severely. In turn, sharp sectional blades on the one hand do not have sufficient length, on the other, they are tightly jammed in the cut. You can use the cheapest kitchen knife sharpened on a coarse abrasive to form a micro-saw on the blade, as well as a jigsaw with a diamond wire or a simple fine-toothed hacksaw for metal.
With rare exceptions, trimmed parts do not converge at the installation site into a tight joint. If the gap cannot be eliminated by rough squeezing the edges of the skirting board, the trimmed edges will need to be adjusted in place. For these purposes, you can use a tool for fine work: a scalpel bought at your nearest pharmacy, a knife with a new sectional blade or an emery grater..
Corner trim
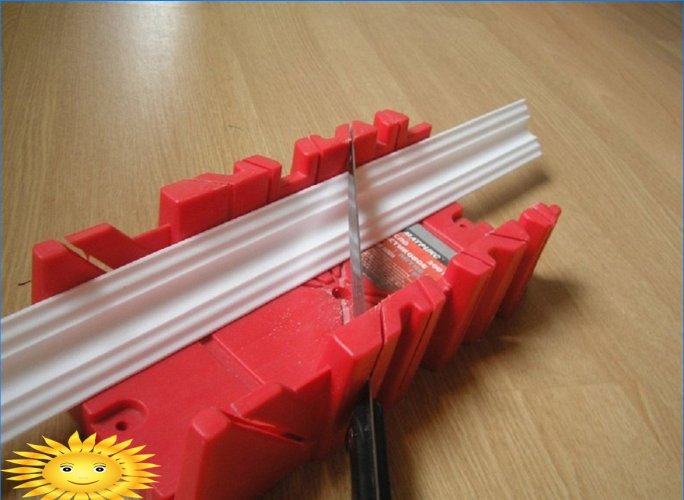
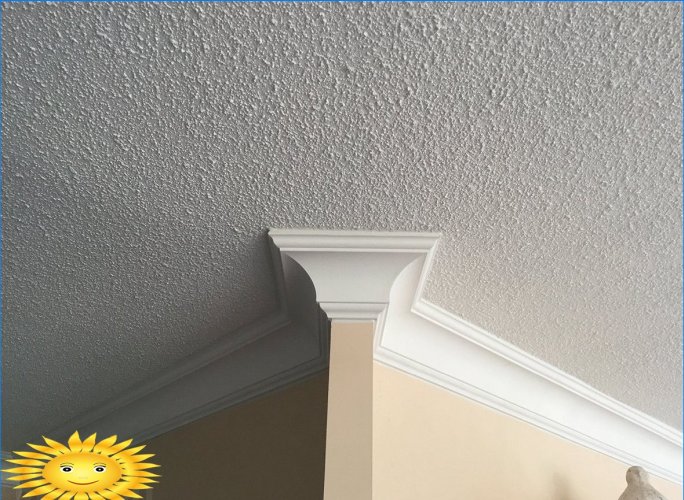
Not every corner joint of the skirting board is brought out at a perfect right angle. In each place it is necessary, using a square, and in the optimal version – a small one, to determine the deviation of the formed angle from 90 °. For this value, you need to adjust the rotation of the cutter table or adjust the position of the cutting tool using the gaps in the slots of the miter box.
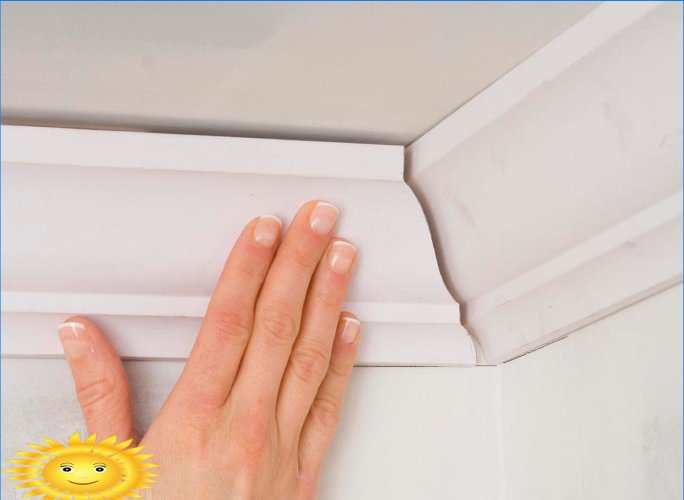
When joining the skirting boards in the corners, you must first cut both opposite elements. If the skirting board is already installed on one of the walls in the immediate vicinity of the corner, the element must be cut with a tolerance of a couple of centimeters to make an accurate and neat corner joint, and then make a straight cut fit. Two opposite fragments with corner trimming must first be tried on dry, noting for yourself the width of the gap and which parts of the cut do not allow tight joining. In the future, we will take it as the norm that foam moldings and baseboards are joined without a visible gap, which in practice is very simple to achieve.
First, you need to make sure that if a gap is formed at the joint, then it must be uniform, which indicates the correct choice of the trim angle. To completely eliminate the gap on the cut of the skirting board, you need to manually re-fill by cutting off the edges of the bevel facing the wall and ceiling. In this case, a thin strip of even oblique cut should remain on the profile part, approximately no more than 2-3 mm. After both corner fragments are qualitatively matched, it is necessary, holding one of the compared parts, to mark on it a line of direct cutting to the end of the already glued plinth. If one of the walls is free, the corner element is glued to it first..
After one of the abutting fragments is glued in, you need to attach the second to it and mark the cut line of the direct joining on the back side. When trimming straight parts, you need to give an allowance of half a millimeter. Thus, when the second corner fragment is glued in, the edges of the joint are pressed tightly into each other, and the joint is gap-free.
When cutting a plinth into a corner, remember that the elements to be joined are cut mirror-like. For inner corner upper the edge of the skirting board is shortened
For outside corner bottom the edge is shortened
Corner joints are the most difficult to trim, especially if both edges of the skirting board require corner joints. In such cases, it is recommended to leave larger allowances, up to 1–2 mm in total. First of all, it is necessary to technologically join the outer corners, where the presence of a gap will be most noticeable. Even if this creates a gap in the inner corner, it is quite easy to fix it with a plastic putty..
Attachment connections
Sometimes it is necessary to adjoin the skirting boards to the stucco elements of complex shapes. Props columns, as well as overlays at the seams between finishing materials force to resort to even more painstaking work technique.
First, you need to take a junk segment of a figured element, trimmed at a right angle, and transfer its profile with a marker to an arbitrary plane. When cutting a template, the cut must be made from the outside of the marking. According to the template, a preliminary cutting of the plinth is performed first, then the excess foam is cut off with a model knife or scalpel, which interferes with a snug fit. The final fit can be done with fine abrasive paper wrapped around the finger. Please note that, as in the case of corner joining, here it is necessary to leave a small tolerance towards the joint with a straight cut, which is much easier to perform..
Straight joints
The trimming techniques described above force the overlap to be left in areas with straight seams. The appearance of gaps in these places is also quite easy to avoid, while their presence will ruin the appearance and can result in the appearance of cracks at more complex joints..
There are two techniques that can be used to make a precise straight cut. The first is to use the flat end as a stop, along which the surface of the plinth placed underneath is cut with a thin blade. Obviously, the visible part of the joint lies exclusively on the surface, so a deeper cut in the back of the plinth will not play a significant role. When performing such a cutting operation, it is important not to deepen the blade too much so that it does not jam, and the cutting tool must also be sharp to avoid burying the edge..
The second technique consists in cutting the overlaid fragment in relation to the inserted one. It is necessary to first perform a preliminary trimming with a tolerance of a few millimeters, then remove a wide bevel, forming a beveled back part. Further, by carefully pressing in the part to be cut and removing thin strips from the thin end, you can achieve a very tight abutment at the joint. Usually, with such a fit, not a gap is formed, but a flare – a protrusion, which is simply enough to eliminate with sandpaper.
Adjoining walls and ceilings
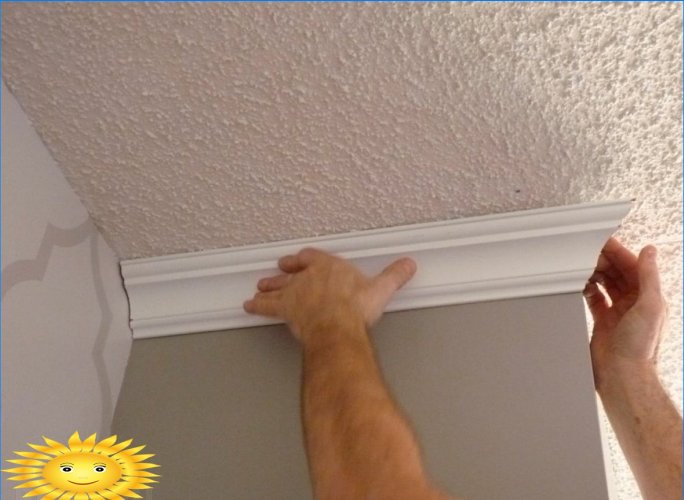
When adjusting plinth fragments, you must always take into account the curvature of the walls and ceilings, so that significant gaps do not form at the junction. That is why all the fragments are first tried on dry before gluing. If a gap forms in any place, mark the protruding area with risks and remove a commensurate layer from the adjacent edge using sandpaper or a sharp blade.
Gaps up to 1–1.5 mm thick can also be closed with a sealant by gluing the skirting board with residual stress, which is possible due to the flexibility of the foam. First, the junction area, where the gap is formed, is covered along its entire length with a white acrylic sealant flagellum with a thickness slightly larger than the gap width. Further, without exerting significant pressure on the plinth, the flagellum is pulled with an elastic spatula. In this state, the molding should be left for 2-3 minutes, then lightly press the plinth against the wall or ceiling. After waiting for a small amount of sealant to appear, remove it with a spatula.
Also, white acrylic sealant will help mask gaps that could not be avoided during trimming. Interestingly, nothing better than a finger for sealing curved joints has been invented. The sealant should be pushed into the gap with a little effort, smoothed, and then wiped off the excess with a wet, clean cloth.
Working with small fragments
We strongly recommend starting edging with moldings with the smallest elements, which will seem strange to many. This is actually a very important aspect of working with skirting boards, especially if the product has a complex profile and is not cheap. The first thing to do is to determine the layout and location of the additional elements that will end each linear section of the plinth.
It is recommended to start gluing skirting boards with elements used to decorate projections of columns, niches and other objects of internal architecture. In these areas, the presence of joints will be most noticeable, therefore, the plinth fragments should be solid in linear areas. Among other prerequisites, the most important is the complexity of working with small parts: they often have to be made again, changing the cutting angle.


Can anyone provide some tips or instructions on how to properly cut a ceiling plinth? I have never done it before and I’m not sure where to start. Are there any specific tools or techniques that I should be aware of? Any advice would be greatly appreciated. Thank you!
To properly cut a ceiling plinth, you will need a few tools including a measuring tape, pencil, miter box, and a handsaw or power saw. Start by measuring the length you need to cut, marking it with a pencil on the plinth. Use the miter box to create a straight and precise angle for the cut. Make sure to cut slightly longer than your measurements to allow for any mistakes. Take your time and use steady hands to ensure a clean cut. It’s also helpful to practice on scrap pieces first. Remember to always wear safety goggles and gloves when cutting. With practice and patience, you’ll be able to expertly cut ceiling plinths in no time. Good luck!
Can anyone please share a step-by-step guide for cutting a ceiling plinth? I have never done it before and would appreciate some tips or techniques to ensure a clean and accurate cut. How do I measure and mark the correct length? Which tools should I use? Any advice would be highly appreciated. Thank you!
To cut a ceiling plinth, you will need a measuring tape, pencil, miter box, and a fine-tooth saw. Measure the length needed for the plinth and mark it on the back side. Place the plinth in the miter box with the marked line aligned with the cutting slot. Hold the plinth firmly and slowly saw through the material using a smooth motion. Make sure to keep the saw straight to ensure a clean cut. Double-check the measurements before cutting to avoid mistakes. Sand down any rough edges for a professional finish. Practice on scrap pieces to gain confidence before cutting the actual plinth. Hope this helps!
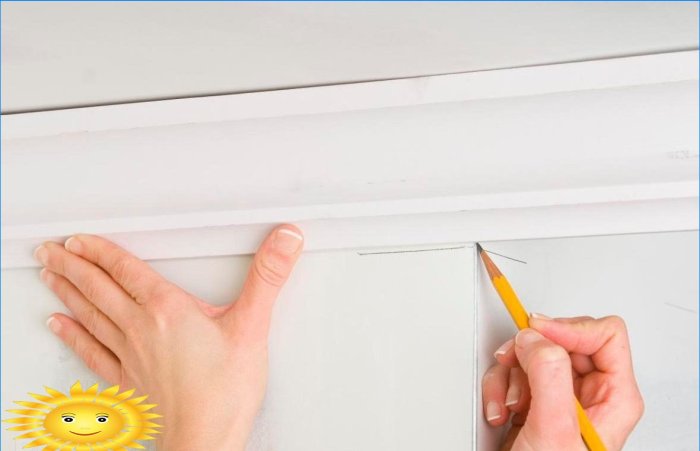
To cut a ceiling plinth, start by measuring the length you need to cut off using a measuring tape. Once you have the measurement, mark it on the plinth using a pencil. Make sure the pencil line is straight and accurate.
Next, use a miter box or a miter saw to make the cut. Place the plinth inside the miter box, lining up the pencil mark with the cutting guide. Hold the plinth securely in place and carefully cut along the mark with a fine-toothed saw.
Alternatively, if you are using a miter saw, adjust the angle to 90 degrees and place the plinth flat against the saw fence. Line up the pencil mark with the blade and make the cut by slowly lowering the saw.
After cutting the plinth, sand down any rough edges with sandpaper to ensure a smooth finish. Double-check the length before installing it on the ceiling to avoid any gaps or overlaps.
Overall, precision is key when cutting a ceiling plinth, so take your time and use the right tools for the job. With practice, you’ll be able to achieve clean and accurate cuts for a professional-looking finish. Good luck!