Recommendation points
- Typical defects of a parquet floor
- Elimination of unevenness of the base
- Parquet creaking in large areas
- Local repair
- Parquet looping
Parquet can last a really long time if it is properly maintained. And its main advantage is the ability to completely restore decorative attractiveness. But a procedure such as scraping parquet can be just part of a whole range of repair work, which will be discussed in this article..
Typical defects of a parquet floor
Parquet is considered to be the most attractive floor covering from a decorative point of view. Unlike an ordinary floorboard, it is never painted, but can only be tinted with compounds that leave the natural texture of the tree visible. Protective treatment with varnish, oils or mastics only emphasizes the beauty of the parquet, but each of these coatings has its own disadvantages. Scratches quickly appear on the varnish, and oil and mastics do not protect the wood itself from mechanical damage and physical wear of the top layer.
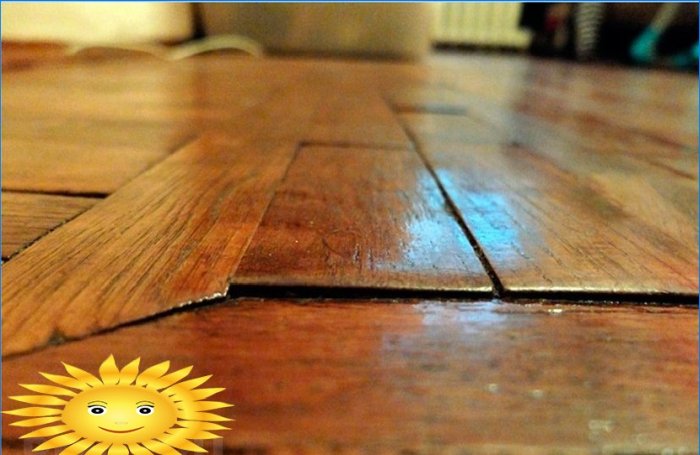
Another “unpleasant” feature of the parquet is the appearance of a squeak and even loose planks. This is due to the fact that the parquet has small dimensions of the planks, and they are not fixed on logs, but laid on glue on a solid, even base. But the base itself may not be ideal, and the glue loses its elasticity and adhesion strength over time. Plus, the wood itself dries out, which leads to the appearance of cracks in the flooring. It is the “backlash” of the strips and the gaps between them that cause the creak.
All these defects can be eliminated by doing the parquet repair with your own hands..
Elimination of unevenness of the base
This is the largest and most time consuming type of repair. In fact, it can be compared to a major overhaul of the floor, but using the old coating.
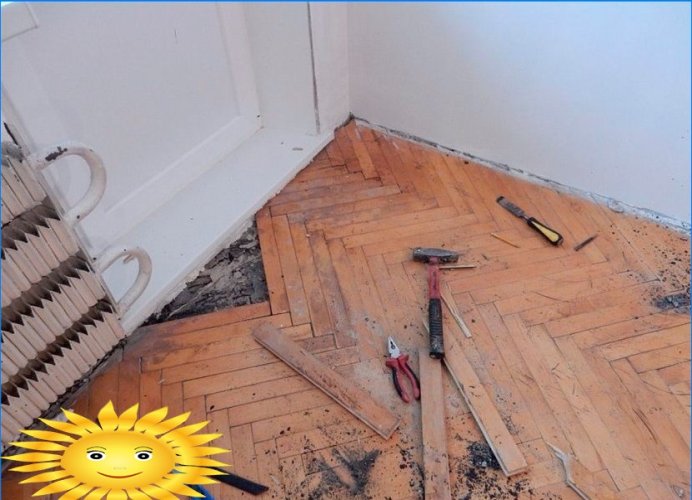
In order to eliminate the unevenness of the base, you will have to completely disassemble the parquet, being careful not to damage it when dismantling the plank.
At the next stage, the subfloor is inspected, the necessary measures are taken to prepare it for leveling and the surface level is restored using one of the following methods:
- filling the screed;
- the use of self-leveling compounds;
- plywood laying;
- installation of the floor on adjustable joists or adjustable plywood.
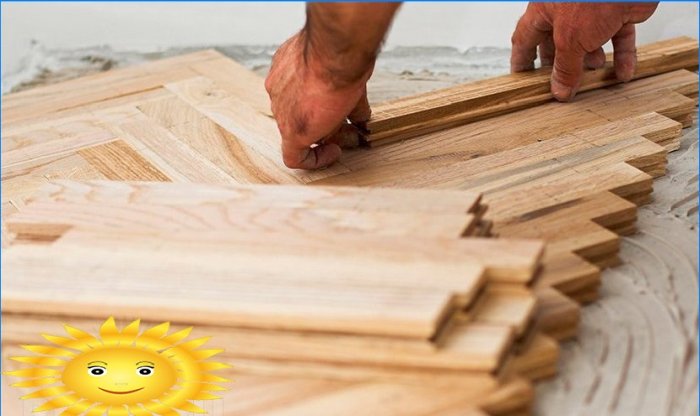
Then re-lay the flooring.
When assembling parquet, you will almost certainly need to add repair planks. They are selected as close as possible in texture and color, and, if necessary, they are also tinted..
Parquet creaking in large areas
Parquet can squeak almost over the entire surface and on a flat base. In this case, this is a consequence of the glue’s loss of its properties and (or) drying out of the wood..
The second factor is most typical for block parquet. So dense wood species, possessing excellent resistance to mechanical stress, have a rather high shrinkage coefficient (as a rule, higher than that of soft woods). Therefore, poorly dried wood at the production stage and a violation of the optimal humidity regime in the room during operation lead to the appearance of gaps between the planks.
And in this case, you will have to completely sort out the parquet and add repair planks.
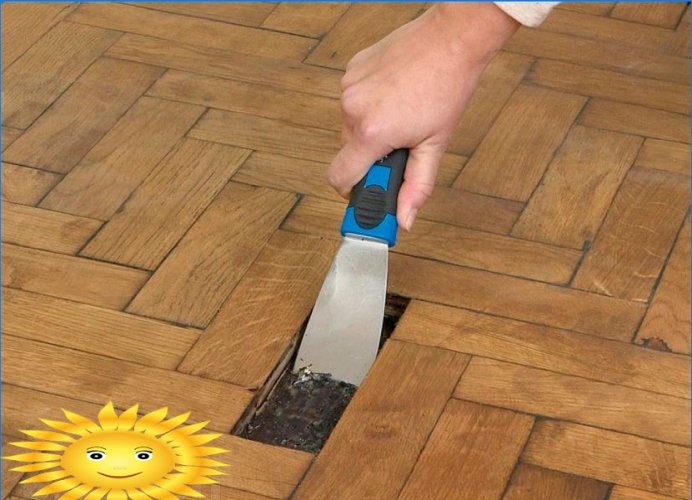
Local repair
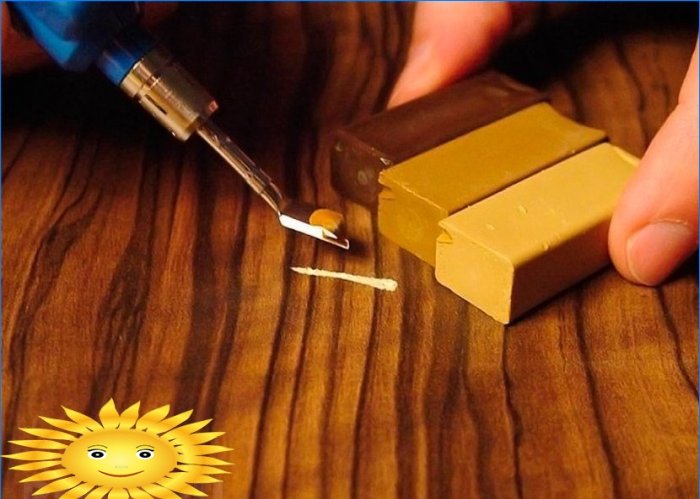
If the creak appears in a small area, then you can limit yourself to the injection of the repair adhesive through the body of the strips, after drilling small holes. And the gaps between adjacent strips need to be filled with “grease” from heated wax with the addition of turpentine or mastic on an oil-wax basis.
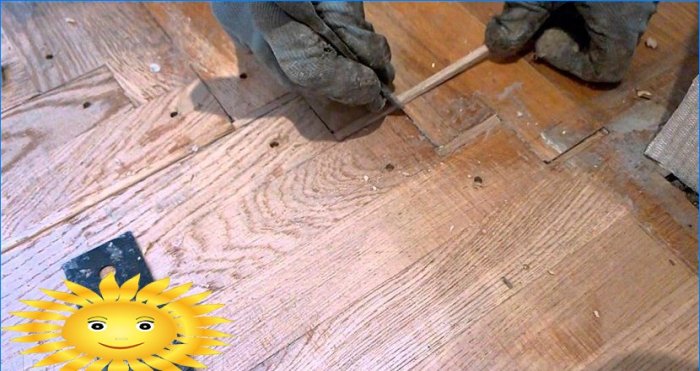
If a separate plank is seriously damaged, it can be replaced without rebuilding the parquet. For this you need:
- Carefully cut out the old bar.
- Carefully remove the remnants of the ridges from the grooves of the adjacent planks.
- Remove remnants of old adhesive from the base.
- Choose a new bar that is as close as possible in texture and color.
- Adjust its dimensions to the seat.
- Cut off the spikes at the repair bar.
- If necessary, earn extra thickness with a plane or jointer.
- Apply new adhesive and refit the repair insert.
- Pull it with parquet nails (when laying on a screed – to adjacent planks, when laying on plywood – to the base).
- “Sink” the heads of the finishing nails into the plank body.
Deep scratches need to be puttied – this will reduce the thickness of the removed top layer when scraping the parquet.
Parquet looping
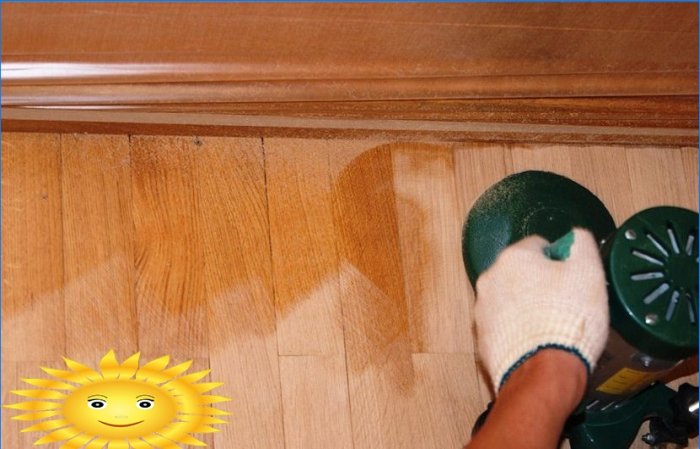
If we talk about modern finishing of newly laid or repaired parquet, then it would be more correct to say “parquet polishing”. For large areas and for processing the periphery along the baseboards or in the corners, grinders are used. Although they differ in the type of “working bodies”, they all use abrasive materials, and not a cutting blade like a cycle.
First, there is a primary polishing of the parquet. At this stage, the overall surface is leveled, eliminating uneven floor wear in different areas.
Then the cleaned surface is checked for the presence of microcracks, putty, and after the putty has dried – polished “clean”.
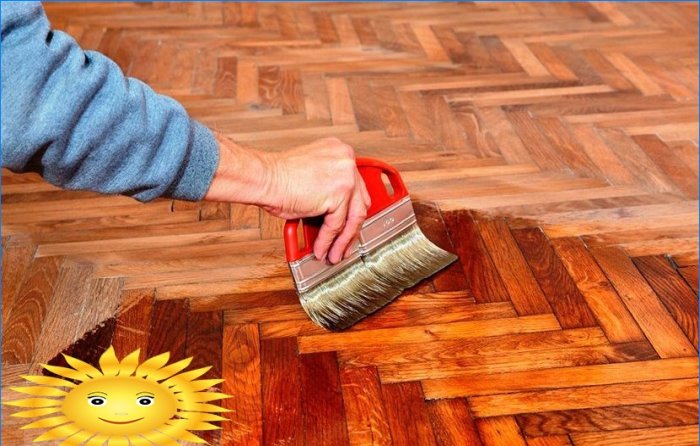
And while most grinders have either built-in dust collectors or a vacuum outlet, some of the dust will end up in the air. Therefore, it is necessary to wait a few hours for the dust to settle, vacuum it again and start finishing with varnish, oil or mastic..


Can you provide some tips or recommendations on how to effectively repair, sand, and refinish parquet flooring as a DIY project?
Hi there! I’m curious to know if DIY repair, sanding, and sanding of parquet flooring is a feasible task for someone with limited experience in home improvement projects? Are there any specific tools or techniques that beginners should keep in mind before attempting this project? Any tips or recommendations would be greatly appreciated! Thanks in advance!