Recommendation points
- Types of mixtures for leveling screed
- Floor leveling technology
- Preparation of the base
- Volume calculation and solution preparation
- Pouring and distributing the mixture
- Rules to be followed
There is no difficulty in preparing a subfloor surface with near-ideal quality, for example, using a self-leveling compound. Today we will tell you what modern materials are provided for these purposes and how to plan the floor for laying the coating in a single contour.
Types of mixtures for leveling screed
The main feature of leveling screeds is the ability to maintain low viscosity and high mobility of the mixture with a short setting time. Unlike conventional cement mortar, which hardens evenly, a self-leveling mixture hardens rather quickly, but loses fluidity only at the final setting stage. This property results from the specific ratio of water to the base binder, as well as through the use of special modifiers.
In total, there are two types of self-leveling screeds, of which the most popular are compositions based on cement binder. Their main drawback is the limited thickness of the leveling layer, even for top manufacturers it is no more than 20 mm. At the same time, cement screeds have the shortest curing time, due to which, the next day after pouring, repair work can continue at the facility. The choice of a mixture on a cement binder will result in a durable surface that is resistant to high humidity and has improved criteria in terms of fire safety.
Another type of mixtures is anhydrite, in which cement is completely or completely replaced by gypsum binder, and the mass fraction of the filler is also increased. Due to this, the mixture gives less shrinkage, which allows pouring the screed with a layer thickness of up to 120 mm. However, at the same time, the rough coating remains excessively hygroscopic; it cannot be used in high humidity conditions. Therefore, self-leveling screeds of this category are used mainly for preliminary leveling of the floor, followed by pouring the composition on a cement binder..
When choosing a self-leveling mixture, the type of floor base must also be taken into account. Monolithic ceilings and cement screeds may have gaps through which the super-mobile mixture will flow quickly enough, therefore, repair compounds must be purchased in the complete set with the coating. When installing a self-leveling screed on a wooden base, make sure that there are no additives in the mixture that can shorten the life of the wood, for example, casein. The ideal version of the mixture would be one that contains superplasticizers and reinforcing fiber..
Floor leveling technology
The cost of a screed for leveling without beacons is higher than that of DSP or concrete. Considering that the difference in floor level is on average about 60–80 mm in buildings with prefabricated ceilings and 40–50 mm in houses with monolithic slabs, the cost of a self-leveling mixture will be very impressive. Therefore, preliminary leveling is carried out using a DSP, and then the surface is leveled with a self-leveling mixture, the minimum thickness of which is not limited.
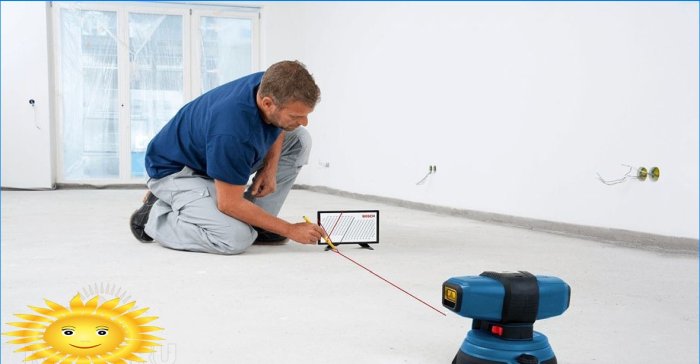
To get it right, you first need to build a virtual ground plane that goes through the highest point on the floor. This can be done both with the help of a laser axial plotter, and with an ordinary water level. As a rule, the highest point is located at one of the walls in the case of precast-monolithic floors and extremely rarely can be located in the central part of the floor, which is typical for monolithic structures.
All floor marks located below the zero plane will be indicated with a “-” sign. It is necessary to find a conditional line from which the drop is more than -25 mm. Starting from this line, alignment is performed using the DSP, after which a single plane is drawn using the leveling mixture. This approach significantly reduces material consumption and increases the speed of work..
There are situations when the lowest point of the floor is located in the area of the front door and it is not possible to raise the floor here to the level of the zero plane. In such cases, the zero plane can be artificially lowered to 20-30 mm, ignoring the resulting “take-off” of the floor. In this case, visually distinguishable irregularities are not formed, however, the consumption of materials is significantly reduced and a strong floor difference between the apartment and the entrance is excluded.
Preparation of the base
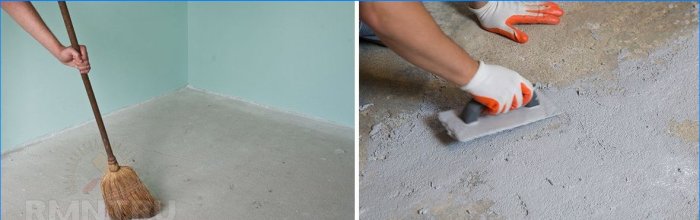
Before pouring the self-leveling mixture, the surface of the base should be carefully treated. The first step is to remove all residues of building materials adhered to the floor during construction or wall decoration. They must be knocked down with a hammer or puncher, and then manually removed the resulting debris. If the floor has gaps, large cracks and all kinds of gaps where leaks are possible, such defects are repaired with a repair compound.
The second stage is general floor cleaning. As a rule, it is carried out using an industrial vacuum cleaner, but you can also use a household vacuum cleaner if you first manually collect large fractions. General cleaning tasks are to remove dust from the corners between the floor and the wall, as well as remove small debris from crevices, cavities and pores. Without this, one cannot count on high-quality adhesion..
At the third stage of preparation, the entire floor surface is treated with a Ceresit CT-19 “Betonkontakt” primer. Priming will improve the quality of the bond between the leveling screed and the base, and will also help to normalize the water separation of the fine mixture. Priming is performed by wetting the floor with a continuous layer, followed by rolling with a thread roller.
Volume calculation and solution preparation
The required amount of the mixture is calculated by averaging the difference. If at the highest point of the floor the layer thickness is 5 mm, and at the lowest it is 25 mm, then the formed screed wedge will have an average thickness of about 15 mm. The consumption rate for each individual type of screed is indicated by the manufacturer, but on average it is 7–9 kg of dry mix for a coating of 1 m2 a layer of 5 mm. When calculating the volume, it is necessary to lay a margin of about 3% to level local depressions and compensate for leaks.
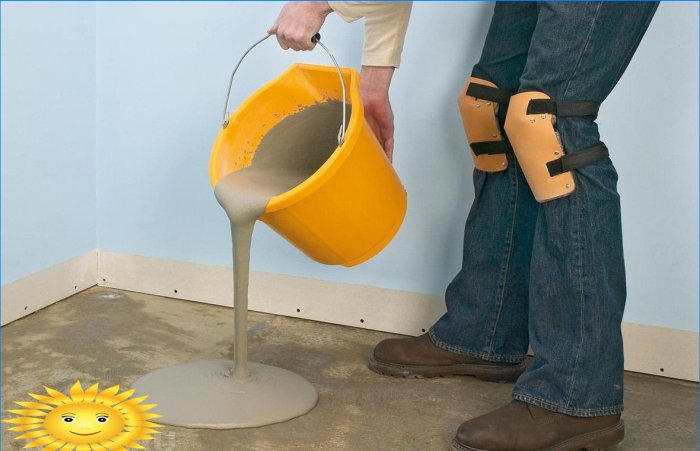
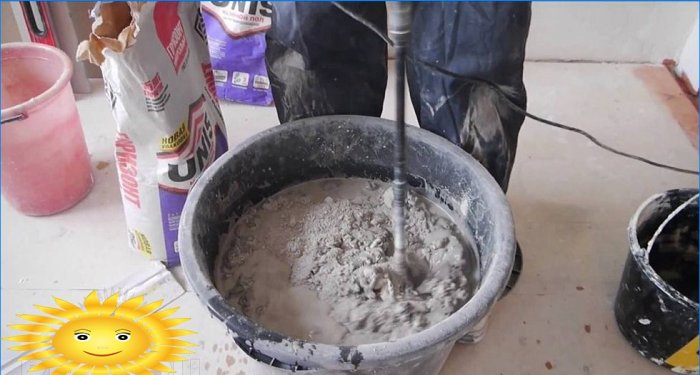
It is possible to prepare a self-leveling mixture manually, but the volume of each portion of the batch should be at least 100–120 kg in dry form. This will require a container with a capacity of at least 100 liters and a powerful electric mixer. The ratio of water and dry mixture is determined by the manufacturer’s recommendations, these proportions must be adhered to with high accuracy, using a measuring container.
The second method for preparing the mixture is automatic feeding from the mixing apparatus. Such equipment is widespread in large cities and renting it is a really good way to save on work time and labor costs for workers. The whole process of preparing the mixture is fully automatic, while pouring can be performed without dividing into contours.
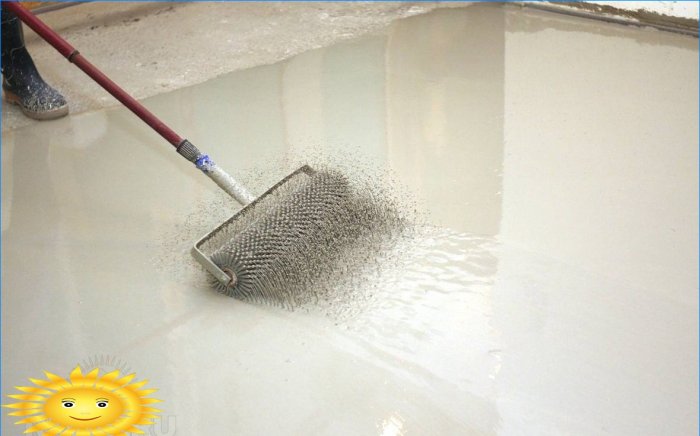
Pouring and distributing the mixture
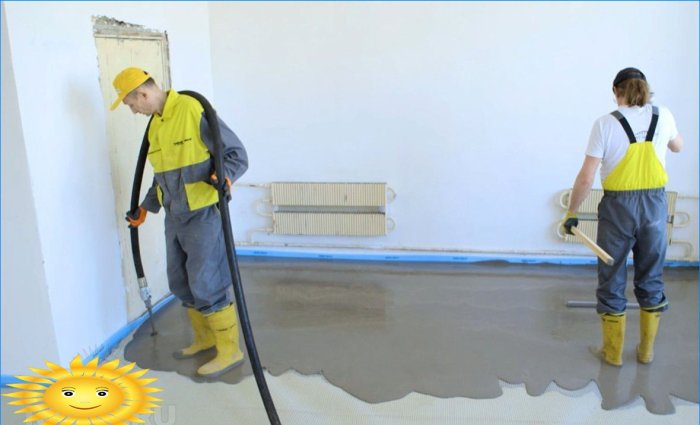
To plan a single subfloor level for the entire apartment or floor of a residential building, it is necessary to divide it into so-called cups. To do this, in the doorways of each room, a guide profile is attached to the floor using dowels, which is removed after the mixture has cured. The need for division is due to the short pot life of the mixture, but this does not matter when mixing in the machine.
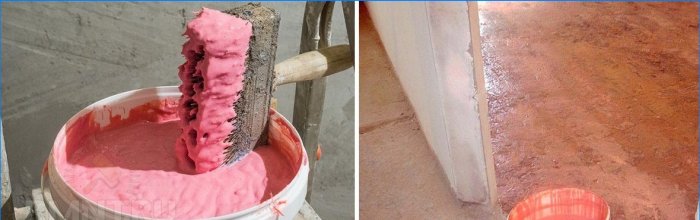
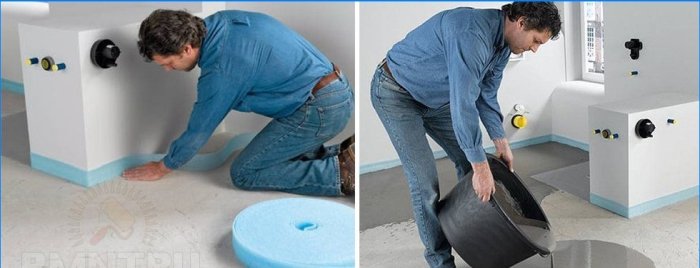
Before pouring each cup, it is necessary to lay an expansion tape made of polyethylene foam around its contour. After that, using a marker, the level of the zero plane is marked on the tape, which is 5 mm higher, that is, the actual level of the finished floor.
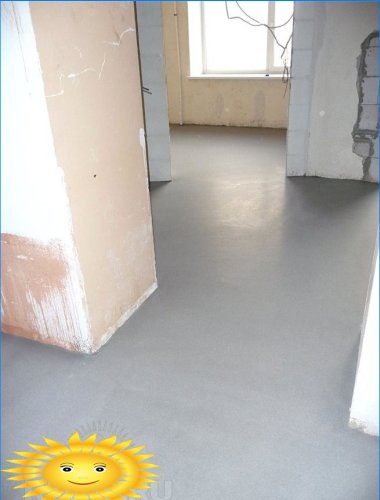
When the markings are ready, the mixture is poured into the center of the room. The self-leveling screed spreads well and does not require additional distribution effort. It is enough to roll it with a needle roller, thus removing air bubbles and excluding further shrinkage. The mixture must be poured into the cup until its level is equal to the marks on the tape. After hardening, the remaining tape must be cut off with a knife, dismantle the partition from the profile and completely remove the tape at the open edge of the screed. Subsequently, the level of the surface of the already poured cup is transferred to the tape of the adjacent one, thus, after the completion of the work, a single horizontal plane of the subfloor is formed, which is primed the next day in order to eliminate residual dust formation.
Rules to be followed
As a summary, we list the main technological requirements, non-compliance with which is guaranteed to lead to the destruction of the screed immediately or over time:
- Do not exceed the permissible thickness of a particular type of screed.
- The proportions must not be violated when mixing the mixture with water.
- Installation of a compensation tape is strictly required.
- Priming the floor before pouring the screed is strictly necessary..
- The screed must not be subjected to operational loads until the end of the specified holding period.
- The screed cannot be used as a topcoat.

What are the key steps involved in leveling a floor with a self-leveling mixture, and what factors should be considered before attempting this process?