Recommendation points
- How to determine the size
- Bed base
- Bed and safety guards
- Using the lower storage area
- Organization of a work or desk
- Ladder options
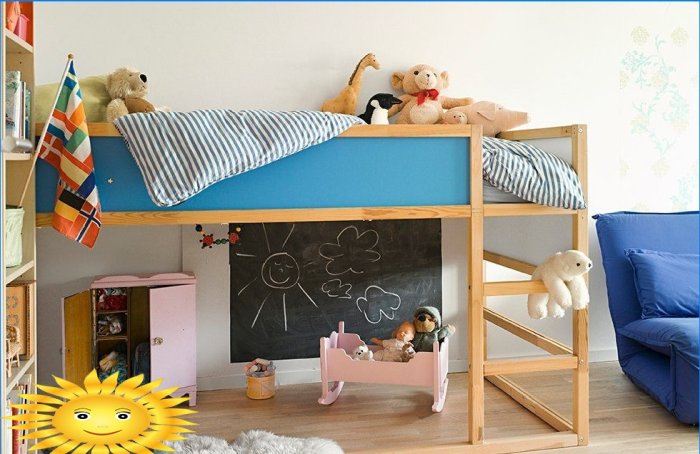
Today we will talk about one of the best ways to organize the space of a child’s room and free up more space for games and exercise. We will consider the main nodes of the attic bed and show you how to independently design furniture, taking into account individual needs.
How to determine the size
It is necessary to distinguish between loft beds for a child and an adult. In different cases, there will be significant differences in bed dimensions, structural strength and type of installation. We will consider several options for the device, along the way, giving tips on scaling furniture.
First of all, you should decide on the size of the bed. They are always determined by the length and width of the available mattress, and the reason for this is quite simple: it is much easier to purchase a suitable mattress and adjust the bed structure to it than to look for an orthopedic product of the appropriate format.
The height of the bed is usually measured from the ceiling so that the maximum free space remains in the lower zone. The easiest way to determine a suitable height is to measure your own height while sitting. For an average adult it is 80–100 cm, for a child – 50–70 cm. It should be noted that this distance is a clear gap between the surface of the mattress and the ceiling. Also remember that babies grow quickly and the loft bed can get cramped over time..
Bed base
The design of the bed is quite weighty; it must also support the weight of a person sleeping on it. There are three types of fairly reliable carrier circuitry, each with its own advantages.
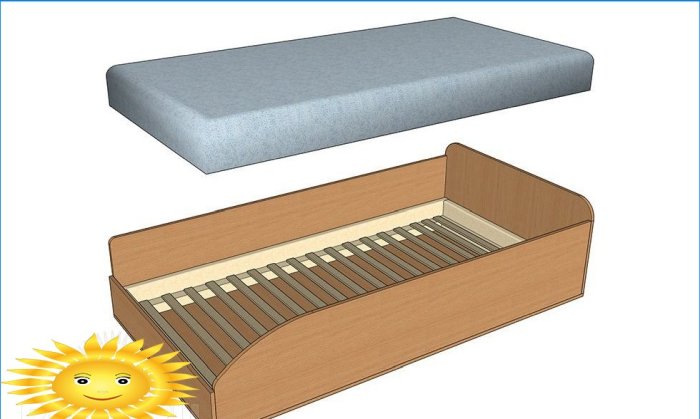
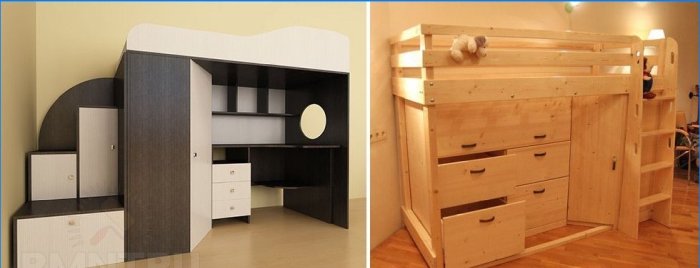
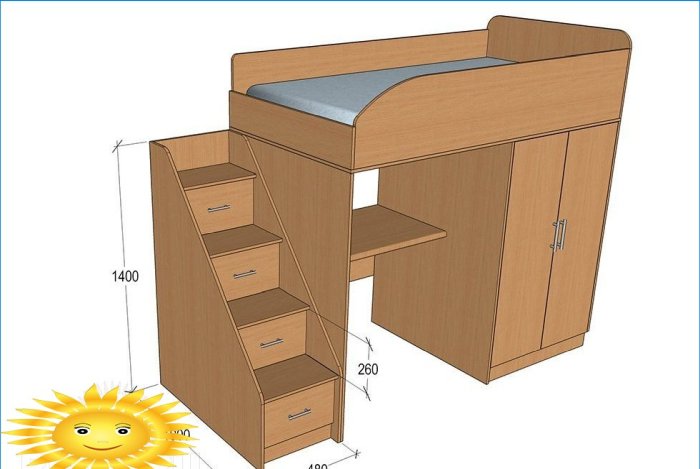
In the simplest case, the bed is assembled from chipboard panels. Due to the correct spatial orientation and stiffening ribs, it is possible to ensure sufficient strength and resistance of the body to loads. The advantage of such a base is the availability of material, ease of assembly, the absence of actions for protective and decorative processing, the ability to supplement the walls of the case with details such as shelves and cabinets. There are also disadvantages: due to the significant size, the body forms a closed lower zone, which is not always comfortable. Also, simple fastening of parts with confirmations will not be enough, all loaded nodes must be fastened with metal corners.
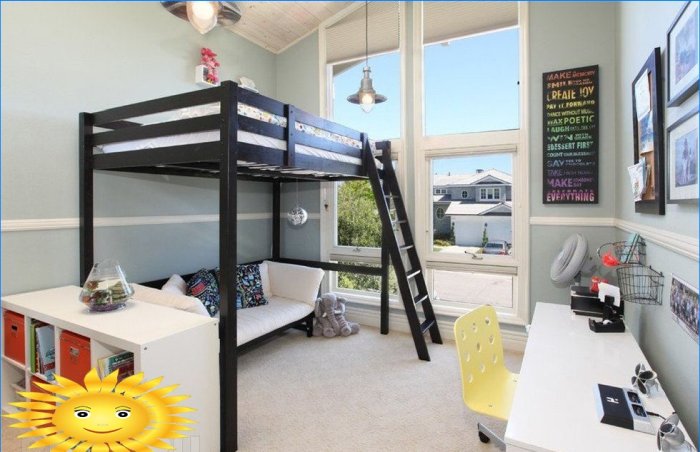
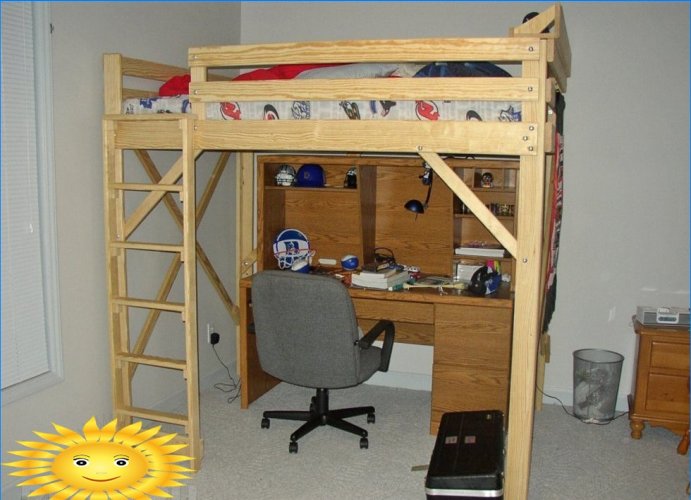
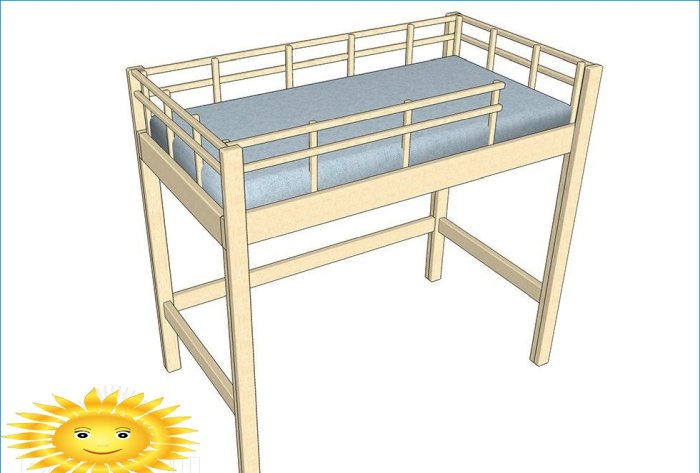
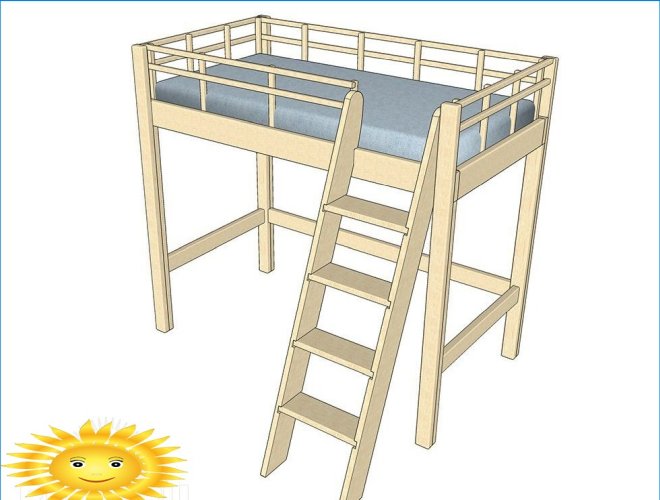
The solid wood frame has a slightly greater visual lightness. It is very easy to imagine such a scheme – this is an ordinary bed, but on very high legs, interconnected by crossbars at the very bottom, that is, a bunk bed without a lower bed. The advantage of the wooden frame is good “translucency” – it is not necessary to organize local lighting to arrange the lower working area. Among the shortcomings, the significant weight and difficulties in disassembling the bed are especially pronounced, as well as the need for careful processing of materials – grinding, impregnation, painting.
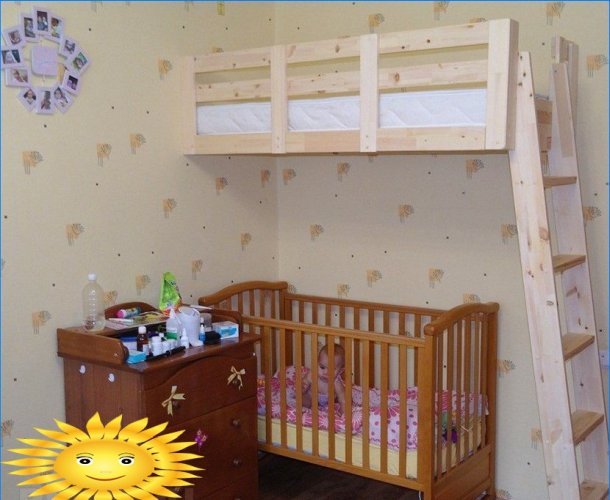
The third type of construction is a hanging bed. This is the best option if the bed is located in the corner of the room. In three corners, the bed rests on brackets fixed to the walls, and one on the ladder. The design flaw is obvious – the bed cannot be moved. The advantages of this installation method are the lowest material consumption and maximum permeability in the lower zone..
Bed and safety guards
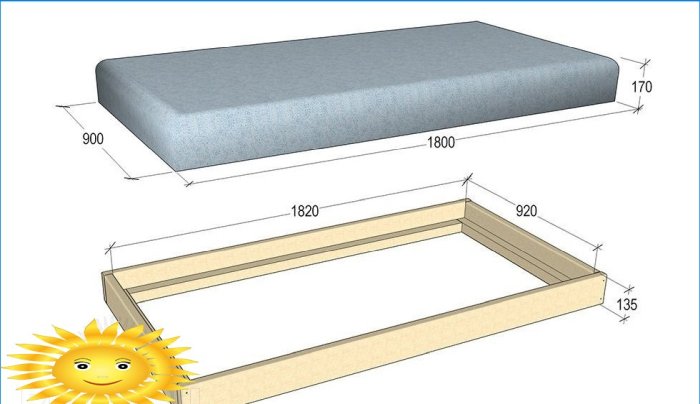
Regardless of the type of base, the bed is recommended to be made of solid wood. If you wish, you can frame this part with a decorative chipboard or MDF screen in the color of the main structure. To make a bed you will need:
- 40 mm board, preferably glued or calibrated. The width of the board is half the thickness of the mattress plus an additional 50 mm.
- Beam 50×50 mm.
- Sliced strips about 10 mm thick and 35-40 mm wide.
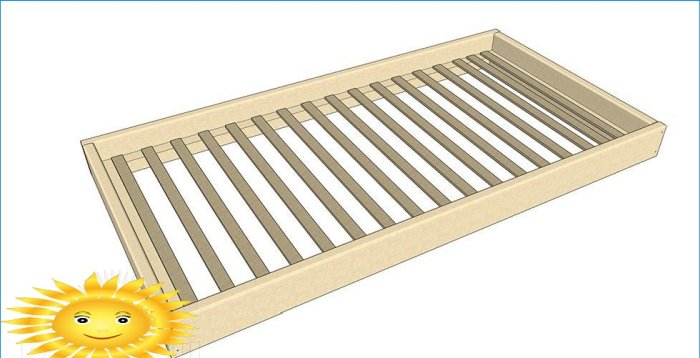
You need to knock down a box from the board, the internal dimensions of which will be 20 mm larger than the mattress in each direction. A frame made of timber is screwed flush with the bottom end of the box from the inside. If the bed is double, along its longitudinal center you need to screw an additional crossbar from a bar.
We prepare a slatted base for a mattress from thin slats. The boards must be cut 20–25 mm shorter than the internal dimensions of the box and laid out on a frame made of timber at a distance of 50–70 mm from each other, and then screwed to the frame with self-tapping screws. There is no need to screw the slats to the middle additional crossbar.
A loft bed fence is necessary, even if adults will sleep on it. The height of the rails is small – about 150-200 mm above the mattress level. They provide fall protection and wall finishes. At the location of the lifting ladder, it is necessary to organize a gap in the fence about a meter wide, if the ladder is adjacent to the short side of the bed – here the fence can be omitted at all.
The material for the fence in the simplest case is a decorative panel made of chipboard or MDF, which frames the box of the box – it is enough to increase its height. You can also shield the bed with a frame made of 25×25 mm timber. The racks of such a frame abut against the bar on which the rack base of the bed is attached, and are attached to the box enclosing them with through ties. Do not worry that the bars will interfere with the laying of the mattress – they will easily press into it, you just need to remove the chamfers so that the sharp edges do not damage the mattress cover.
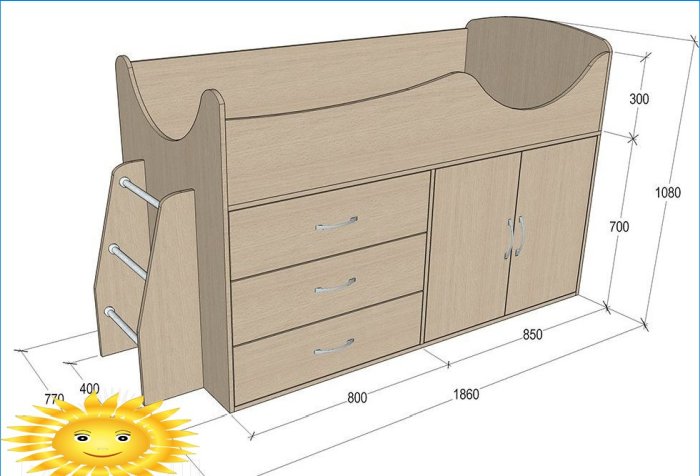
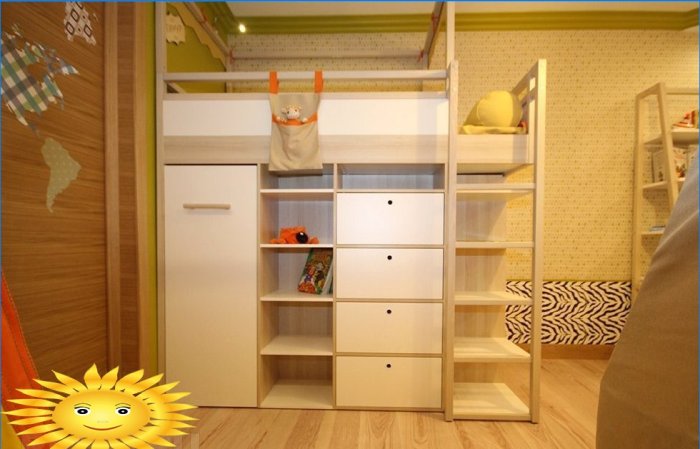
Using the lower storage area
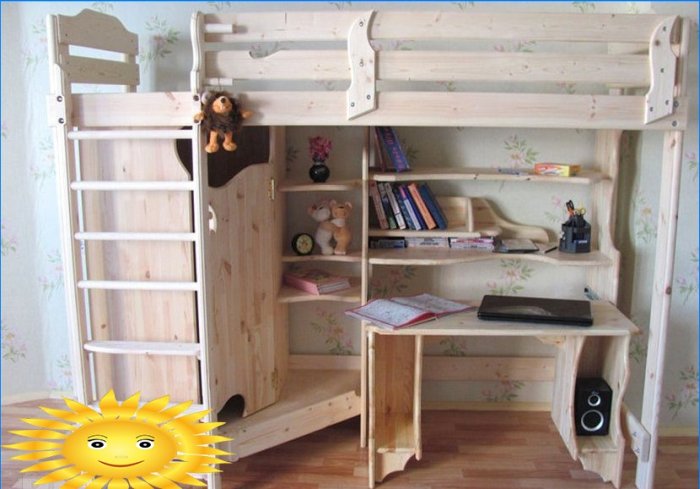
As many have already understood, a loft bed is not just a sleeping place, it is a convenient way to organize space. It’s time to talk about how you can use the vacated space below.
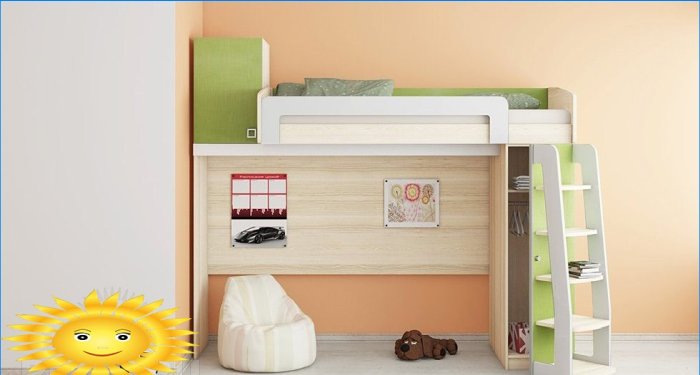
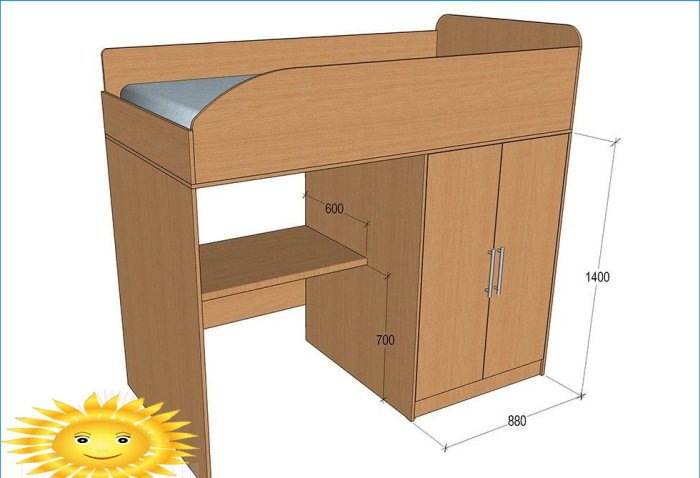
The most obvious way out is to install a wardrobe in which bed linen, clothes and all sorts of household items will be folded. It is better to place the cabinet doors on the side of the bed: this way the second wall will serve as an additional point of support, and there will be additional space for the rational use of the remaining space under the bed.
The variant with the longitudinal arrangement of the cabinet close to the wall is also good. A deep wardrobe of this kind is optimal for a child’s bed: the side support panels experience minimal stress, and the overhanging bed, with sufficient height, will not interfere with approaching the wardrobe.
The fastening of the cabinet walls is identical for all versions of the base: one of the outer sides is simply sewn up with a chipboard sheet, shelves are attached to it with confirmations, and a straight panel suitable for hanging doors is already attached to the shelves.
Instead of a wardrobe with three doors, the loft bed can be completed with open shelves or drawers. The panels form a straight box, which can be divided as desired by horizontal and vertical partitions. The remaining space can be used to install a baby sofa.
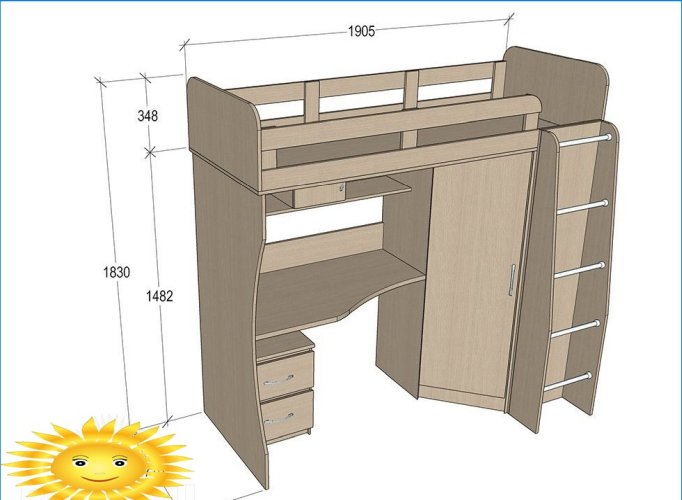
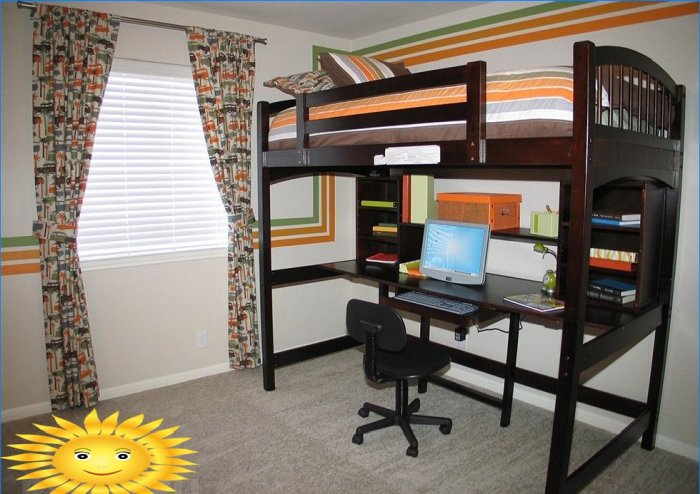
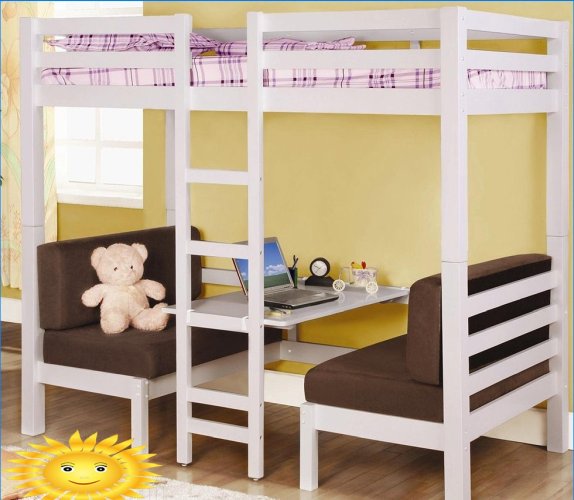
Organization of a work or desk
If sufficient height is maintained from the floor to the bed, it is recommended to leave some space under the worktop. For study and work, this option is optimal: the width of the single bed is about 80-100 cm, the same depth is optimal for a spacious table.
For double beds, the installation height in this case should be 10-15 cm higher than the height of the person using the work or study area. Also, because of the overhanging bed and side rails, shading is possible, respectively, the table will need a close connection point to the mains and at least a simple table lamp.
The table does not have to be tied to the bed structure, but when making a support structure from chipboard, it is very convenient to use one of the side panels as a fulcrum for the table top. It remains to put one more plank 70–80 cm high on its edge – the space for work and creativity is already ready. For additional space saving, the tabletop can be made folding or retractable.
Ladder options
There are many options for stairs – from iron to special plastic. We offer two of the most optimal drain options – for a solid wood frame and a sheet construction.
If the bed frame is knocked down from a wooden beam, a solid staircase will look most appropriate. The safest design will be two bowstrings, in which grooves are cut for horizontally located wide steps. It is quite easy to make such stairs from a board 150 mm wide, into which 100 mm steps are cut in half the width.
For body walls made of laminated chipboard, one rectangular panel should be dissolved diagonally symmetrically, observing the contour of the checkerboard cells. The oblique trimming with ledges is an almost ready-made stringer for the stairs. It is enough to connect two symmetrically cut parts in steps, and install drawers instead of risers.
Cascading drawers are attached to the side or long side of the bed, while the interior space under the bed can be distributed as you wish. In order not to cling to your feet when lifting, the steps of such a cabinet should have a protrusion above the risers of about 30–40 mm in order to hide the cabinet handles under them. Alternatively, the steps can be located flush with the fronts of the drawers, but it is better to use crimped holes as handles.
Could you please provide the necessary instructions and materials for building a DIY loft bed, along with detailed drawings, diagrams, and photos?
Could you please provide drawings, diagrams, or photos of the do-it-yourself loft bed? I’m interested in building one myself and visual references would greatly assist in the process. Thank you!