Grooved flooring is easy to install, yet durable and elegant. Planks of soft coniferous and valuable European trees can serve as a subfloor, which will be covered with carpet or plastic tiles, or can be covered with modern durable varnishes, and then the floor will have an attractive appearance. Hardwood planks, although more expensive, produce a beautiful finish that is highly durable.
The figure shows how softwood planks are nailed directly to the joists; Hardwood planks can also be laid directly on the joists, but narrow planks are best placed on an existing plank floor as shown below. In both cases, the small gaps between the boards and walls, which may have some curvature or not be rectangular, are covered with skirting boards. However, if the gap is too large, you will have to saw off the last board at an angle..
Grooved boards are rallied using two wedges and metal U-shaped brackets, which are hammered into logs or a subfloor. Instead of a bracket, you can use a piece of board nailed to the log. To speed up the work, you can rent special floor clamps. Hardwood and softwood tongue-and-groove boards are available in various widths and lengths from 1 to 5 m or more. They are sold by square meters; when ordering, you must provide for at least 10% of the stock for waste. For laying on logs with a gap of 400 mm between them, use boards with a thickness of 18 mm, and for a larger gap – with a thickness of 21 mm. To prevent warping of boards with a width of more than 200 mm, they must be attached with screws..
If the room is humid, the floor boards can swell and warp. If your home has central heating, choose a forest with a low moisture content (about 10%). If you are using underfloor hot air heating or if you want to install plank floors in your kitchen or bathroom, consult a specialist. The entire forest must be left in the room where it will be laid for about a week in order to equalize its temperature and humidity in accordance with the climatic parameters of the room.
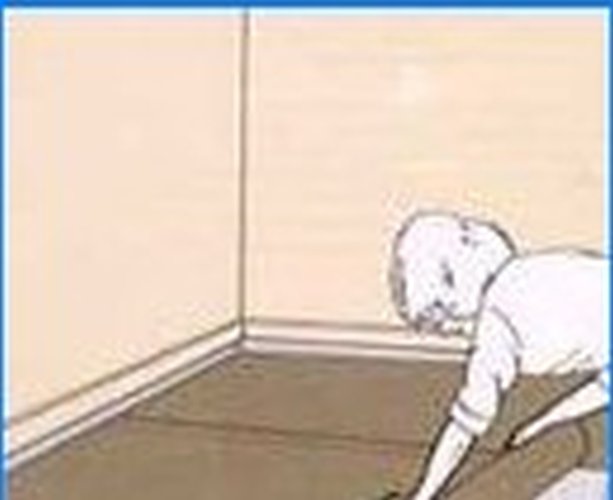
1. Nailing the first board. Choose a board that is long enough to span the entire room, with gaps at the ends of a few millimeters. Make sure the edges of the board are straight. Then, while standing on a piece of chipboard, lay the first board with the comb against the wall, with a 10mm gap from the wall. This gap will allow the floor to expand after it has been laid. Attach the board to each log with nails with a cylindrical head equal to 2-2.5 times the thickness of the board, and drive one nail into each log from the side of the board ridge.

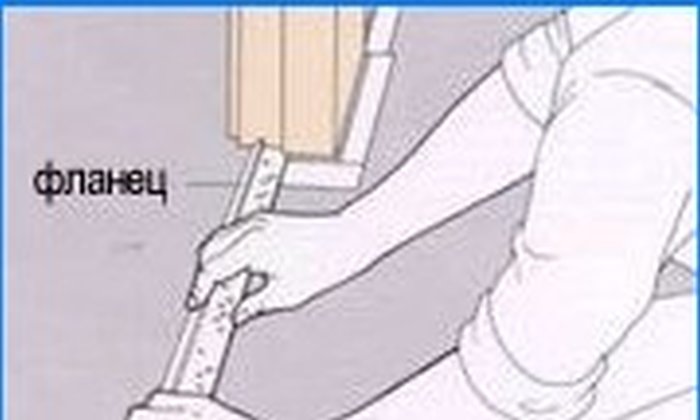
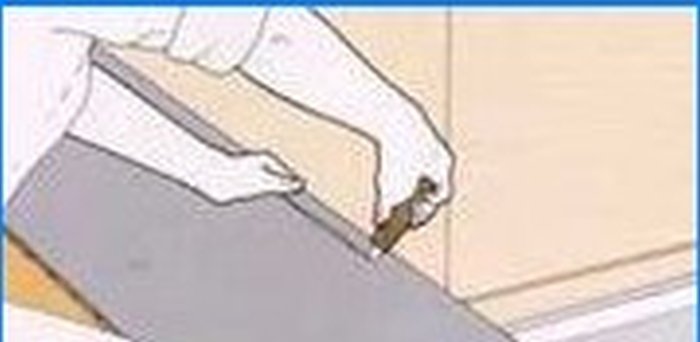
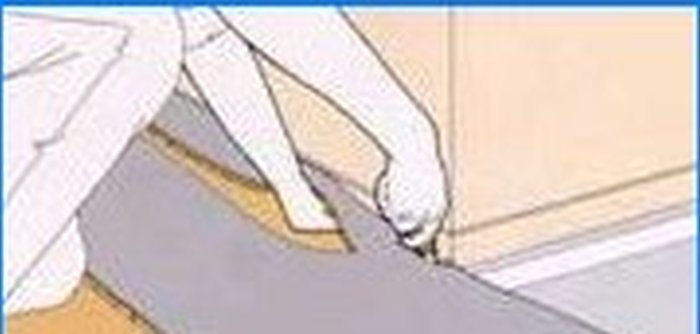
2. Installation of subsequent boards. Lay four full rows of planks, lining up the ridges with the grooves, with one complete plank in the last row. Join short boards on logs with overlapping joints in adjacent rows. On every fourth lag along the length of the room, rally a row of four boards. To do this, take a piece of board with a comb, which will be used as a spacer, and insert it into the groove of the edge board, then hammer the staples into the logs at a distance of 75 mm from the piece of board, setting them vertically. Insert wedges between the staples and a piece of board and with two hammers drive the wedges towards each other so that the boards are tightly connected without gaps.
3. Driving nails in an open way. Nail the first plank to each log. Then nail the next three boards with two nails to each log. If the row consists of several pieces of boards, nail the first board, then press the second board to its end with a claw crowbar and nail it. Such a clamp is necessary to ensure a snug fit of the ends of the boards in a row. The last row is nailed with only one nail to each log from the ridge side, so that the ridge of the next row can be easily inserted into the groove of the installed board. Remove the wedges and braces and proceed as described above to lay the entire floor.
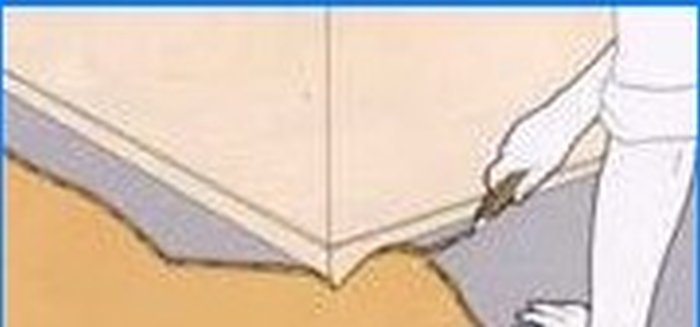
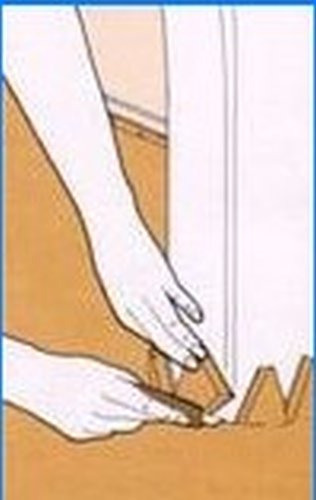
4. Sawing off the last board. When there is no room for wedges and staples, install the last two or three rows of full width boards. Then, using a circular saw or hand saw, cut off a piece of board with a comb that will fit exactly in the remaining space with a 10mm gap from the wall..
5. Finishing the flooring. Place the board with the comb in place, then drive wedges between the wall and the last board to pull together the last few boards and nail the boards to the joists. Remove the wedges and nail in the baseboards.
Parquet flooring from narrow hardwood planks
1. Installation of the first row. Lay a long, straight, narrow plank 10 mm from the straight plinth and at right angles to the subfloor planks with the groove facing the wall. To attach the edge of the board with the groove, drill the nail holes at intervals of about 400 mm as close to the edge of the board as possible and nail it with 37mm cylinder head nails or special nails with blunt ends for nailing the floorboards to the joists. Drive 37 mm nails into the base of the flange of the board at a distance of about 400 mm, sinking their heads with a dowel about 3 mm. If the first plank does not cover the entire room, add additional pieces of plank to complement the first row.
2. Laying boards with overlapping. Lay 7-8 rows of boards to the first board so that the joints in adjacent rows are at a distance of at least 150 mm from each other. Then, pushing the boards back to make room, pull the first two rows of boards together at approximately 600 mm intervals using staples, wedges and a piece of tongue and groove board. Drive nails with a cylindrical head or with blunt ends at an angle into the base of the ridge of the second board, sinking their caps with a dooynik. Use the described method to lay the floor throughout the room, paying particular attention to the location of the joints between the pieces of boards. Finally, fit the last slotted board, trimming it to the width if necessary, as described above..
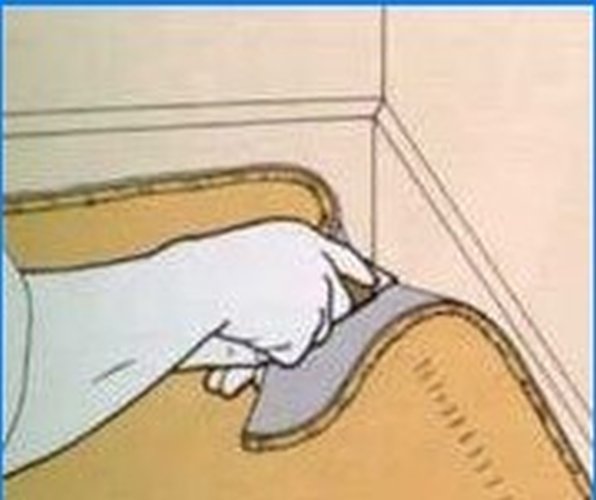
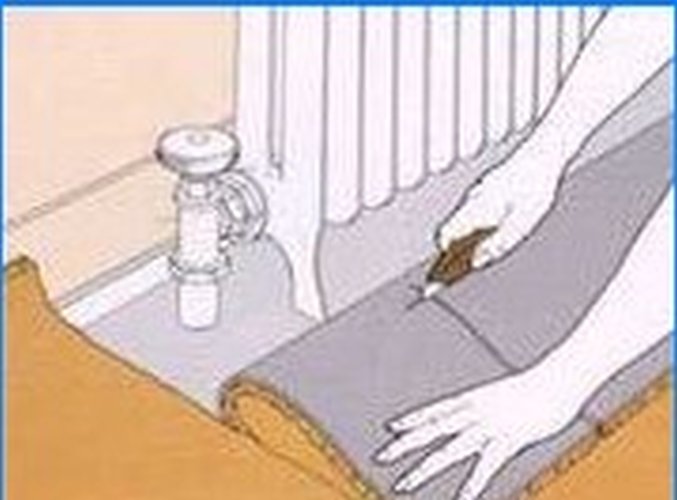
3. Shape cutting of boards. Using a saw box, saw off the planks at a 45-degree angle to frame the fireplace stove in front of the fireplace. If necessary, trim the ridges of the boards to ensure they fit snugly against other boards. In this case, the nails are driven in openly..
4. Changing the direction of laying the boards. To change the location of the grooves and ridges to the opposite, for example, when entering the hallway, connect the groove boards to the groove using a plywood strip as wide as two combs. Insert this strip into the groove of the first row, rally the second row with the first row and secretly nail it through the comb..
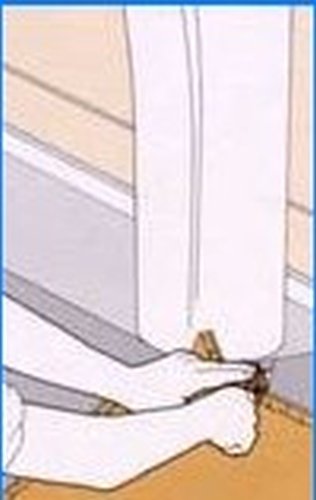
5. Laying the last board in the doorway. Use a saw and a jointer to remove the comb of the board, then trim the board so that it slopes towards the edge where the comb was. This is necessary to reduce the height of the sill, which is formed in the doorway when moving from the old floor to the new, higher one. Nail the sill board open 50mm from the edges at 300mm intervals with 37mm nails along the groove edge and 32mm nails along the thin edge. Sink the nails in with a docking tool about 3 mm. If the line of the doorway is at right angles to the planks of the new floor, remove the comb and groove from the piece of plank, trim the plank to thin one edge as described above, and nail the plank to the floor. It is better to do this before laying the floor to obtain an even edge, to which you can press the ends of the boards when laying them.
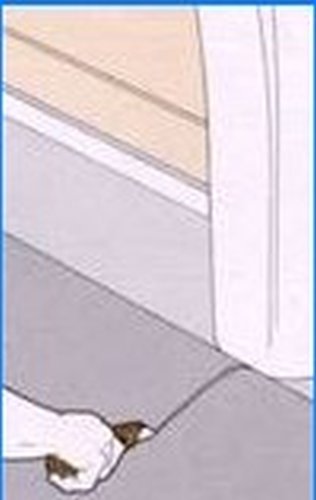
6. Laying of gaskets. Place cork strips in a 10mm gap between the edges of the floorboards and the narrow baseboard of the room. The cork acts as a resilient cushion that contracts and straightens as the floorboards expand or contract..
7. Installation of new skirting boards. Nail a quarter-circle baseboard with a 19mm radius around the room with 32mm nails, hammering in at 200mm intervals. Drive nails horizontally through the center of the plinth into the thin plinth on the wall. With this installation method, the skirting board is not damaged when the floor expands or contracts..
Attaching wide planks with screws
1. Drilling holes for screws. Use a 12mm center drill to drill the ends of the boards. To determine the depth of the hole, glue colored adhesive tape to the drill 6 mm from the cutting edge. Drill additional holes for screws in wide planks at 500 mm intervals.
2. Attaching the boards with screws. Install the 37 mm long countersunk screws No. 8 in the holes prepared for them. Then close the screw heads with plugs 6 mm deep and 12 mm in diameter, which can be cut from a piece of floorboard using a special drill installed in the drill. Glue the plugs with PVA glue, ensuring that the direction of the fibers on them coincides with the location of the fibers in the boards. Align the surface of the plugs flush with the surface of the boards.
Could you please clarify what you mean by “floor device made of grooved boards”? Is it a type of flooring or a specific device constructed using grooved boards? I am curious to know more about its purpose and functionality. Could you provide further details or examples?