Recommendation points
This article will show you how to make your own pool roof. We will tell you in detail how to assemble a full-fledged folding canopy from a profile pipe, we will give step-by-step instructions with calculations. You will learn about non-standard but effective solutions to protect the pool bowl.
In the previous article, we talked about the popular factory models of protective pavilions. Such structures, although they have a rather primitive design from publicly available material, are not cheap. This is a good reason to think about creating a roof for the pool with your own hands..
Note.One of the goals of making your own canopy model is to save money. It is understood that the pool itself is small – 2.5 m wide and 4 m long will be taken in the calculations..
Requirements for a homemade pool roof
The search for an acceptable solution should start with setting a goal – what exactly you want to see and how it should work. The further choice of material, technology and work strategy depends on these tasks. One thing is for sure – the roof of the pool will not differ from the roof for any other object (holes, beds, caisson).
Basic requirements for the design:
- Construction reliability. Of course, the protection will serve in winter and must withstand snow and wind loads. This suggests a rigid frame frame.
- Resistant to moisture. This requirement excludes permanent timber-framed structures, as they will not last long. A frame made of a painted profile pipe seems to be optimal..
- Tightness. Rain, dust, insects and melt water must not enter the pool (under the roof). Here you will need a waterproof material for filling the cells of the frame and side protection – solid or with sealed joints. Fabrics and polyethylene are discarded as unusable. The most popular materials for these purposes are polycarbonate or profiled sheet..
- Ease of use. This factor entirely depends on the realities of the object, but there are six most relevant types of homemade roofs:
- Stationary canopy, canopy.
- Removable canopy. Frame with rigid covering material that can be removed and installed manually.
- Retractable. Can be applied if there is room to rollback.
- Cap. Frame with infill on the side hinge. Suitable for small pools.
- Pavilion.
Below we will describe each of the options..
Stationary visor
This method of protection is more likely not for the pool, but for the people in it. The shape and materials of the canopy are usually dictated by the general background and design of the house, landscape. Surely we can say that its installation will require a reliable place of support..
Note.During the construction of the bowl, provide a concrete blind area 1 m wide and 200 mm thick around the pool on solid ground – this will allow you to trim the sides with tiles and install canopy supports if necessary.
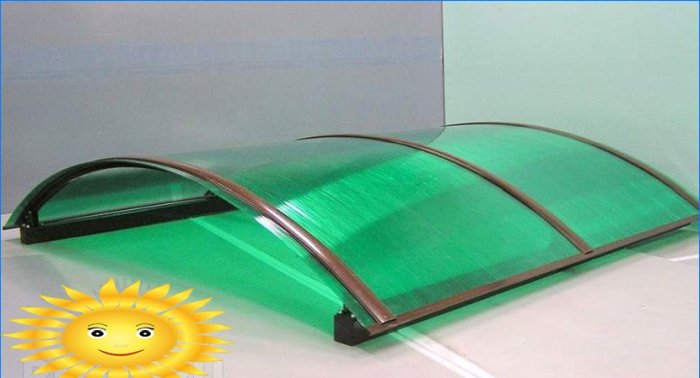
Cap
It is quite an effective means of protection and at the same time, it is easy to manufacture. A flat cover or lada is suitable not only for an economical owner, but also for the owner of a small plot, the area of which does not allow for a high pavilion.
The characteristic features of the cover:
- Flat design. When closed, conditionally parallel to the ground.
- Requires a reliable covering material.
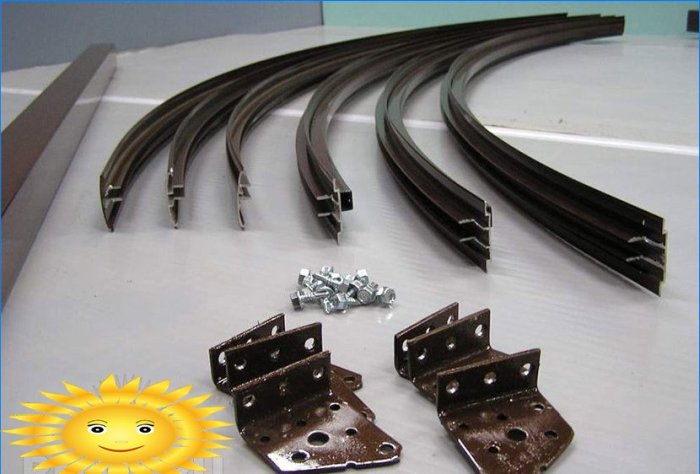
To assemble the 2.5×4 m cover you will need:
- Profile pipes 60×40 – 22 lm. m.
- Covering material – profiled or sheet metal.
- Gate hinges O 40-60 mm and embedded plates 200x100x6 mm for them.
- Welding and locksmith tools.
Working process:
- Cut a profiled pipe for frame edges 2.5×4 m.This should result in 3 longitudinal (4 m each) and 4 transverse (2.6 m each) ribs.
- Assemble the frame with tacks.
- Try on the frame on the bowl, check the diagonals and flatness. Adjust them with a sledgehammer if necessary.
- Remove and weld the frame.
- Select and install powerful door hinges so that they allow the lid to open 1800.
- On the long side, install anchors in the blind area or the concrete wall of the bowl and weld the pads for attaching the hinges to them. The step of the loops is 1.5 m.For 4 m, 2 or 3 loops will be obtained.
- Paint metal parts with a primer according to the instructions.
- Set the frame to the design position (in the closed state) and grab the hinges by welding, connecting the cover with the support pads.
Advice. Install the hinges so that the cover is removable in the manner of a collar or a regular door.- Check the operation of the cover. Digest or adjust loops as needed.
- Mark the places of the clamps (fasteners of the open position) if you intend to use the cover as a canopy or lean against a support.
- Paint the structure with a finishing paint and mount the cover material – for welding or on self-tapping screws. Install handles for easy lifting.
1 – pool bowl; 2 – hinge and embedded part; 3 – concrete blind area; 4 – cover in closed position; 5 – cover material (professional sheet); 6 – cover in open position; 7 – house wall; 8 – retainer
Node 1: 1 – blind area; 2 – anchors; 3 – base plate 200x100x6 mm; 4 – collar loop O 40-60 mm; 5 – welded seam; 6 – profile 60×40 mm
The reliability of a flat roof is provided by a professional pipe and a metal sheet – in this form it holds any snow load. You only need to provide a covering material, for example, a tarp, to preserve the pool for the winter.
If you set a goal, you can modify this simple cover into a full-fledged folding canopy that retains all its functions. To do this, you need to add an additional knee to the structure along the longitudinal section of the frame rectangle. Install hinges in these places, and on the sides of the bowl – thrust rods with latches.
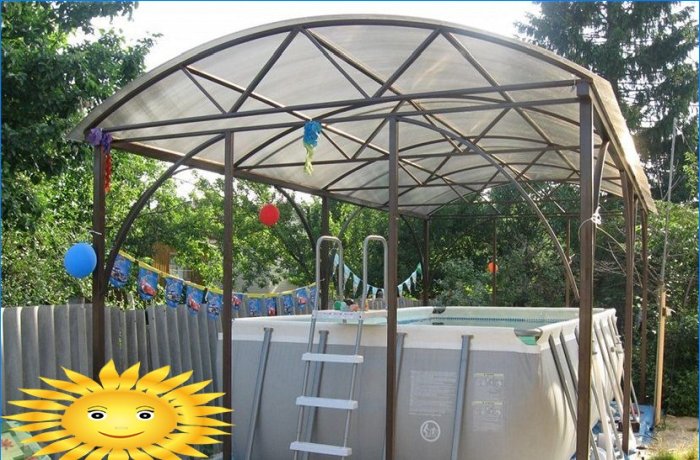
Prefabricated inventory canopy
Convenient DIY kits can be easily found on the market. Its cost is about 260-280 USD. That is, for a set of 3×4.2 m.All its parts are fitted and processed – assembly takes only a couple of hours.
Such a kit can be modified and improved. If you put it on the hinges, you just get a hinged arched cover. If you weld 100 mm pins in the corners and in the middle and drill holes in the blind area under them, you get a removable canopy. You can also install wheels with a stopper on it – then it can be rolled to the side.
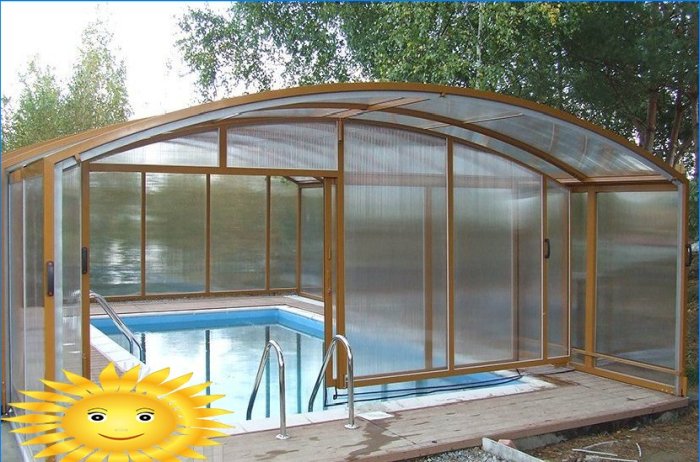
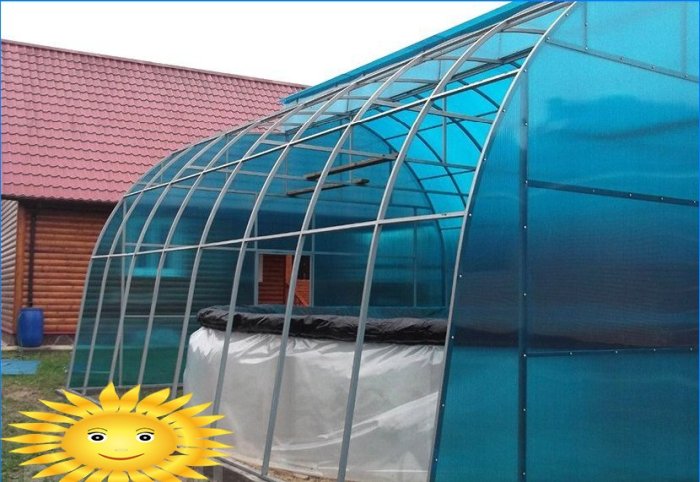
Pavilion
It should be noted the similarity of modern pool pavilions with conventional greenhouses. Ready-made kits for them can be purchased commercially in standard sizes or made to order. The polycarbonate cover and metal frame meet all requirements for pool protection. In addition, greenhouses are designed for year-round operation..
Such a pavilion can be made stationary, removable or retractable, if the area of the site allows. Be sure to check before buying the kit parts for the possibility of attaching polycarbonate – a removable awning is not suitable for a pool, even if it is reusable.
Table. The cost of sets of Russian-made greenhouses
Name Dimensions LxWxH, m Cost, cu e. G1002F (aluminum) 3x2x2.5 420 “KREPYSH Basic” 4x3x2 260 “Harvest PC” 4x3x2.2 240 “Economy” 4x3x1.9 225 “YENISEI Framework” 4x3x2.1 210 “Uralochka” 3.5x3x2 270 ShelterLogic (USA) 3x6x2.4 490 All greenhouses are supplied with a choice of polycarbonate. The turnkey assembly of such pavilions will cost $ 50-60. e., and their service life is from 25 years. Additional options (negotiated with the supplier) – removable and folding sections, ventilation, partial disassembly – will make the pavilion more convenient to use.
Assembling the greenhouse pavilion – step by step video
There can be an infinite number of variations on the theme of self-made pool protection – as many masters as there are projects. One statement is undeniable – a shelter for water is a must. Otherwise, the pool from a place of receiving positive can turn into an object that requires an endless investment of energy and money..
I have been thinking about building a DIY pool roof and I am wondering if anyone has any experience or tips they can share. What materials did you use and how did you go about constructing it? Any advice or suggestions would be greatly appreciated. Thank you!
Could you please provide more information on how to build a DIY pool roof? Specifically, what materials and tools are needed, and step-by-step instructions would be greatly appreciated. Any tips or advice from your own experience would be a plus too. Thank you!