Recommendation points
- Tools and materials
- What you need to know before getting started
- Dismantling the old door block
- Door frame manufacturing
- Insert of the lock and door awnings
- Door block installation
If you bought new doors and think that the services of installers are unreasonably overstated, then after reading this article you can install the door block in your apartment yourself, spending only on consumables.
Today, when buying interior doors, sellers often offer an additional service for their professional installation, but this service is not very cheap – from 10 to 50 percent of the cost of the door. If you have at least basic skills in handling a drill, saw and chisel, and are eager to save money, then most likely you can do this work yourself.
Tools and materials
For this you will need:
- Crowbar or nailer.
- Bulgarian.
- Hacksaw for wood.
- Miter box.
- Drill, wood drill bit 3 mm and wood drill bit 16 mm.
- Screwdriver and wood screws of various sizes and dowels.
- Building level.
- Chisel set.
- Mounting foam.
- Pencil, triangle ruler, tape measure.
- Puncher.
- If there is, then a manual router with a set of cutters.
What you need to know before getting started
First of all, although this is obvious, we note that the installation of doors can only be started after all the “wet” construction work has been completed before finishing the premises..
This is done primarily from the considerations that a tree (and MDF all the more so), with a significant change in humidity, very much changes its geometric shape. So if you first install the box, and then plaster the walls or fill the screed, then no one can guarantee that your doors will close and open as well as immediately after the installation work..
The second factor that should be taken into account before proceeding with the installation and dismantling work is dust, which will necessarily form when the old box is removed, and which can spoil your finish and stain interior items in ready-made, residential premises. This means that everything must first be removed or covered with construction protective films..
Dismantling the old door block
Dismantling of old doors is carried out in several stages:
- Remove anything that might interfere with you or get damaged during the dismantling work. Particular attention should be paid to power wires, internet and telephone communications, antenna cable, radio. As well as a variety of interior items that can be attached to the door frame.
- Remove the old doors from the hinges. If for any reason this is difficult – cut the loops with a grinder.
- Use a hacksaw to cut the rack of the box approximately in the middle and dismantle it with a crowbar. When the closure of the structure is broken, the work will go much easier. The lower and upper jumpers are torn off with the same crowbar, after which the last remaining rack of the box is removed.
- Remove construction waste. At the same time, do not rush to take out large chips and whole wooden blocks into the trash – they can help you with subsequent installation work.
Door frame manufacturing
The installation of a new door should begin with the assembly of the door frame. In the store you will receive it in the form of three ordinary bars 2200-2300 mm long with a quarter chosen under the door.
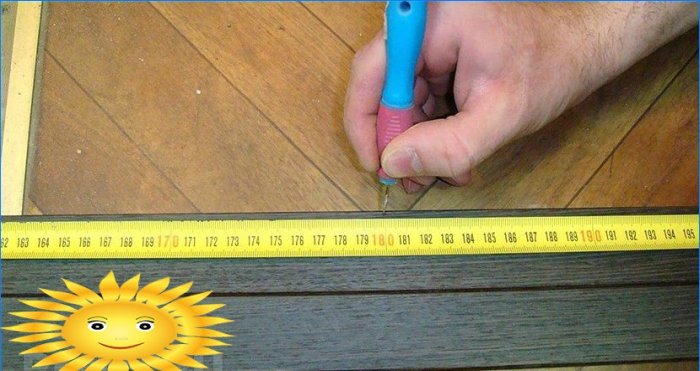
1. First, take two bars you like – these will be racks. Use a tape measure and a pencil to mark them. Racks should be only 5 mm longer than the door, no more. Sawing of a bar should be carried out only in a specially designed miter box. To avoid chipping, start cutting from the front side only..
Important: The saw should follow the scribed line, not along it. Only in this way will you be able to cut off what you have measured, and not 2–3 mm less.
2. Then we take the remaining timber and make the upper and lower jumpers from it. Their length is calculated using the following formula:
- L = W + 2? T + 5 mm
Where:
- D – jumper length
- Sh – door width
- T – box rack thickness
After marking with a miter box and a saw, we cut off the required length of the workpiece.
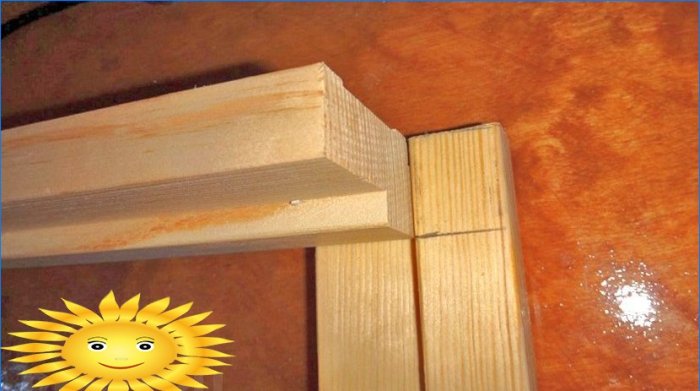
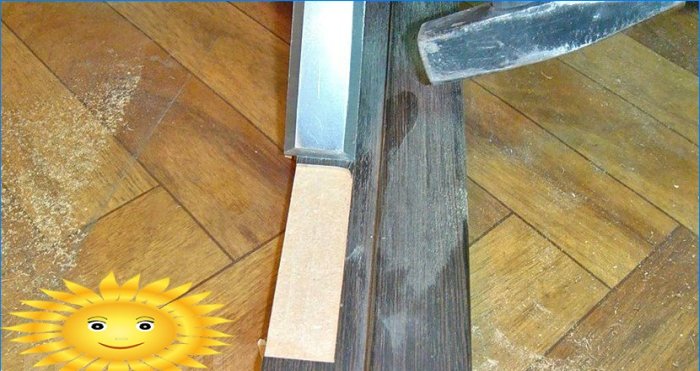
Then set aside from the edge of the workpiece on the inside a segment equal to the thickness of the rack, and in this place make a strictly perpendicular cut in the miter box to the thickness of the selected quarter. Then, using a wide chisel, gently break off the interfering part of the workpiece. As a result, the thickness of the lintel at the specified location should decrease by a quarter depth.
We process all ends of the jumpers in a similar way..
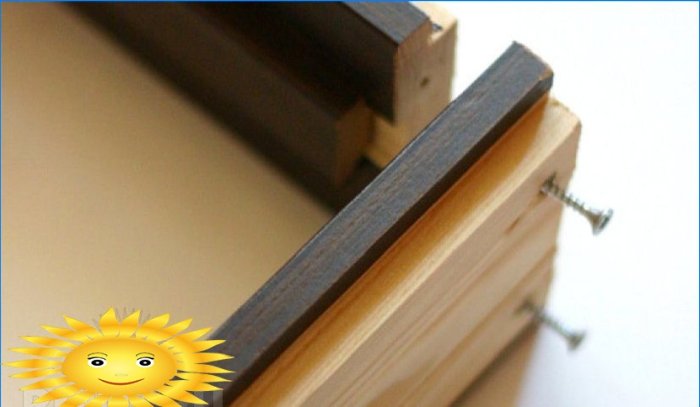
3. Now you can assemble the door frame from the obtained blanks. To begin with, it is simply folded and fitted tightly right on the floor. And then the parts are twisted together with self-tapping screws for wood (60–70 mm long and 3.5–4.5 mm in diameter). Depending on the thickness of the screw, it is necessary to drill a hole with a diameter of 3-4 mm beforehand in the place of fixation for the self-tapping screw. This is done in order not to crack the workpieces themselves with a screw. This is especially important if the parts of the box are not wooden, but made of MDF.
Next, we need to ensure that our design is a regular rectangle: the diagonals must match, all internal corners must be straight. After that, the box in this position is fixed with small braces.
Important: Fixation must be done in the corners using short wooden slats on the side opposite to the side with the selected quarter.
Now you can make a “fitting”, that is, carefully place our door in the box prepared for it. If everything is done correctly, then a distance of 2-3 mm should be maintained between the parts of the box and the door leaf around the perimeter.
Insert of the lock and door awnings
Since all work is easier to perform on a horizontal plane, it is now possible to insert a lock and door handles. The location of their location is often noted by a caring manufacturer himself. But if there is none, then they are installed at a height of 930-950 mm.
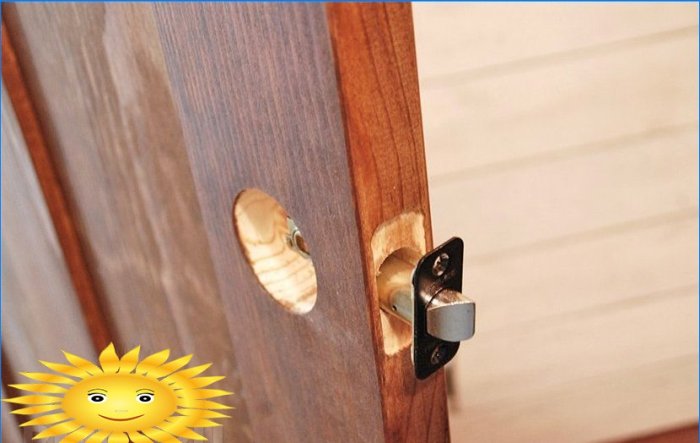
To insert a lock, it is necessary, first of all, to make a careful marking. Then, using a “feather” of the required diameter (most often 16 mm) and a chisel, select the necessary recess for the lock in the door leaf and make holes for handles and larvae in a pre-marked place.
Important: In general, this is not the simplest procedure, and before doing it, you need to think about: do you have at least basic carpentry skills, if your actions will ruin the entire expensive door leaf. If there is even the slightest doubt, before it’s too late, call a specialist.
Once the holes have been made, try on the lock to make sure the job is done correctly and set it aside..
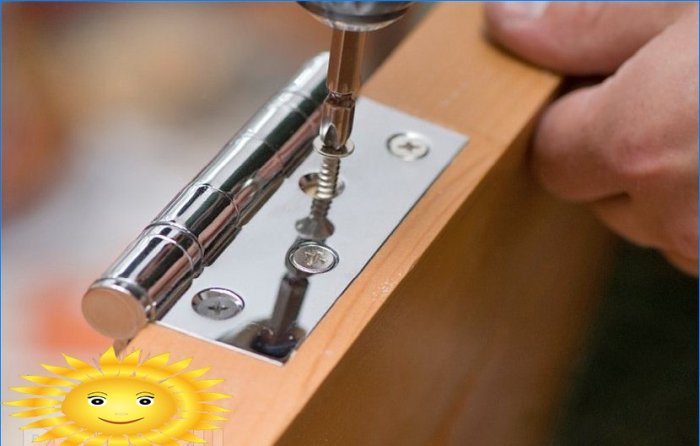
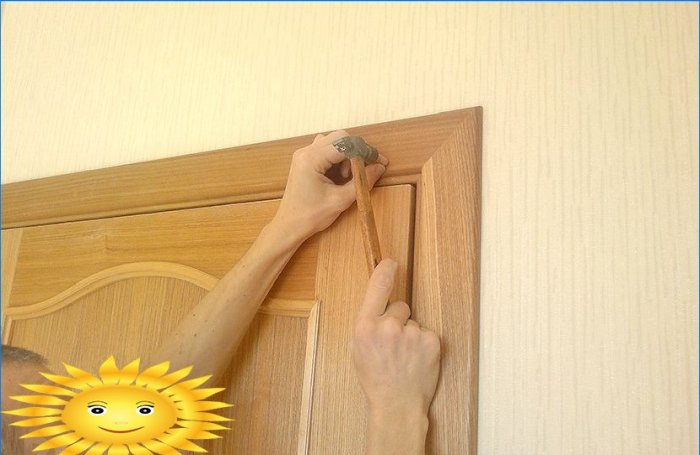
The next step will be the installation of door sheds, they are located at a distance of “one and a half hinges” from the upper and lower edges of the door leaf. Under the hinges, grooves are pre-hammered with a chisel (if there is a manual router, this will greatly simplify the whole process) strictly along the perimeter of the canopy and on its thickness. They are screwed to the canvas with special screws included in the kit.
Next, the door must be correctly positioned in the box itself, that is, move it as much as possible at the top. There should be a gap of about one millimeter between the top lintel and the door leaf. Now you can mark the location of the canopies on the box and install them. The procedure is carried out by analogy with the installation of hinges on the door leaf.
Important: The hinges must be cut. Only this will save the door from gradual “sliding”.
When the hinges are in their places, you can, according to the instructions, install the door lock in the pre-prepared groove, screw the handles and proceed directly to the installation of the door block.
Door block installation
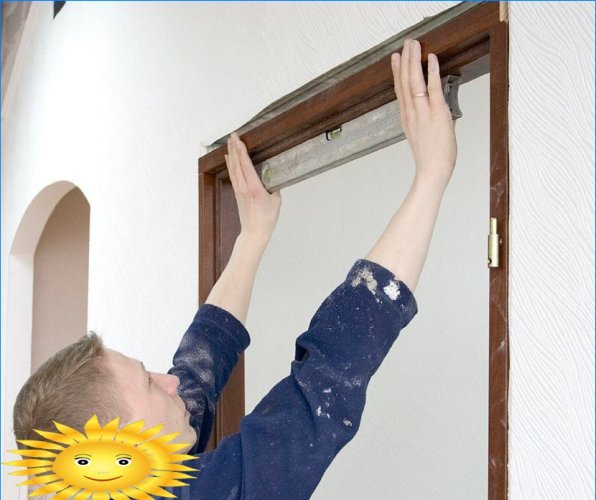
It’s good if you have a wooden box. Then, without any problems with the previously removed door, it is set strictly in level on the wedges in the doorway. By hammering and releasing the wedges, you can easily adjust the position of the box. Then, instead of the door, spacers are installed inside the door frame, and the space between the doorway and the frame is filled with foam..
The situation is worse if the box is made of MDF. In this case, after wedging along the entire perimeter of the box with an interval of 35–40 cm, holes 4 mm thick are made, while the drill should hook into the brick wall of the doorway. Then the box is removed again. Holes are drilled in places of “marks”, where dowels are then hammered. After that, the box returns to its original position and is very carefully fixed in the opening with self-tapping screws. Then we hang the door leaf, insert chips into the cracks between the door and the box and very carefully foaming.
Important: There should not be too much foam, otherwise, despite all the dowels, the “paper” box will still squeeze.
When the foam dries, you can cut out recesses for the latch and lock tab. This process is creative. Open the door and grease the ends of the latches with a marker or lead. Then, holding the handle, close the door to the desired depth. Release the latch and turn the key in the lock as much as possible. Opening the door, you will see marks on the box for the desired recesses. The holes themselves can be made using a drill and a chisel, or with a special nozzle on a hand-held router. All errors will be hidden by the shutter frame fixed over the recesses with screws.
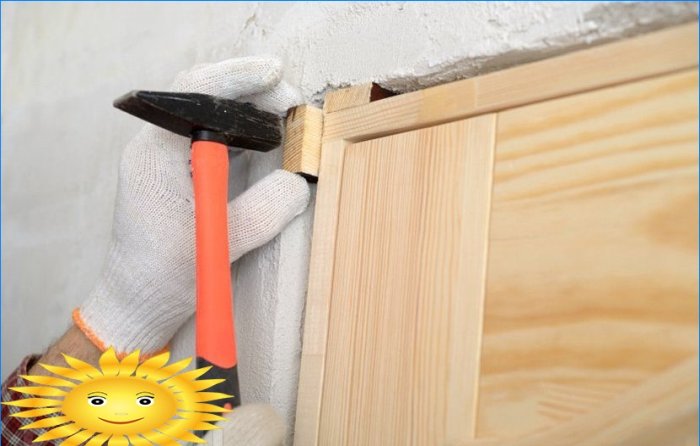
It remains only to cut off the foam, remove debris and mount the platband. The elements of the latter, by the way, depending on the technology, can either be cut at the junction at 45 °, or they will connect at right angles, but this is already a matter of taste and design vision of the situation. The platbands themselves are mounted to the door frame on small copper nails, or on a specially designed glue.

I’m not sure how to install an interior door myself, but it sounds like an interesting and useful skill to have. Can anyone share step-by-step instructions or helpful tips on how to go about installing an interior door on your own? I’d appreciate any guidance or advice on this topic. Thank you!
Could you please provide a step-by-step guide on installing an interior door by ourselves?
Installing an interior door can be done by following these step-by-step instructions:
1. Measure the door frame: Take accurate measurements of the height, width, and thickness of the door frame to ensure the new door fits properly.
2. Purchase the door and necessary tools: Select a suitable door that matches the style of your home, along with essential tools like a saw, drill, chisel, screws, and a screwdriver.
3. Prepare the door: If needed, trim the door to fit the frame by marking the excess wood and using a saw to cut along the line. Sand the edges for a smooth finish.
4. Remove the existing door: Unscrew the hinges from the door frame to remove the old door. Carefully remove any trim or molding around the frame if necessary.
5. Install the hinges: Position the new door on sawhorses or sturdy supports. Measure and mark the hinge placement on the door’s edge, ensuring they align with the existing hinge recesses on the frame. Use a chisel to create the recesses and attach the hinges with screws.
6. Hang the door: With someone’s assistance, hold the door in the frame. Insert the hinge pins into the hinges and check if the door swings smoothly. Adjust the hinges if required.
7. Install the doorknob and latch: Measure and mark the appropriate height for the doorknob and latch on the door. Use a drill and chisel to create holes for their installation. Attach the doorknob and latch by following the manufacturer’s instructions.
8. Test and adjust: Close and open the door several times to ensure it functions properly. Adjust the hinges, latch, and doorknob as needed to achieve a perfect fit.
9. Apply finishing touches: Install any decorative trim or molding around the door frame to enhance its appearance. Sand and paint or stain the door as desired.
By carefully following these steps, you can successfully install an interior door by yourself.
Can anyone provide a step-by-step guide on how to successfully install an interior door without hiring a professional? I’m looking for advice on the tools needed, measurements to be taken, and any tips or tricks that might make the process easier. Thank you in advance for your help!