Recommendation points
- Selection and purchase of linoleum
- How to level the floor under linoleum
- Substrate preparation with cement-sand screed
- Preparing the wooden base
- How to lay linoleum
- How to dock linoleum
- How to glue linoleum
In this article, you will learn how to properly lay linoleum on different types of bases, how to level the floor under linoleum and what to look for when choosing a soft floor covering. We will give recommendations on the selection of an arsenal of tools and methods of laying the material.
Linoleum is the top of practicality and affordability. The huge assortment of this coating makes it affordable, so linoleum is chosen for commercial and residential premises, it is appropriate in the office, in the bedroom and in the kitchen. In this master class, we will tell you how to lay linoleum, observing the basic rules.
Selection and purchase of linoleum
For those who decide to tile the floors of a large office or apartment, the decision to purchase linoleum in bulk is suitable. In this case, the price of 1 sq. m will be at least 15% below market. This material has an impressive service life – up to 40 years, so the choice of colors and textures should be approached carefully. Some tips and tricks for choosing are shown in the video:
About 60% of all linoleum on the market is made in China, which does not always meet fire and hygiene standards. There is also a danger of acquiring counterfeit material, which may even be unsafe for health. The right decision would be to entrust the floor covering with highly professional products from a European manufacturer. Linoleum IVC, Tarkett, Grabo and other proven brands will serve faithfully while remaining safe for you and your children.
How to level the floor under linoleum
Preparation of the base is the key to the success of the whole business if you decide to use laminate or linoleum. Do-it-yourself installation may imply some defects that in most cases can be eliminated, but even the most expensive material cannot fix problems with the base. We will consider two types of bases that make up 98% of all possible options – a cement-sand (CP) screed and a wooden base. The remaining 2% is ceramic tiles and asphalt.
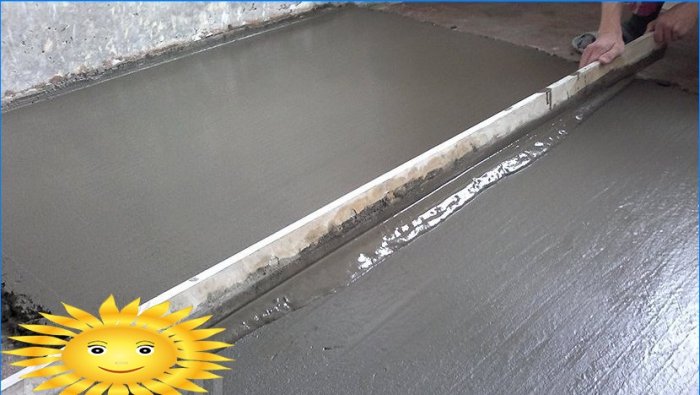
Substrate preparation with cement-sand screed
There are usually three screeds for linoleum:
- Rough CPU – 50 mm – is laid on a concrete slab or floor. Smoothes out uneven joints, “steps”, “overflows” and cracks. Beacons 50 mm from a wooden beam or profile should be set at a level, lay the mixture on the beacons, remove the beacons and rub them with a homogeneous composition.
- Finishing CP – 10–20 mm – is laid on the rough CP screed. Brings floor level to the desired horizon line. Install plaster beacons 6-12 mm on a rough screed level to the horizon, lay the mixture, clean the surface with a rule, remove the beacons, rub the sinuses.
- Leveling screed – 5–15 mm – is placed on top of the final CP of the screed. Eliminates the slightest irregularities, sinks, level differences of 1 mm. Prepare and lay the mixture according to the instructions on the package. Lighthouses are not required, since they are aligned under the influence of gravity.
There may be fewer screeds, for example, in apartments they make two of them – finishing and leveling – it all depends on the quality of the base. If it is sufficiently flat and free of serious defects, the roughing screed can be omitted. The portal wrote about the floor screed in detail in the article: “Do-it-yourself warm floor screed – personal experience, step-by-step photos”.
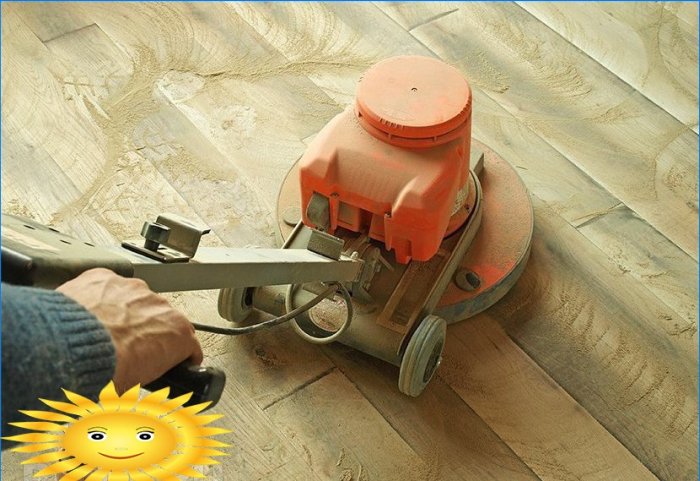
Preparing the wooden base
There are a huge number of options for arranging a wooden base. It can be all sorts of combinations of profile and sheet materials, but in the end it all comes down to a sequence of layers. And there are two options left: wood-on-wood and wood-on-concrete.
Tree-to-tree.In this case, the base – the floor or the floor – is wooden, most often it is an old but strong floor board. All preparation in this case comes down to removing or eliminating all metal obstacles – nails, hardware; remove old finishing layers (paint, varnish, PVC) and clean the surface. The last step should be given special attention and use electric planers and grinders.
If the base has significant mechanical defects – chips, steps, drops – but clean without rot and fungus, you can simply fix sheet material over it with a thickness of 10 mm – chipboard, plywood or OSB.
Wood-on-concrete. In this case, 16-22 mm plywood sheets are attached to the ceiling with dowels through special glue. Read more in the article “Workshop on laying parquet on a cement base”.
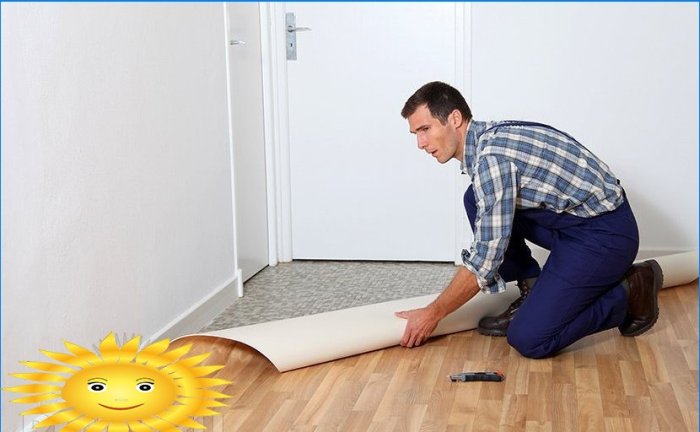
How to lay linoleum
After the base is ready, you can proceed directly to laying linoleum with your own hands (a video showing this process in detail is given below).
Attention! When pruning, leave a 20 mm expansion margin to the wall.
The main disadvantage of linoleum for the master is the risk of damage to the entire sheet at once if the markings and pruning are incorrect. Therefore, be careful and try not to break the sheet during fitting..
How to dock linoleum
One of the important questions that arise when laying linoleum with your own hands: how to connect linoleum at the junction? In order to get a perfect joint, it must first of all be trimmed exactly. There is a special tool for this – a linocat. For more information on the linoleum tool, see the video:
Linoleum joints can be welded, glued or dry strengthened with a special nut.
How to glue linoleum
Gluing or welding of seams is usually resorted to in rooms of a large area or with a large traffic. In such cases, two or more sheets of material are joined. There are two types of joint connection.
Cold welding.The specific name of the procedure for using a special glue that contains a solvent. It chemically melts the edges of the sheets, and they stick to each other..
Hot welding.This method is used only by professionals, since it involves the use of special equipment. A cold polymer cord passes through a special soldering gun, where it heats up to 350–400 ° C and immediately fits into the edge of the joint.
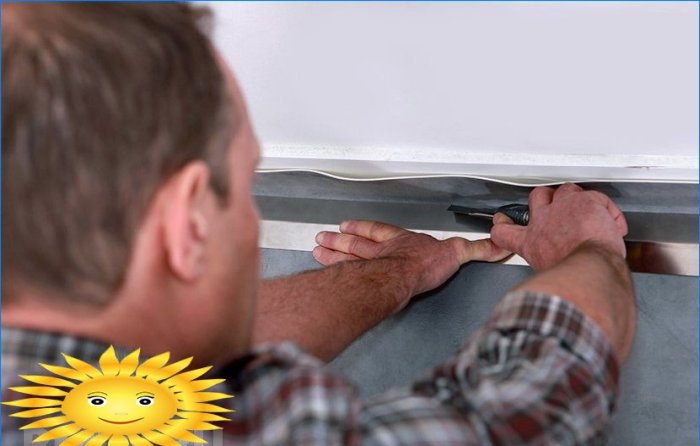
In total, there are two ways of laying linoleum – “dry” and glue. The first method is suitable for domestic use, in rooms with low traffic and low traffic. In this form, the material is pressed only by the baseboard.
Attention! In the “dry” method, the “laying” of the leaf is of decisive importance. After pruning (with a margin), it should lie unsecured for at least 7 days.
The second method is intended for public places and heavy use. Linoleum is simply glued to the base with a special compound, the plinth has decorative functions.
The variety of linoleum and its price do not significantly affect the general rules for its installation. Firms producing this material, as a rule, offer glue, mastics and compounds for joining joints to it. Using video instructions and master classes, you can lay linoleum with your own hands.
Can anyone provide tips or step-by-step instructions for laying linoleum as a DIY project? I’m interested in trying it myself, but I’m not sure where to start or what tools I’ll need. Any advice would be greatly appreciated!
Can anyone share their experience with DIY linoleum laying? I’m considering doing it myself, but I’d love to hear some tips, tricks, and maybe even mistakes to avoid. How challenging is it for a beginner? Any specific tools or techniques I should be aware of? Any advice would be greatly appreciated!