In this article: how the plasterboard partition works; stages of work on its creation; necessary materials and tools; plasterboard ceilings; stages of building a single-level ceiling, materials for its installation.
Among other materials for finishing walls and ceilings indoors, drywall has a clear advantage – it allows you to quickly and easily get the desired interior, and not only to level any surfaces, but also to give them the desired curvilinear shape and volume. Along with such finishing materials as pvc panels or lining, gypsum plasterboards allow you to “hide” any communications behind them. So, the advantages of drywall are obvious – let’s find out how to work with this material, how to create a drywall ceiling and partitions indoors with it.
Plasterboard partitions
Advantages of gypsum plasterboard partitions: performed in a short time; are lightweight (up to 50 kg / m2); have high sound and heat insulation; fire resistant. You can find out more about drywall here, and now let’s move on to building partitions from this finishing material.
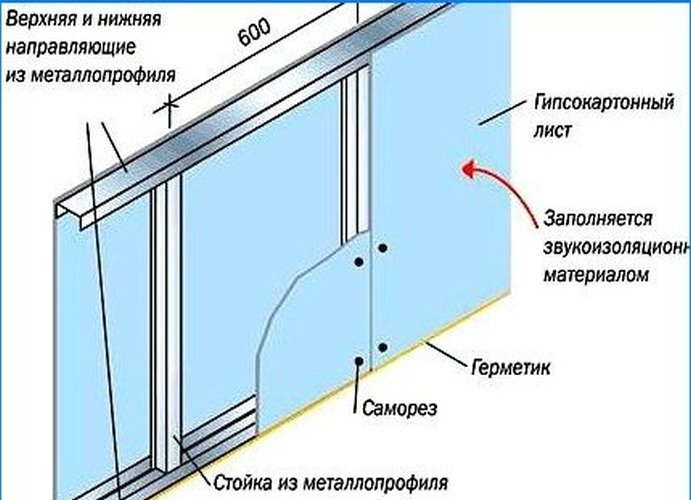
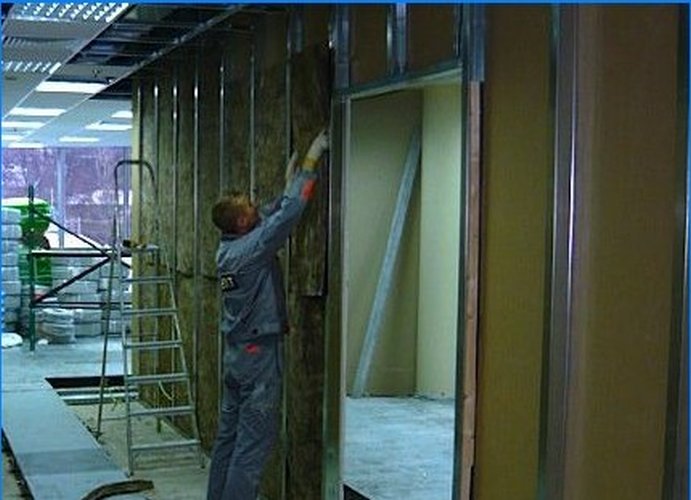
By their design, plasterboard partitions resemble a “sandwich” – between sheets of drywall, fixed on a profiled metal frame or a wooden frame, mineral wool is laid, increasing the resistance to heat transfer and damping sound waves. The layout and installation of the partition is carried out at the end of the rough finishing work in the room, i.e. surfaces are leveled, but painting and placement of topcoats have not yet been completed. The assembly of a plasterboard partition is performed in the following order: marking the position of the future partition; installation of guide metal profiles (PN); installation of rack metal profiles (PS); sheathing of the partition with plasterboard on one side; laying a mineral wool insulation in the formed cavity; laying of communications (if necessary); covering the cavity with drywall sheets.
Partition markings. An extremely responsible task – at the slightest deviation from the horizontal level, the partition will turn out with a slope. Before starting the marking work, make sure that the surfaces to which the partition frame will be attached are level and strong – if necessary, level them with a thick cement-sand mortar. We proceed to the marking, armed with a building level, a tape measure, a steel ruler and a plumb line. The markings are first of all applied to the floor, then these dimensions are transferred using a plumb line and level to the ceiling and walls. Double, or better three times, double-check the accuracy of the markings – it is better to make sure that it is 100% correct than to redo the mounted partition due to the slope.
Frame installation. To build it, you can use a special metal profile or a wooden bar, but the first option is better – profiled metal is cheaper than a bar and is guaranteed not to be flammable. For the frame posts, fixed to the walls, floor and ceiling, we use a 50 mm guide profile. To fasten the PN to the marked installation sites, dowels for a brick wall or self-tapping screws for concrete for concrete, 50-60 mm long, with a pitch of 300 mm between them, are used – holes in the profile should be drilled under the screws and dowels. The profile is fastened to the walls in increments of 1,000 mm, while each profile on the wall must be fixed with at least three self-tapping screws. Before installing the guide profile, a sealing polymer tape-damper is placed under it (between the profile and the surface of the wall, floor and ceiling) – its layer will prevent sound transmission and ensure a tighter adhesion of the frame profile to the base. During installation, adjacent guide profiles are inserted into the lock between each other.
After completing the installation of the guide profile, we proceed to the installation of the rack profiles – having calculated the distance between the guide profiles placed on the floor and ceiling, we cut the rack profile to this length. The step with which the vertical ribs of the rack-mount profile will be installed is 600 mm. The ends of the profile are inserted into the lock with the upper and lower guiding profile, the vertical position is verified along the plumb line, then the profiles are connected with self-tapping “bugs” (cone-shaped head, length 11 mm).
The two outermost rack profiles, i.e. located closest to the walls on both sides, should be installed not 600 mm from the wall, but closer – 550 mm from it. The reason is as follows: the drywall sheet at the ends has a factory bevel, which is not difficult to align with a putty closer to the center of the plasterboard partition, but it will be difficult and inconvenient to align at the points of direct joint with the wall. Therefore, you just need to cut off the chamfer section from the first 50 mm plasterboard sheet.
In those sections of the plasterboard partition, where a door or another opening is planned, household appliances will be hung, it is required to install embedded elements that increase the rigidity of the partition frame – additional horizontal sections of the profile are installed along the contour of the opening, fixed to the rack profile. If the weight of the door leaf does not exceed 25 kg and is not wider than 900 mm, then vertical post profiles with a horizontal transom from the profile fixed to them and two vertical posts connecting the transom to the ceiling guide profile will be sufficient. If the door leaf weighs more or has a greater width, then the frame profiles along the perimeter of the doorway should be reinforced with a wooden bar inserted into the profile and fixed with self-tapping screws, or by inserting an additional profile into the existing posts and crossbar and fixing it inside. In the same way – with horizontal sections of the profile along the perimeter – the frame is strengthened in the places where household appliances are supposed to be hung, while it is also possible to increase the rigidity of the profile by inserting a wooden bar into it.
For installation to a plasterboard partition of more weighty household appliances, for example, toilets and sinks, it will be necessary to install a mounting element in the partition frame – a metal frame-traverse of a special design specially designed for installing plumbing in non-load-bearing walls, including plasterboard.
The frame of the future plasterboard partition is ready – we sheathe it. The electrical wiring, if it is necessary in the partition being created, must be stretched before the start of the drywall sheathing work – the electric cables are pulled into a metal tube, in turn, threaded into the existing holes of the vertical posts strictly horizontally. You can use a corrugated hose, but it will not provide protection against damage by screws, so you will need to insert 100 mm pieces of metal tube into the holes of the posts and pull the corrugated hose through it. Do not pull the wiring without tube protection – when installing the casing, the cables can be damaged by self-tapping screws. Do not run electric cables in the profile cavity under any circumstances.!
For cladding, 12.5 mm thick gypsum plasterboard is used. As recommended above, cut off the chamfer from the drywall sheet installed first from the wall. You can cut drywall in two ways: using a mounting (wallpaper) knife; a blade for cutting drywall (a hacksaw blade for wood will not work – it will work quickly). To remove part of the drywall according to the first method, you need to put its sheet face up on the floor, mark it with a pencil and, with a metal ruler, cut the cardboard. Then put the sheet on the end side and easily hit with the edge of your palm along the cutting line – the sheet will break along the notch, after which you just need to cut the cardboard layer along the line on its other side. This method will not work for chamfering – too small a fragment needs to be removed, use a saw blade. It will not be enough to simply remove part of the drywall sheet; it is necessary to align the end formed during cutting using a special plane.
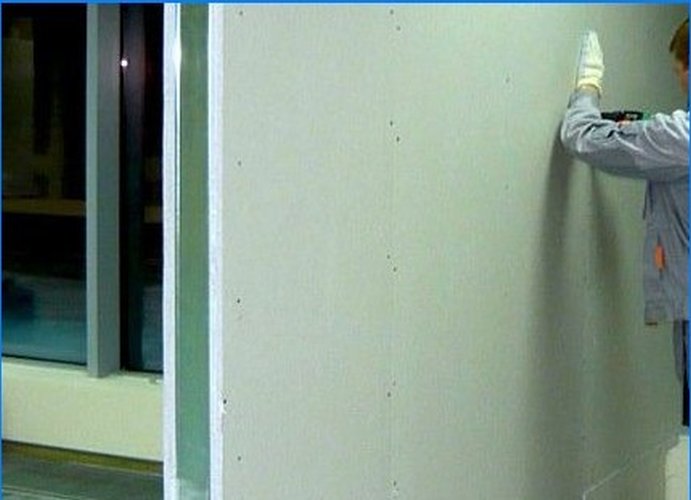
Sheathing of the partition with plasterboard is performed according to the following “checkerboard” scheme – the first sheet is attached from the floor level, the second sheet from the ceiling, etc. The joints of adjacent drywall sheets should be located only on the vertical rack-mount profile. The sheets are fastened with self-tapping screws for metal 25 mm long, with a countersunk head (true for single-layer plasterboard sewing, if there are more sheets, the length of the screws must be longer). Each screwed self-tapping screw is sunk one or two millimeters into drywall, but no more – do not overdo it, it may crack.
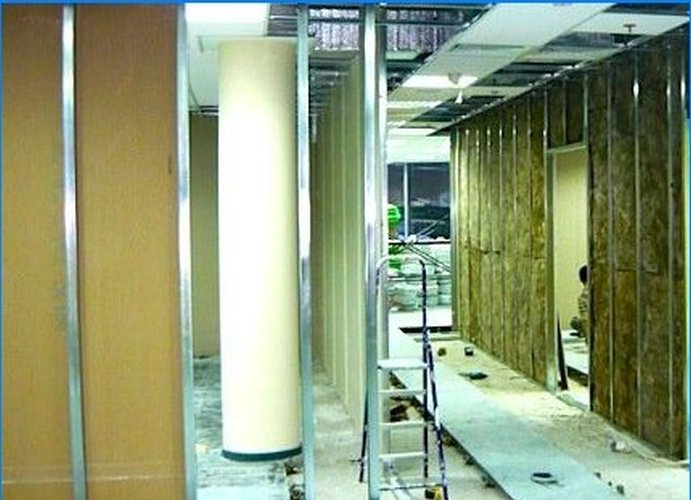
Insulation laying and sheathing of the second side of the partition. Mineral wool slabs will mostly serve not for insulation, but for sound insulation – they need to be laid, cut, if necessary, into a niche formed by the frame and one-sided plasterboard plating, and sewn up with drywall sheets as they are laid, adhering to the “checkerboard” order. It is not recommended to use foam or expanded polystyrene for soundproofing drywall partitions – read this article. Since the created plasterboard partition is located inside the room, there is no need for a vapor barrier layer made of pvc film..
At the end of the work, the plasterboard partitions are prepared for the installation of sockets and switches (using a drill and a crown drill), a serpentine mesh tape is glued to the joints of drywall sheets, then the joints over the serpentine and the recessed heads of self-tapping screws are putty.
Plasterboard ceilings
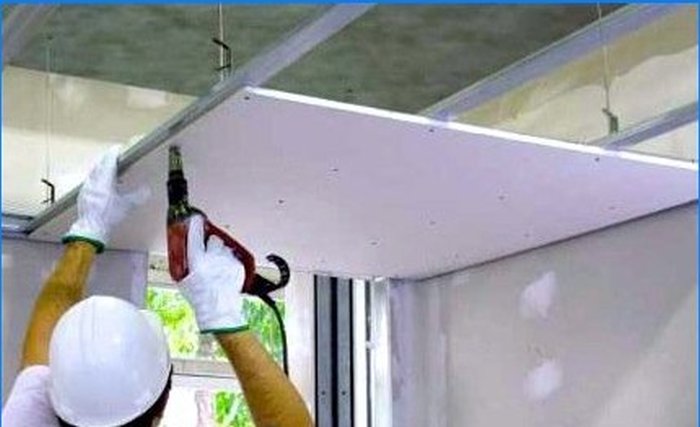
It is not difficult to arrange single-level plasterboard ceilings, you only need an assistant – you cannot build it alone. In addition to the already described advantages of plasterboard sheathing, such a ceiling will allow you to install spotlights in it and thereby more effectively illuminate the room. The stages of work are similar to the procedure for constructing a plasterboard partition – marking, installation of a supporting profile, installation of a ceiling profile, laying of soundproof material and laying of an electrician, plasterboard lining.
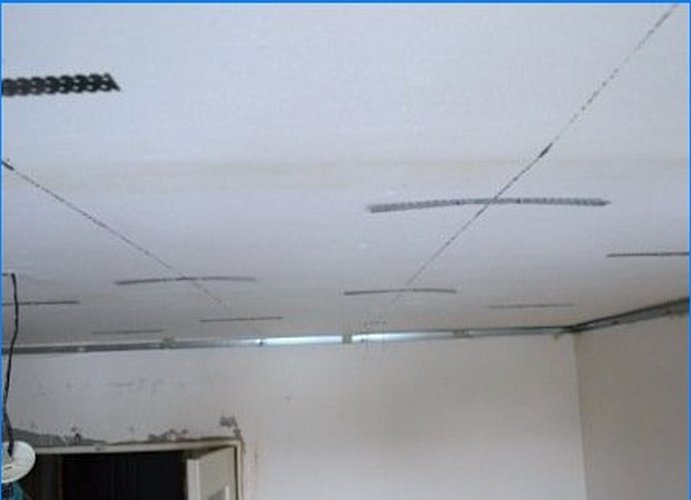
Plasterboard ceiling – markings. The distance from the surface of the future ceiling to the existing one depends on the type of fixtures that will be installed on it. If it is only a chandelier, then 50 mm will be enough, but if it is planned to install spotlights, then at least 100 mm.
Spot luminaires require more space under the ceiling – they heat up, air exchange is needed (by the way, ventilation holes are also needed). The marking is carried out on the walls – we arm ourselves with a pencil, water or, more conveniently, a laser level and measure the perimeter of the future ceiling. Measure and transfer the horizontal level to opposite walls as carefully as possible – this will determine not only the horizontalness of the new ceiling, but also its strength, because any distortions will cause an increased load on certain areas of the plasterboard sheathing and, as a result, cracks.
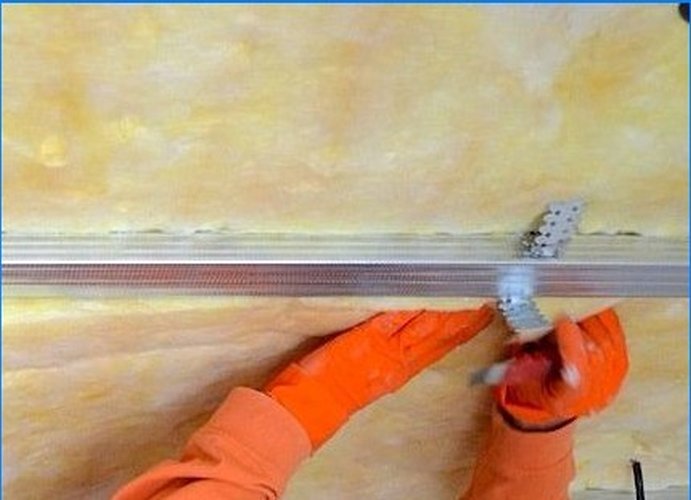
We mount the supporting profile – we expose the ceiling frame. Along the contour, following the marked marking lines, we fix the supporting (starting) profile 28 mm wide and a 27 mm shelf – with a wide base to the wall, having previously laid a damper tape under it. The supporting profile is fixed with steel dowels 10 mm in length, step – 400 mm.
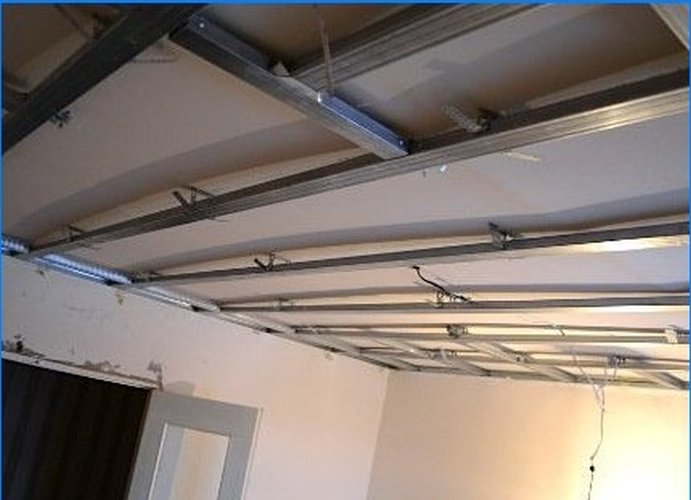
We install a 60 mm wide ceiling profile, a 27 mm shelf. Let’s start with laying along the room – we start the sections of the profile, equal to the length of the room, into the supporting profile fixed on the wall. The step from the wall and between adjacent parallel sections of the ceiling profile should be 400 mm – mark these distances on the support profile before actual installation. If the length of the profile is less than the length of the room, you will need special extension cords – they are made of metal and have the same cross-section as the ceiling profile. Before installing each section of the profile in its place, pull a nylon thread between the bearing profile of the opposite sides of the room – it will allow you to bring the sagging profile into a “line”, to determine the points of its attachment with the “antennae” of the suspensions. Having installed each segment of the supporting profile, with a step of 700 mm, install the hangers strictly above it, fix them on the ceiling by 70 mm screws with dowels – you cannot use screws with plastic plugs, because they will eventually come out of the holes drilled for them in the ceiling.
Having finished the installation of the longitudinal sections of the bearing profile, having carefully checked each one for horizontality with a two-meter building level, we proceed to the installation of short sections of the profile across the room, i.e. along its width. The step – 400 mm – is preserved, the frame lattice formed at the same time will ideally fit with the subsequent sheathing with plasterboard sheets – the joints will fall exactly on the profile frames, they will not end up in empty areas. At the points of intersection of the longitudinal and transverse elements of the supporting profile, they are connected using the “crab” mounting element or 60 mm profile sections (the segment flanges are directed to the short transverse sections of the profile, two segments for each intersection point), are interconnected with self-tapping “bedbugs” »Length 3.5 mm. This completes the assembly of the frame for the plasterboard ceiling..
Soundproofing and electrical. As in the case of laying electrical cables in plasterboard partitions, they cannot be laid in the “convenient” channels of the ceiling profile – they can be punched during the installation of drywall sheets. Plasterboard ceilings are equipped with wiring led to the places of future installation of spotlights in a corrugated hose and laid on top of a frame made of profiles. In the squares formed by the transverse and longitudinal profile, we lay rigid blocks of mineral wool slabs, cut wider than cells 400 by 400 mm.
Plasterboard sheathing. It’s time to explain to you why you suddenly needed such a powerful frame construction from a profile – not a 9.5 mm thick ceiling drywall, but a 12.5 mm thick wall plasterboard will be fixed on it. The reasons for this decision are simple – wall drywall is more resistant to bending, which means that it is guaranteed not to sag and crack over time..
The installation scheme for drywall sheets is similar to the scheme of plasterboard partitions cladding – “checkerboard”, i.e. the first outer sheet is laid in full length, half of the sheet is attached next to it, etc., until the ceiling is fully sewn. To fix drywall, use 25 mm countersunk head self-tapping screws, each sinking 1-2 mm into the sheet – a step between them is 200 mm. A 2 mm gap must be left between the drywall sheets and the wall around the perimeter – the drywall will absorb moisture from the interior atmosphere of the room and expand somewhat. In addition, it is necessary to fasten adjacent sheets not closely, leaving a 3 mm gap between them, which afterwards can be filled with butt putty.
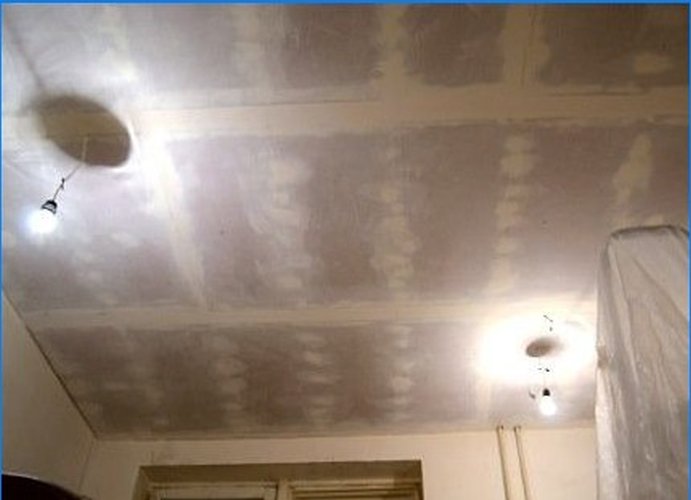
Completing work on plasterboard ceiling sheathing, drilling holes for spotlights, filling gaps between sheets and recessed screw heads, finishing the new ceiling.
Plasterboard ceilings and partitions
Plasterboard ceilings and partitions add a modern touch to any interior space while offering key advantages like quick and easy installation, fireproof and soundproof properties, and cost efficiency. It is a lightweight and durable material that requires minimal maintenance and provides high resistance to all environmental conditions. Plasterboard is also a great option for creating unique shapes due to its flexible nature, and for creative applications such as a decorative feature wall or contemporary lighting designs.
Renovation and finishing
What are some common challenges faced when working with plasterboard ceilings and partitions? Is there a specific technique or method that is recommended for installation or repairs?