Recommendation points
- Essential tool for working with granite
- Features and secrets when working with granite
- Stages and sequence of work with granite tiles
- Floor surface preparation
- Calculations for laying and cutting tiles
- Determination of floor level
- Laying granite
- Final finishing
Competent laying of granite tiles is compliance with all the features of working with granite. In this article, we will consider the types and stages of laying granite tiles, as well as technological methods and necessary tools, without which it is impossible to make a granite floor..
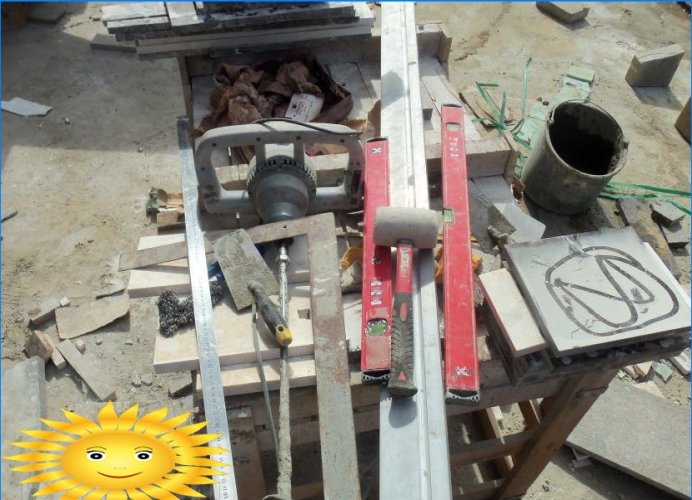
Essential tool for working with granite
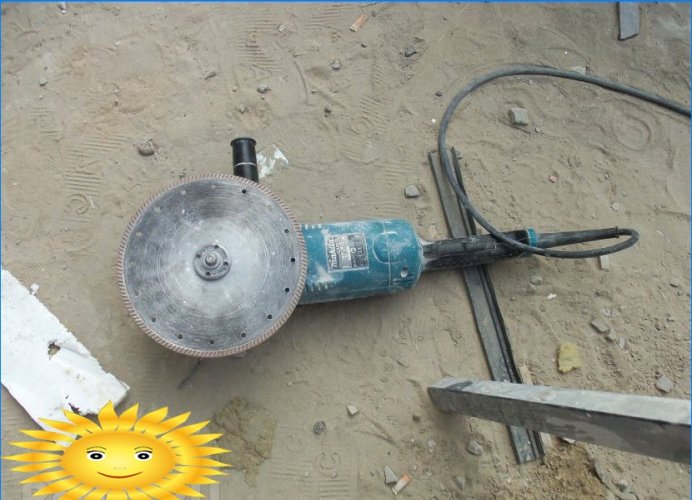
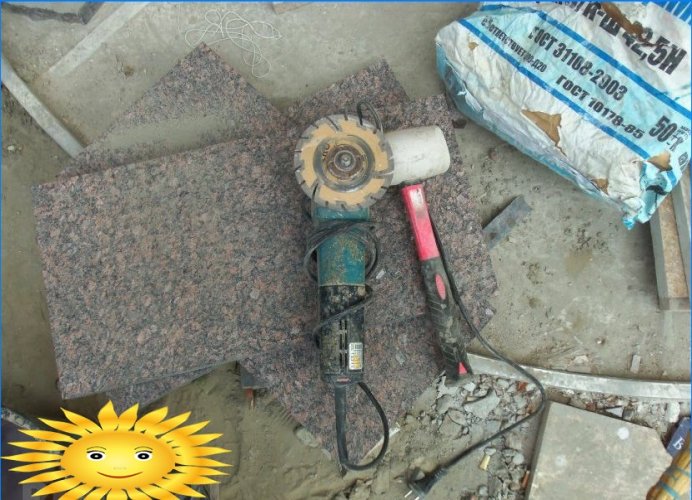
To make a granite floor, you need regular construction tools. Granite tiles are a very durable material, so a regular tile cutter will not work..
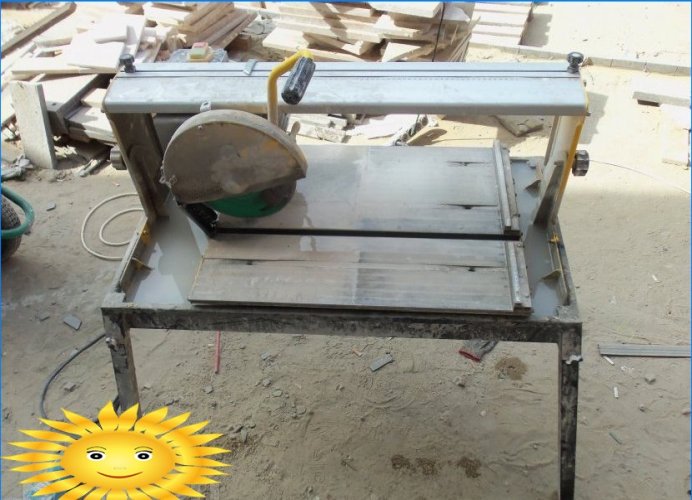
You will need a high power angle grinder and a disc specifically for stone. But you need to clearly understand that with the help of the grinder, you can only make some cuts on the granite tiles, which will need to be hidden under the baseboard. You will not achieve high quality cutting with a grinder, the cut will be uneven, there will be chips and roughness.
In addition, you must have:
- construction level;
- construction mixer for mortar;
- trowel (trowel);
- rubber mallet;
- rubber spatula;
- tape measure, long ruler, large square – can be useful when calculating the laying of granite slabs;
- lighthouse threads;
- pieces of tiles to function as beacons;
- bucket.
Features and secrets when working with granite
Laying granite is different from laying ceramic tiles. It is worth remembering a few rules that apply when working with granite:
- Granite tiles, unlike ceramic tiles, are laid without seams, that is, “end-to-end”.
- Before laying granite, you need to make a floor screed, thereby leveling it.
- The thickness of the granite tiles can be different, and this must be monitored, as the teeth on the granite tiles are very noticeable. Use a thick layer of mortar or glue to press in the protruding areas.
- Granite tiles come in different sizes. Therefore, you should not put it in a seam-in-seam or diagonal way. The best way would be to lay it apart, in compliance with a certain pattern.
- Since the tiles can be cut from different slabs or even blocks, they can have different shades and the color cannot be removed. How to deal with it:
- It is not allowed to lay granite tiles by tiles from one packing box..
- It is imperative to lay out all the material from all packages in order to determine the multi-color, or even marriage.
- Tiles that have any defect or obvious ornament are best used in inconspicuous areas of the room. Use the rest of the tiles randomly, so the existing color will be evenly distributed over the floor and not be conspicuous.
Stages and sequence of work with granite tiles
Floor surface preparation
Granite tiles are much thicker than ceramic tiles, and this must be taken into account. If you plan to lay granite on the floor, be sure to check the height of the door sill (especially now doors without a sill are in fashion) – for granite you need to leave 40–50 mm (20–30 mm granite, 20 mm – mortar or 10 mm – glue).
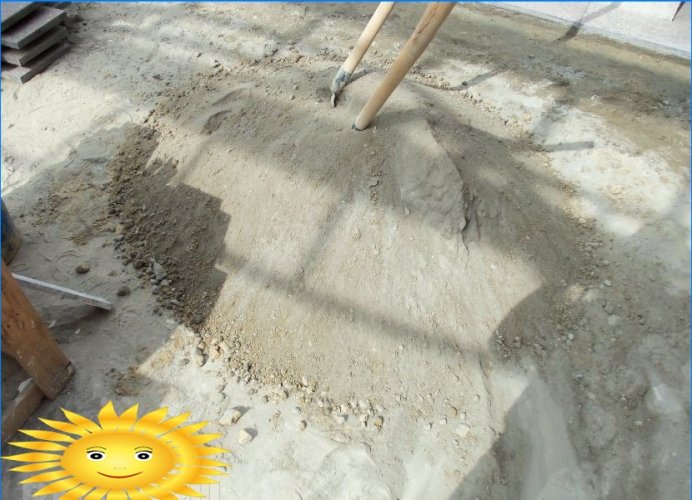
The floor must be clean, free of dust and debris. To be sure, it can be primed, but this is not necessary. Do not forget that concrete work must be done 30 days before granite is laid.
Calculations for laying and cutting tiles
The main task is to cut the minimum. Granite tiles lie down from one of the end walls (usually from window to door), from the left corner (from left to right). But you need to clearly know – to put from a whole tile, half, or maybe even from 1/3. It depends on the area of the room and the size of the granite tiles. The main thing is to use the runaway method.
Determination of floor level
When the floor is screed and the door is installed, a level of 40 mm is left, we install beacons in the corners of the room. For this, levels are suitable for long distances, since the beacons will be transferred to the corners of the room along the walls at a distance of 1 m from the floor. From the lighthouses we pull the threads along the perimeter and diagonal of the room. It is very common to notice that some of the angles are not level. If the room angle deviates to 60 mm, then this can be corrected by adding more mortar. And if the problem is the opposite, instead of the required 40 only 30 mm, you can lay the tiles that fall on this area not on the solution, but on the glue. In addition to the corners of the room, it is necessary to check the quality of the floor along all the lighthouse threads..
Laying granite
There are the following types of granite tiles:
- for solution
- for adhesive
- on a metal frame
On a metal frame, tiles are laid on vertical surfaces: walls, columns, etc. For the floor, you should choose between mortar and glue. In addition to the layer thickness (cement-sand mortar 20 mm, glue 5-10 mm), there is a significant difference in price. Cement-sand mortar (Portland cement diluted with water, slaked lime and river sand) is the most budgetary option, and glue (cement-based or based on epoxy, acrylic resins) will be more expensive in terms of money, in addition, its consumption will be more than mortar.
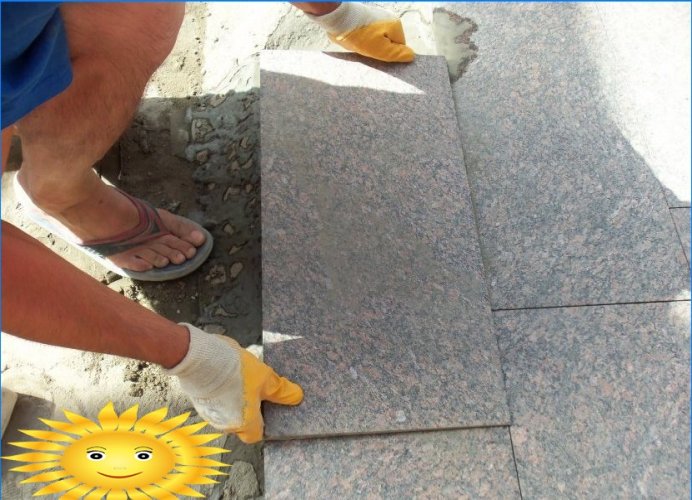
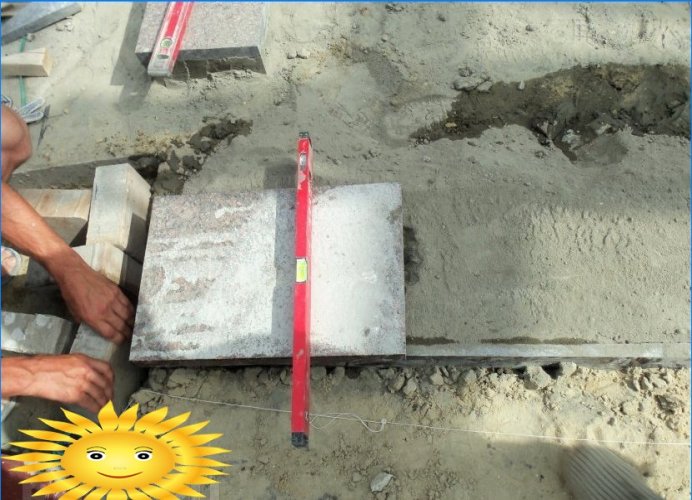
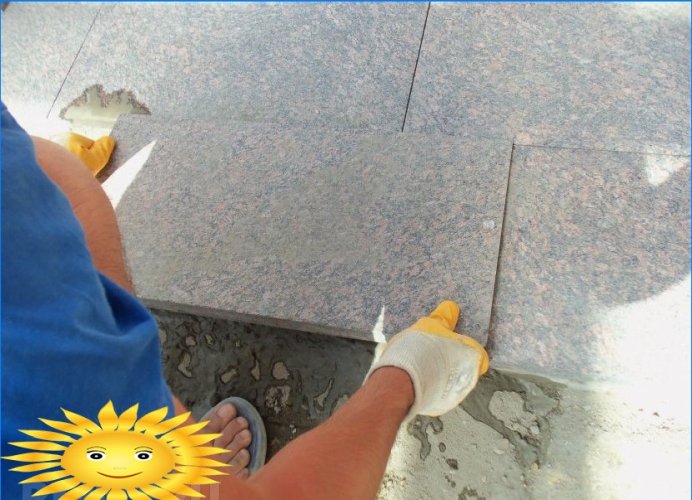
An important stage in laying granite tiles on the floor is the laying of the first row of tiles, since the rest will be tied to the first row. The role of the beacons of the first and last granite tiles in the row will be played by the tiles themselves. To do this, tie the lighthouse thread from the right and left corners into 2 tiles, laid at the beginning and end of the row without mortar.
Granite tiles are laid one at a time, the solution of the required size is applied to the floor surface with a trowel. After that, a plate is laid on it and tapped with a rubber hammer, clearly following the beacon threads.
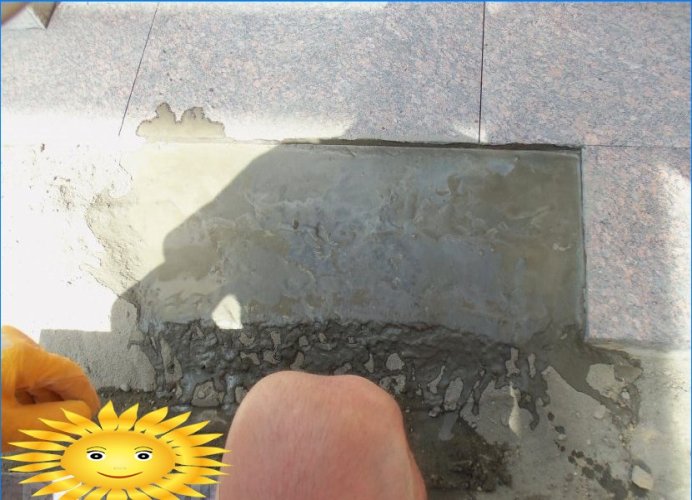
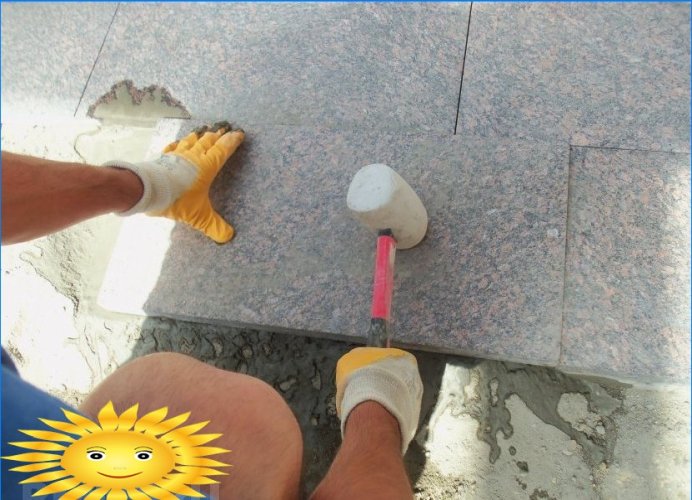
Care must be taken to ensure that no voids form under the installation surface. After that, the rest are laid in the same way until the time of the first and last comes: the lighthouse threads are untied from them, after which the plates are already placed on the mortar.
The next row also begins with the installation of the lighthouse plates and tying threads to them. Do not forget to keep track of which tile the previous row began with, so as not to get lost in the pattern. In addition to the lighthouse threads, you should periodically check the masonry using a building level.
In this way, all subsequent rows of granite tiles are laid. In the event of a laying error or tile defect, it can be removed and replaced within one day. Then it will be impossible to do it.
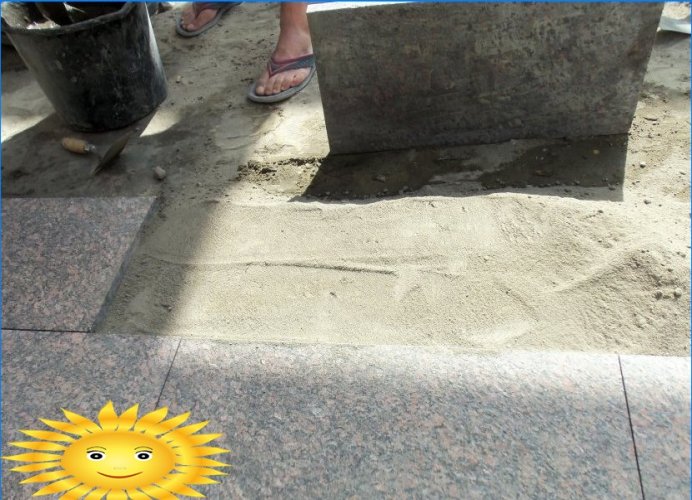
When moving to a new row, be sure to rinse the tiles from the solution with a damp cloth. In addition, do not be afraid to pour too much water between the tiles, this will not damage the masonry, it will even pull it off better..
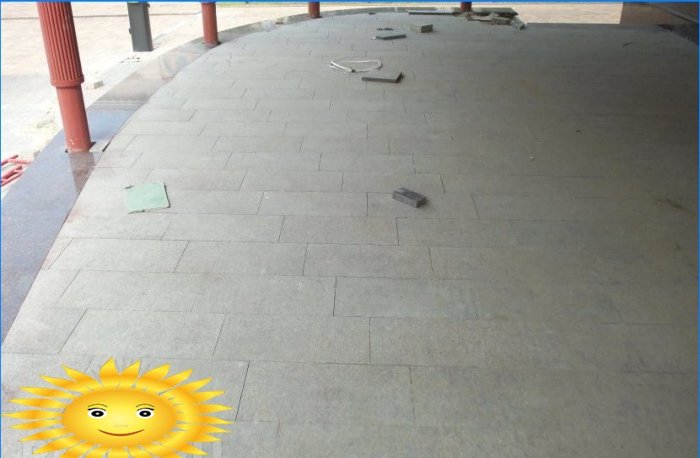
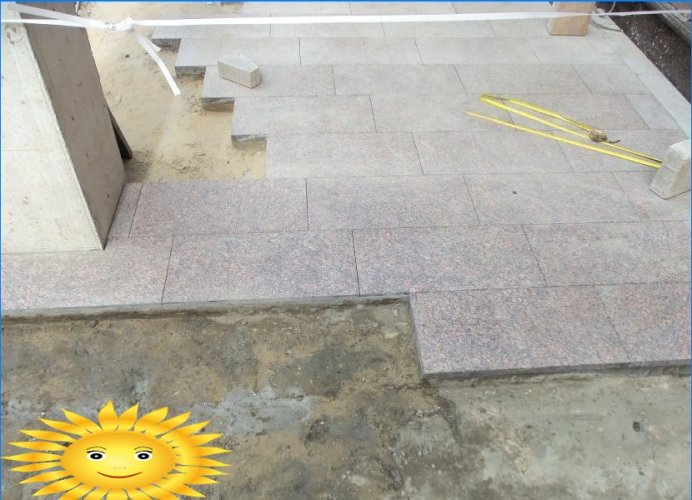
There are no restrictions on the horizontal laying of granite, you can immediately lay tiles on the entire floor. But it will not be possible to walk on it earlier than in 48 hours. Despite the fact that the granite tiles are laid end-to-end, small gaps will still be present. They are rubbed with a grout in the color of the stone, it is worth choosing it depending on the type of room: floor frost-resistant, moisture-resistant, especially durable.
Final finishing
Granite should be given a special charm and nobility after the installation is completed. This can be easily done with liquid wax or granite silicone paste. This can be done by hand using felt or felt, as well as using a polishing machine..
A granite floor is beauty and durability; in terms of its strength, it is not inferior to any building material. Granite tiles are so practical that they can be easily shifted if necessary. It does not lose its quality and appearance over the years, but the solution under it can collapse. For this, the tiles are removed from the old mortar, cleaned of it and re-laid. Thus, granite fully pays for its cost and your expectations..
What are the necessary steps and tools required for DIY granite flooring installation?
Is it possible to install granite flooring on my own? If so, what are the necessary steps and tools required for successful DIY installation?