Recommendation points
In this master class, the RMNT portal will provide detailed instructions with explanations on how you can create a base for a combined ceiling with your own hands – from sheets of drywall and stretch canvas. In the article you will find a description of the method of mounting the junction of an inclined plane.
Training
The first thing to do is create a floor plan or carefully study an existing project. Apply electrical points, material boundaries and level points to the drawing.
At this stage, you need to finally decide on the technology and take into account all the little things. In our case, the ceiling of the room has the following features:
- Constructive rectangular niche inside the ceiling perimeter. As a result, there will be no niche, it is needed for the installation of a stretch ceiling and lighting fixtures.
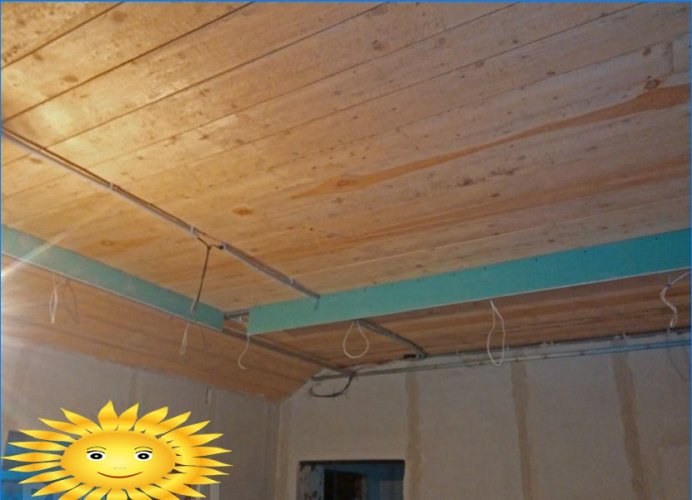
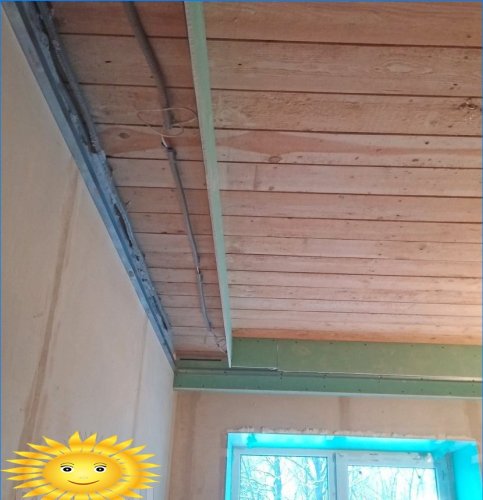
- Sloped edges of the ceiling on both sides of the room, formed by the roof rafters. They will also have to be finished with gypsum plasterboards (hereinafter GKL).
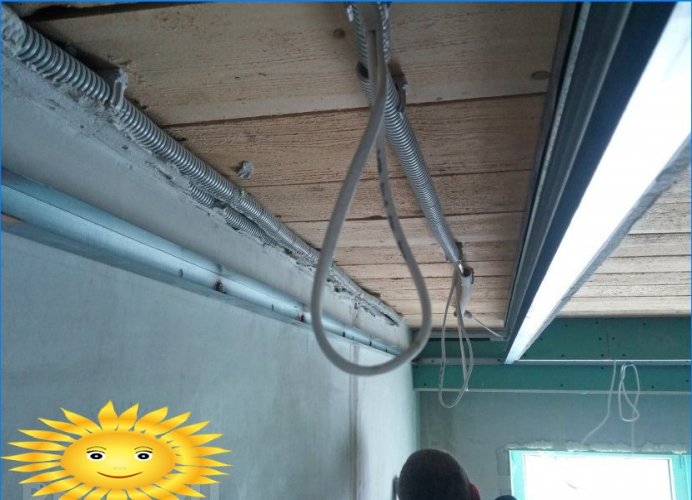
- Multi-point lighting and power cable routing over wood.
- Curtain niche side.
Markup
We transfer the marks from the plan to the terrain. This is done with the help of measuring instruments – level, rule, tape measure, hydro level. Conveniently draw the horizon line at eye level. You should also divide the ceiling area along the axes – they will pass in the middle of each span to be done.
Attention! When marking, take into account the dimensions of the frame and the thickness of the GKL sheet.
Operating procedure
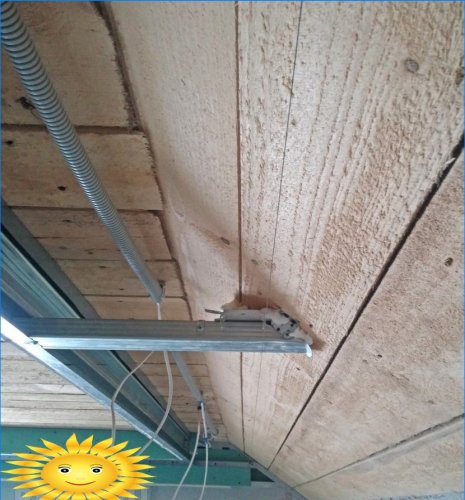
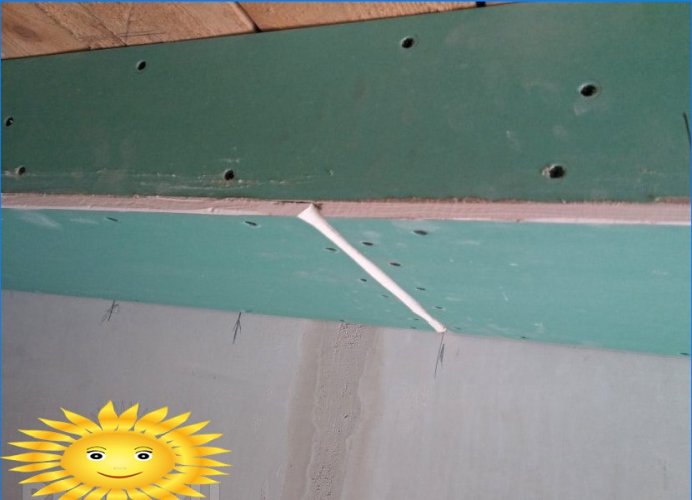
“Zero cycle” – laying of cables and wires according to the project. Since the base is wooden, they are laid in a corrugation.
Attention! The place where the corrugation breaks must be hermetically sealed (with electrical tape). In case of overheating of the wire, ignition will not occur due to lack of oxygen access.
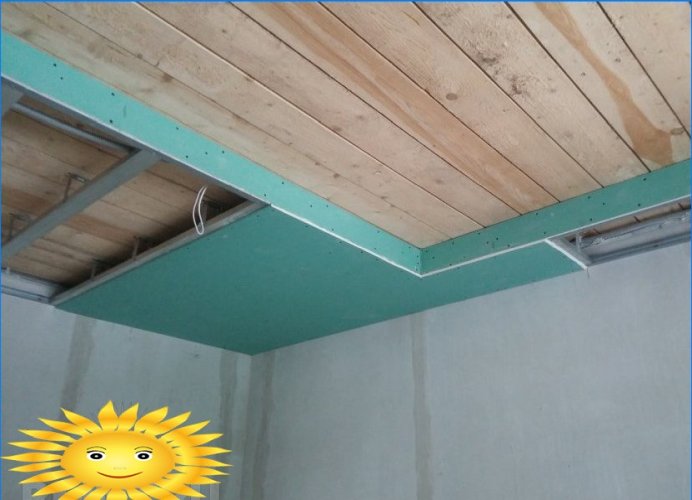
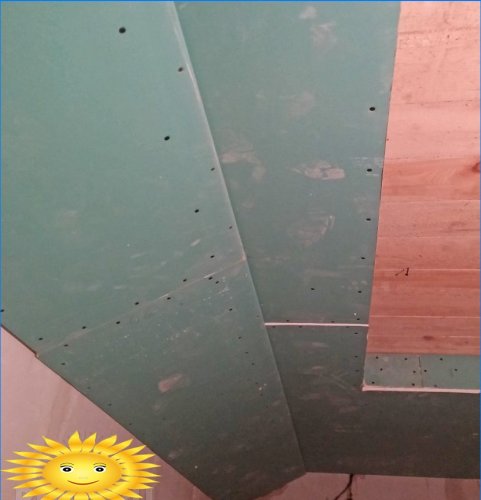
The first thing to do is to create a border for the central element – a niche – from which it will be possible to lay dimensions inward and outward, observing symmetry. To do this, we fix the UD profile according to the marking, taking into account the sheet thickness. Then we cut strips of gypsum board 120 mm wide with jointing along the edge. Then you need to wind these strips onto the UD profile.
At the location of the curtain side, we also strengthen the UD-profile along its inner border. Then we wind the CD profile along the lower edge of the GCR strip.
It will stiffen the contour and allow it to be loosened to the walls..
Along the perimeter of the walls (in the horizon) at the level of the CD-profile shelf, we mount the UD profile. We set the filling of the plane of the frame (edges of the CD-profile), mark and carry out the standard procedure for mounting the frame – fastening the U-shaped suspensions according to the marking with subsequent fixation to the CD-profile with drill-point self-tapping screws.
Attention! The step of the edges of the frame plane on the ceiling is 400 mm, the tolerance is 50 mm.
We sew the horizontal plane of the ceiling with sheets of plasterboard.
Council. Transfer the axes of the frame edges to the walls – useful when installing sheets. Don’t forget about jointing.
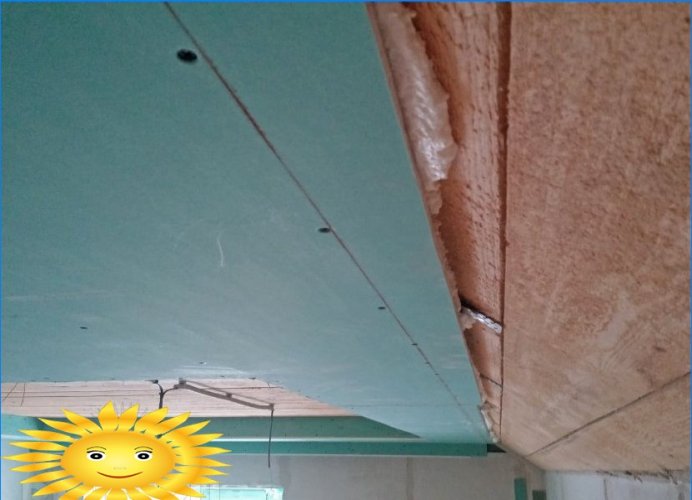
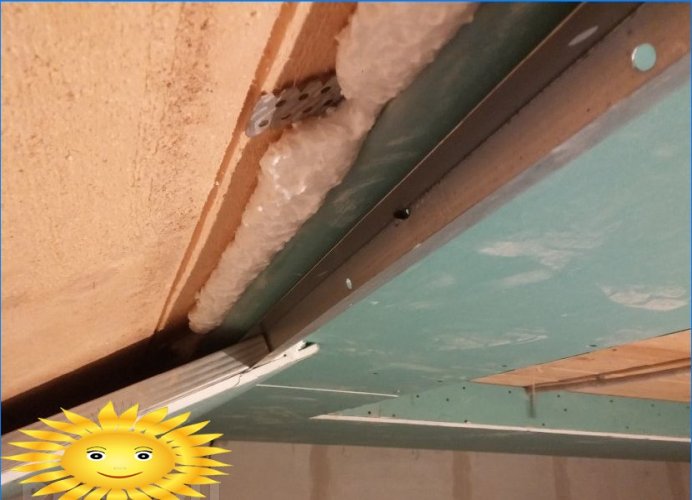
In the place where the gypsum board sheet adjoins the inclined plane, lay polyurethane foam.
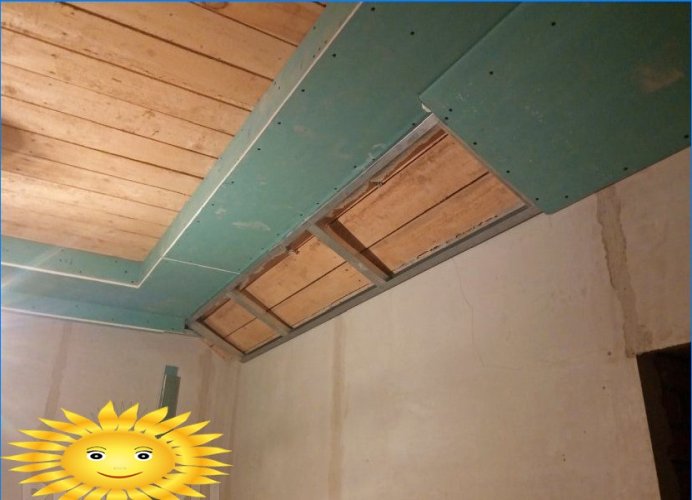
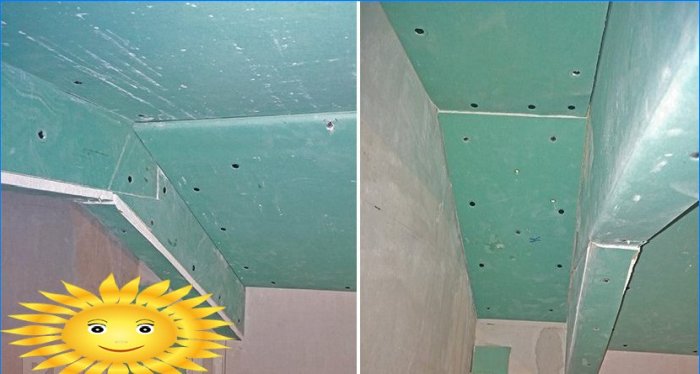
Installation of inclined abutments
- Measure the width of the strip along the entire length of the plane, taking into account the frame and identify the widest section.
- Focusing on the resulting width, make a template from gypsum board and profile scraps, which will simulate a cut of the finished structure in full size.
- Mark the edge of the abutment of the inclined plane to the horizontal.
- Applying a template every 500 mm (frame pitch), mark the lower border of the abutment.
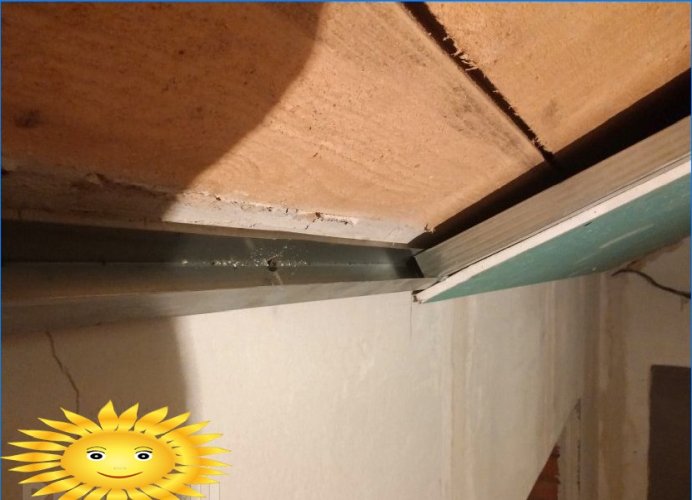
- Prepare wedges and shims for mounting the inclined profile.
- Install the UD profile according to the markings using shims.
View of the frame before sheathing:
- Place the polyurethane foam in the slope of the profile (if necessary).
- With the further installation of the frame and sheets, it is actively to use polyurethane foam in inclined abutments.
The final view of the junction of the inclined plane:
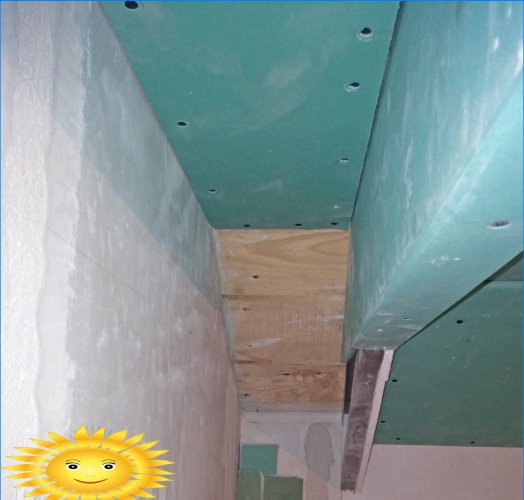
The curtain niche rim is mounted in the same way. The ceiling level in the cavity of the niche is as high as possible – the frame profile should be fixed as close to the base (overlap) as possible.
Finished niche type:
The final look of the plasterboard ceiling base:
Front door wall
Window with curtain niche
Niche on an inclined plane
When filling the ceiling, pay attention to the abutment of the inclined plane to the wall. Since they are made of different materials, you will need a more durable seam reinforcement – in 2 or 3 layers. To do this, use a serpentine net or “cobweb”. The ceiling is filled in two times and does not require a primer.


I’m curious about the process of mounting the base for a combined ceiling using DIY plasterboard. Could you please provide some guidance on the steps involved? Are there any specific tools or techniques that are recommended for this task? Additionally, are there any common challenges or potential pitfalls to look out for during the installation process? Any advice or tips would be greatly appreciated!
Mounting a base for a combined ceiling using DIY plasterboard involves several steps. Firstly, gather the necessary tools such as a measuring tape, utility knife, drill, screws, and a level. Measure and mark the desired height and position for the base. Next, attach wooden or metal furring strips horizontally along the walls to act as a frame for the plasterboard. Make sure they are level and securely fastened. Then, cut the plasterboard to fit, ensuring a snug fit against the furring strips. Attach the plasterboard to the strips using screws, leaving a small gap between each panel for expansion. Apply joint compound and tape over the seams, sanding them smooth when dry. Finally, ensure the base is level and ready for further finishing.
Throughout the process, it’s important to pay attention to safety and use caution when handling tools and materials. Be prepared for potential challenges, such as uneven walls or ceilings, which may require additional adjustments or shimming. Additionally, be mindful of electrical wiring or plumbing hidden behind the walls. Always consult building codes and regulations to ensure compliance. Taking your time and seeking assistance from experienced individuals can greatly improve the success of your DIY plasterboard ceiling installation project.